Venom is an easy-to-use Kodi addon with a simple layout that is most popular among users. It is a lightweight add-on to watch movies and TV shows. The library gets updated more frequently, and you will never run out of content. It supports contents in full HD or 720p and other lower quality. Moreover, you can stream all the content for free. Venom has the same core code as that of Exodus Redux and Exodus. Although they look similar, you will get access to different scrapers.
Note: Venom addon works on Firestick 4K, Fire TV Cube, Firestick Lite, Android TV, Android phone, iOS, Windows, Mac, Linux, Raspberry Pi, etc.
Features of Venom Kodi Addon
- You can stream movies, TV shows, series, and more on HD or low quality.
- Stream the latest episodes of popular series.
- It allows you to integrate with Real-Debrid or Trakt accounts. Thus, you can access HD links to stream without any buffer.
- It has a simple interface with different categories for easy access.
- You can customize the addon from General settings like language, country, IMDB list, etc.
- Using the Navigation settings, you can customize the addon’s menu.
- Moreover, it also provides more settings options like Provider, Source Options, TV Shows, Playback, Trakt, Accounts, Library, Downloads, Subtitles, Debugging, and Shortcuts.
Is Venom Kodi Addon Legal and Safe to Use?
Installation of Venom Kodi Addon on your streaming device is not illegal. The legality of the addon is based on the contents that your stream on it, after the installation. Thus all the contents provided in the addon might have copyrights and are not completely legal to use. So, we recommend you use a VPN for streaming safely.
How to Download Venom Addon on Kodi
If you want to use Venom addon features on Kodi installed device, get to know the procedure.
Configure Kodi
Venom is a third-party addon, and you need to change its setting to install it. Follow the steps to enable unknown sources on Kodi.
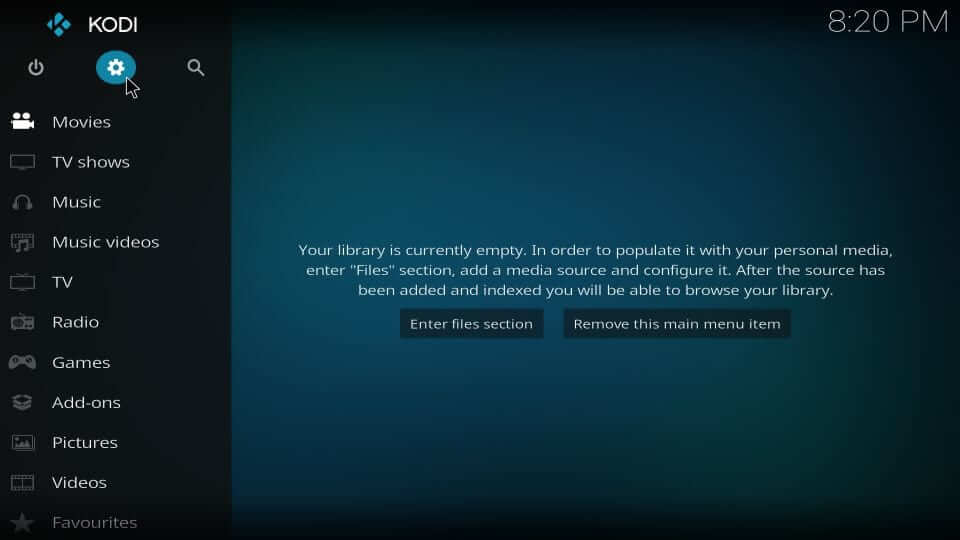
1. Launch Kodi app on your device and highlight the Settings or Gear icon.
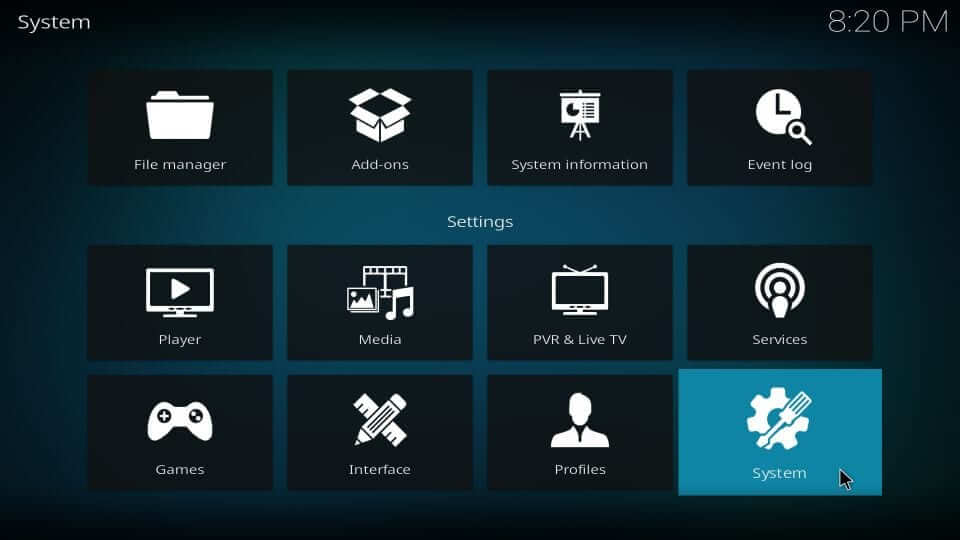
2. Choose the System Settings tile under the system window.
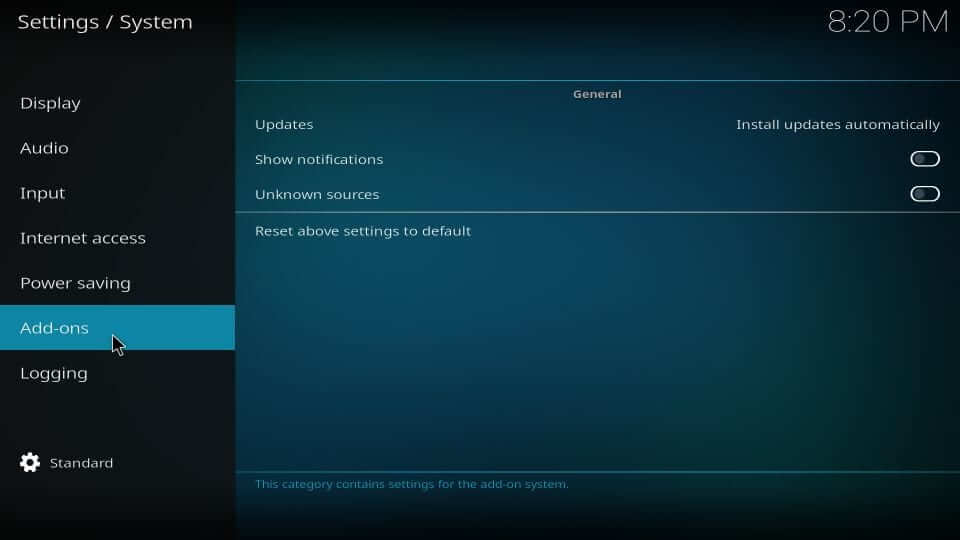
3. Select the Add-ons from the left pane. Next, highlight Unknown Sources and click on the slider to turn it On.
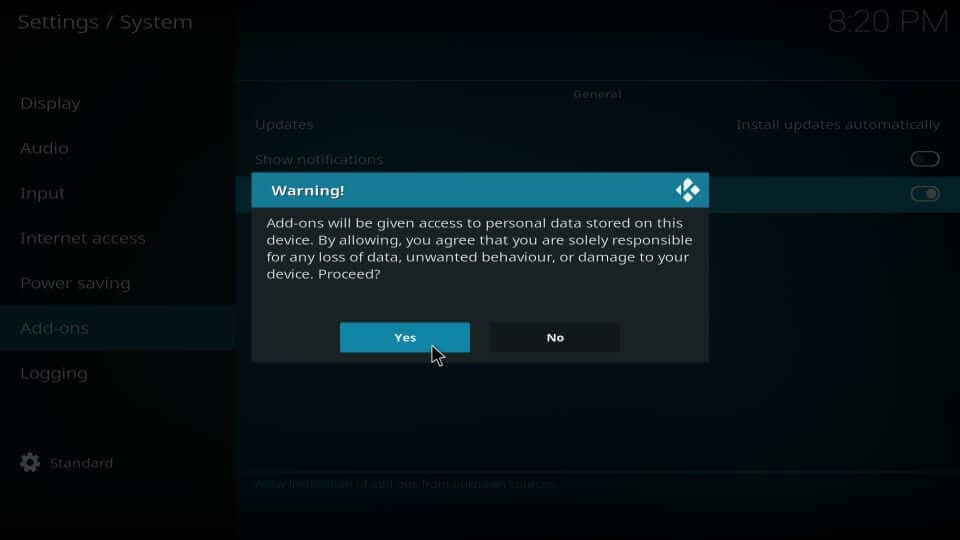
4. On the warning pop-up, select Yes to proceed further.
How to Add Venom Repo Source to Kodi
In this section, you will find the steps to add the Venom repo source URL on Kodi.
1. Start from the home screen of the Kodi app by selecting the Settings icon.
2. Choose the File Manager tile on the following screen.
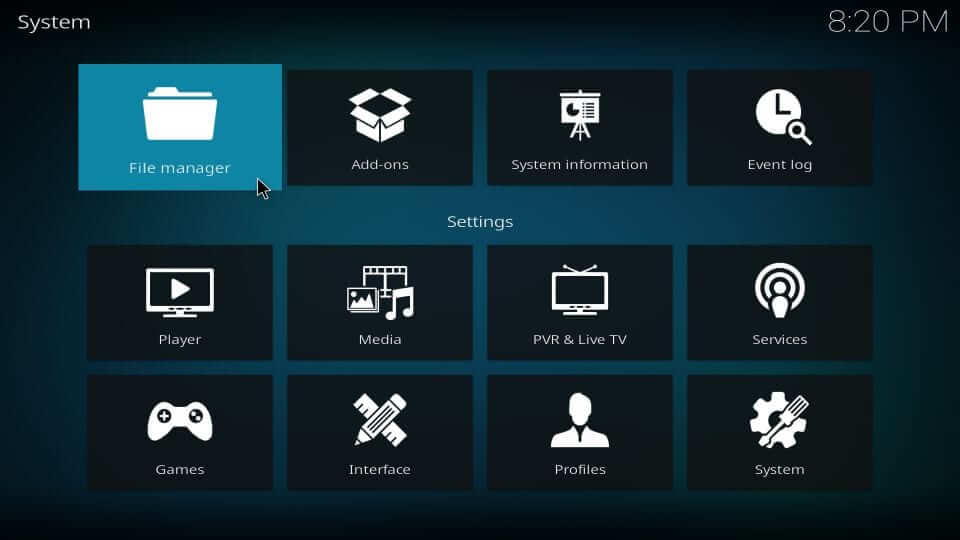
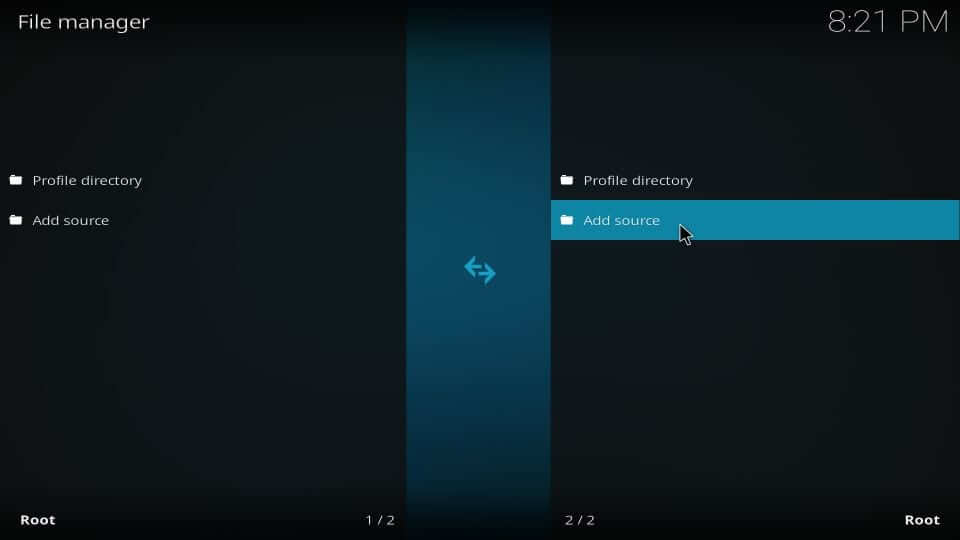
3. Select the Add Source option either from left or right.
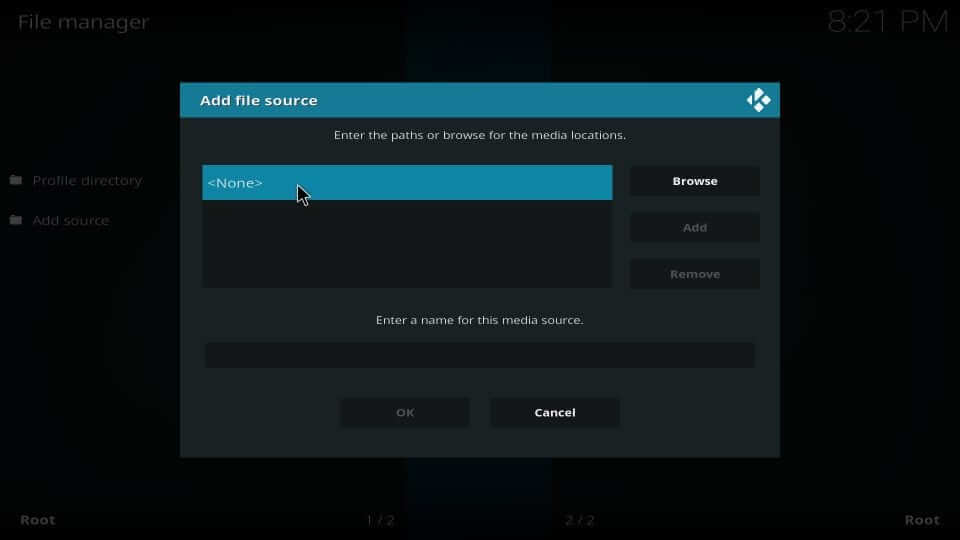
4. Choose <None> under the Add file source dialog box.
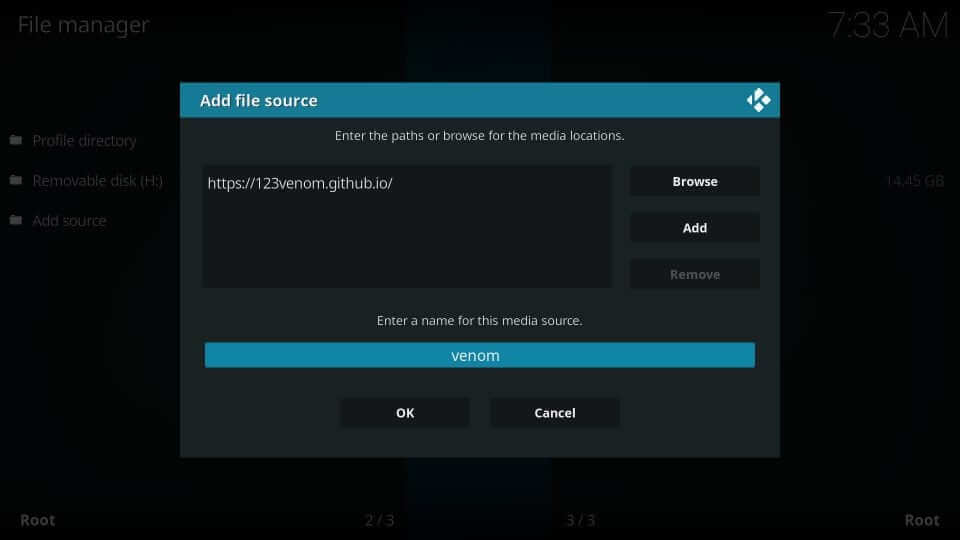
5. On the next screen, type the URL of the Venom addon and click OK.
Venom Addon URL: https://123venom.github.io/

6. Type the media source name as Venom and press OK.
How to Get Venom Addon from Repository on Kodi
Upon adding the source URL, you shall need to follow the steps given below to install the Venom addon from the Venom repository.
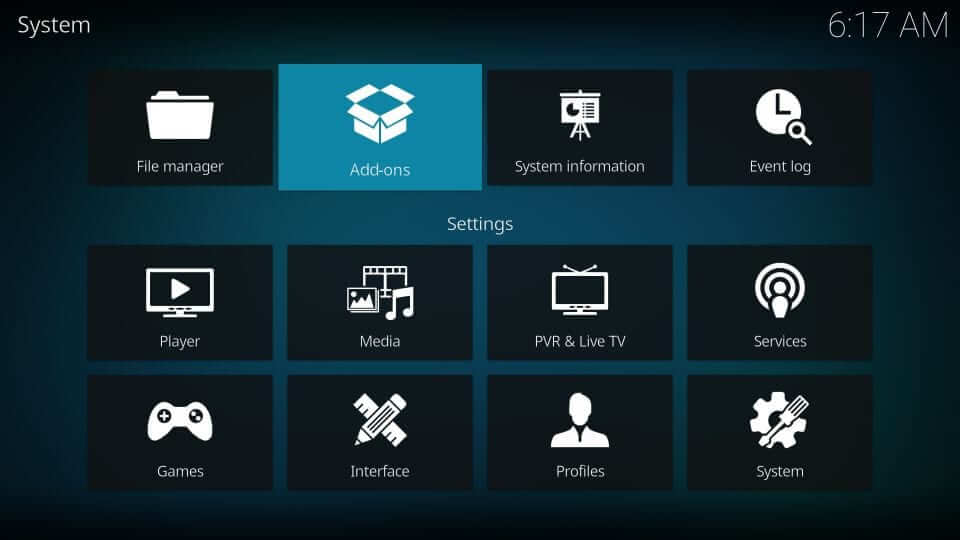
1. From the Kodi Settings screen, select the Add-ons tile.
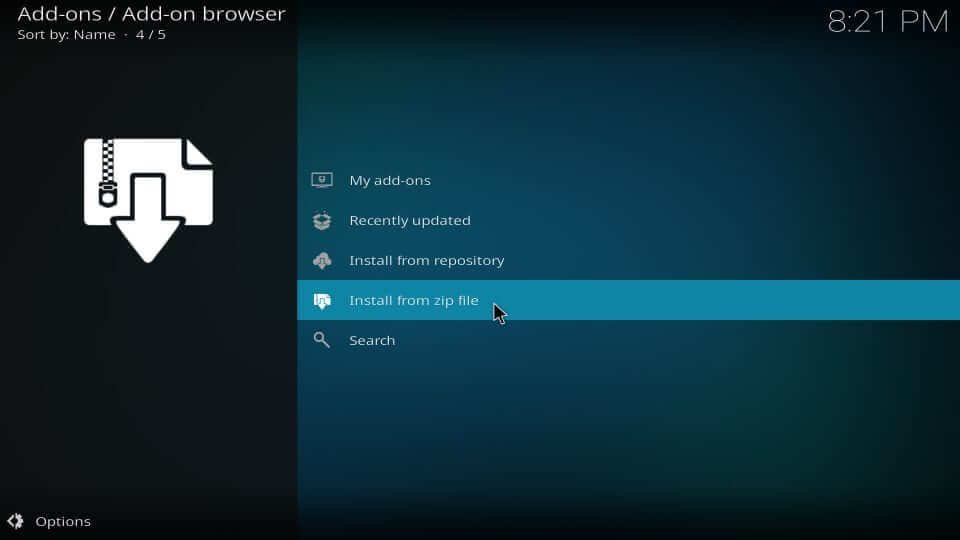
2. Select the Install from Zip file option.
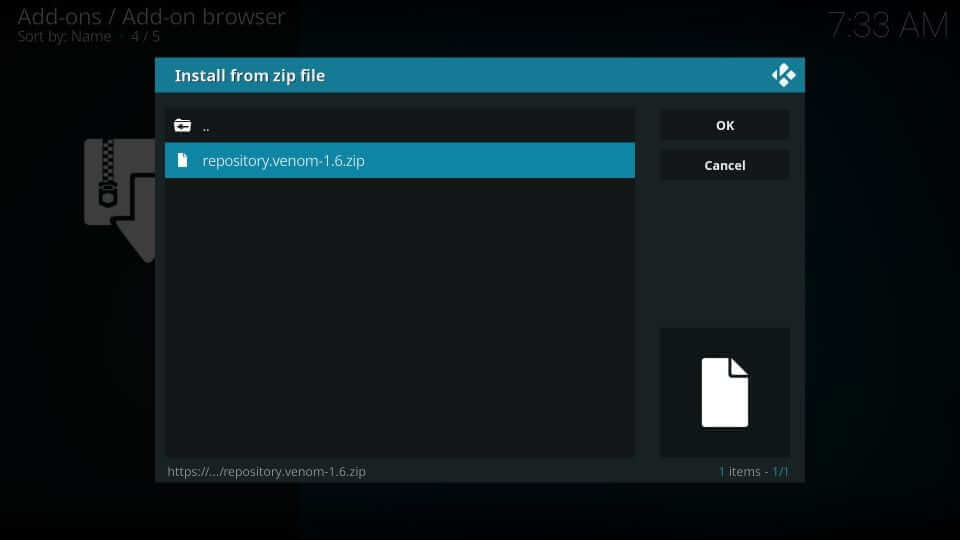
3. On the Install from Zip file dialog box, select the source name. i.e., Venom.

4. Select the Zip file of Venom and click the OK button.
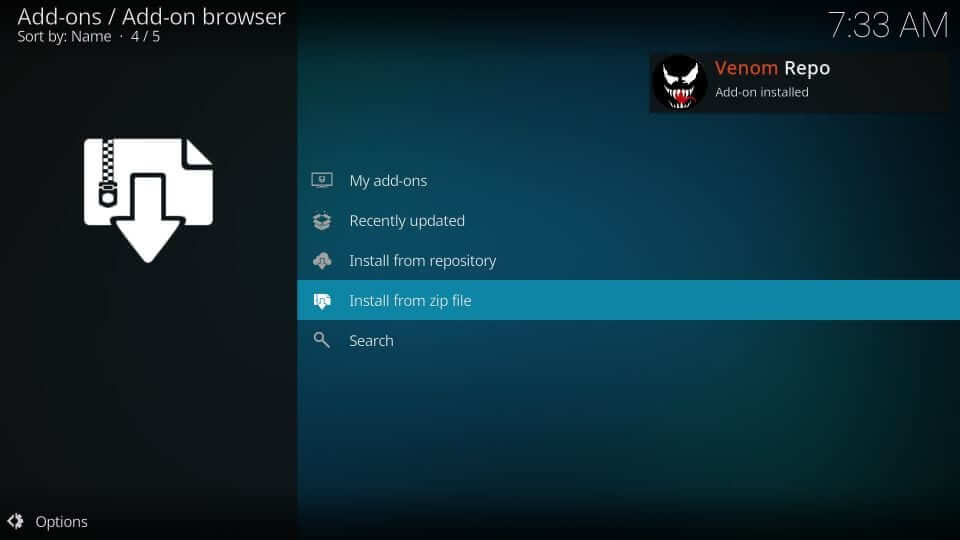
5. Wait for the Venom Repo addon installed notification.
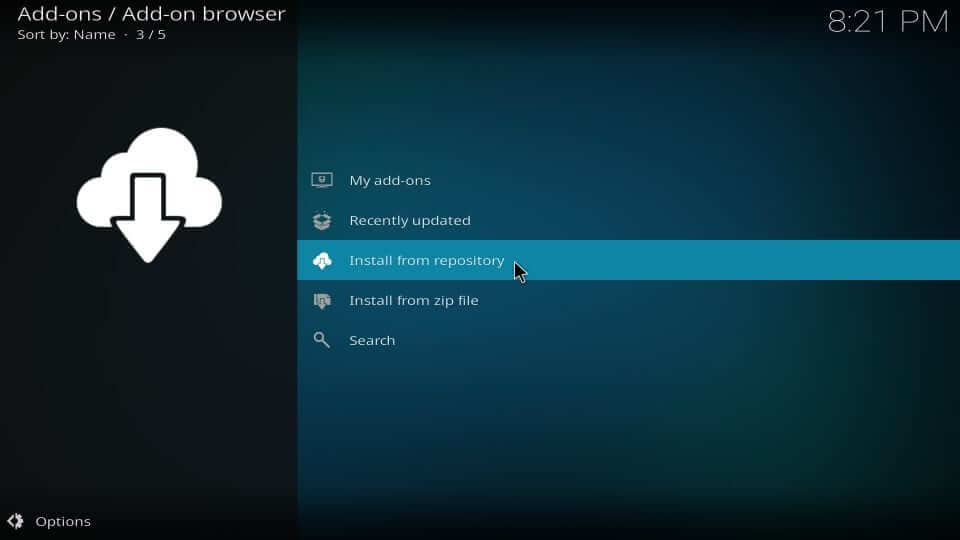
6. Click on the Install from Repository option.
7. Select Venom Repo from the list of installed addons.
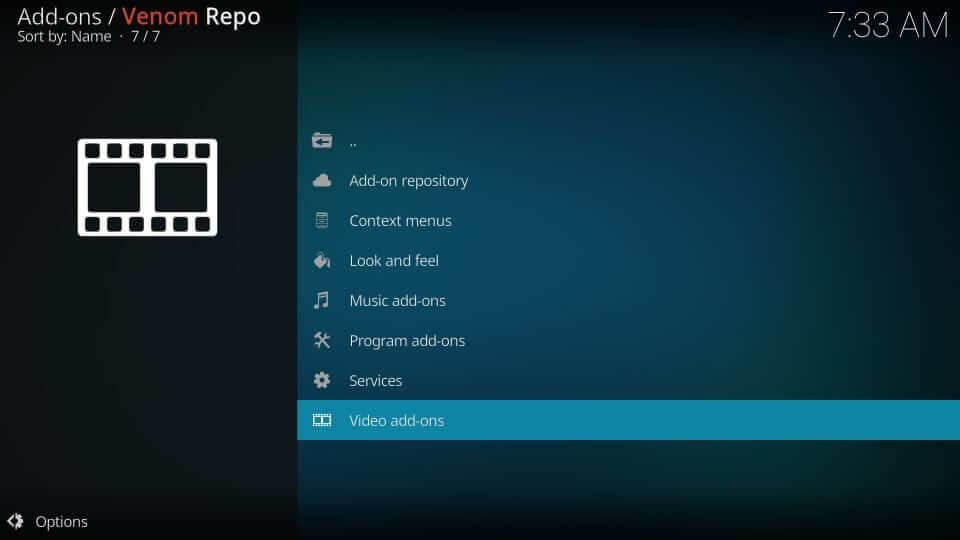
8. Choose Video addons on the next screen.
9. Click on the Venom repository to go ahead.
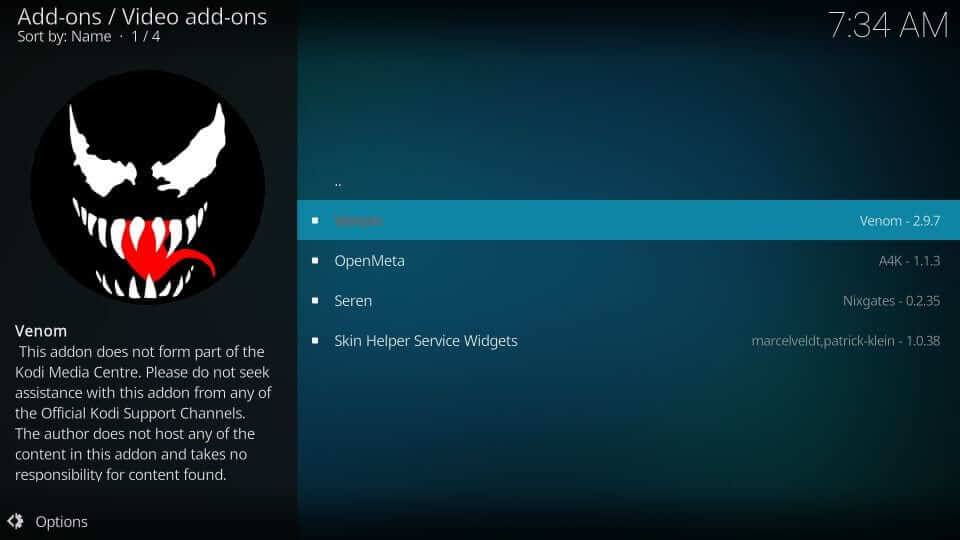
10. Navigate to the Install button and click on it.
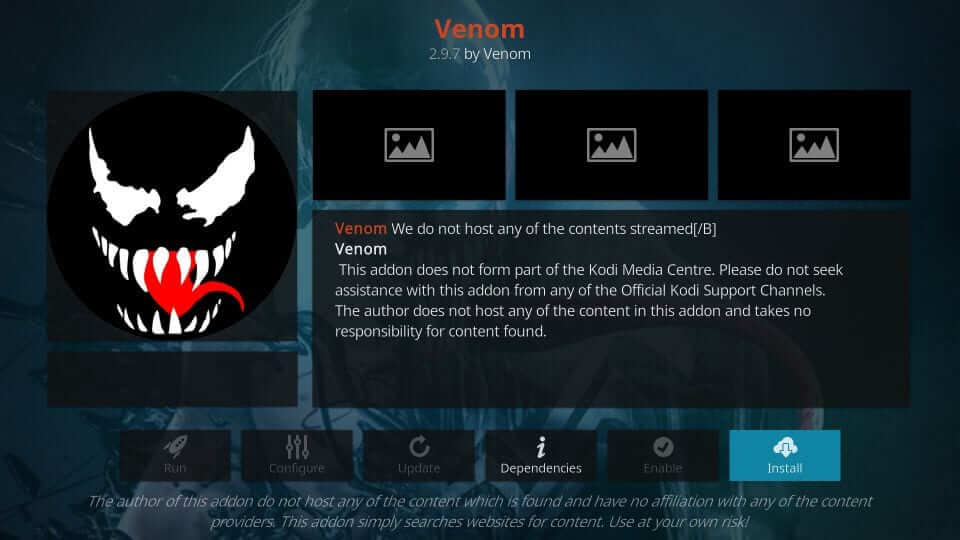
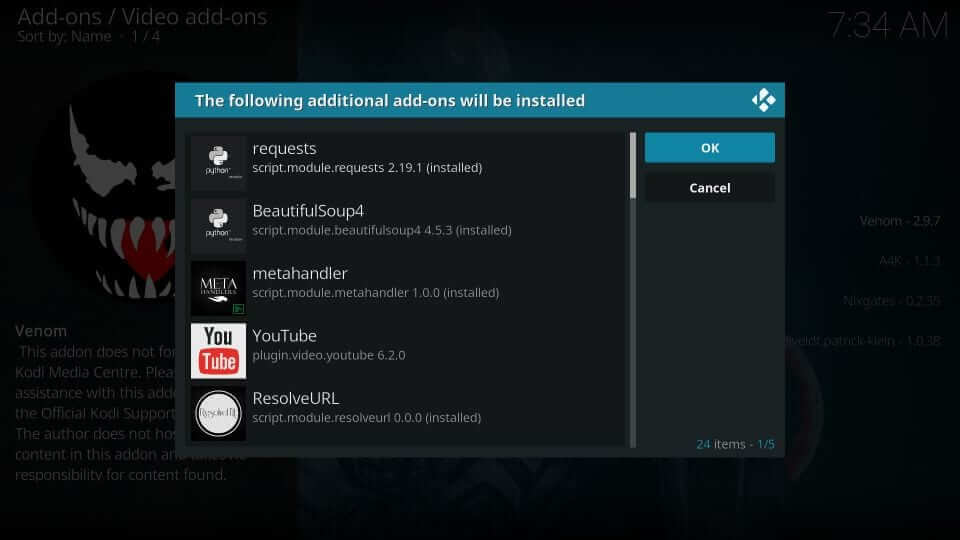
11. Kodi 18 users will get the following window, and you should select OK.
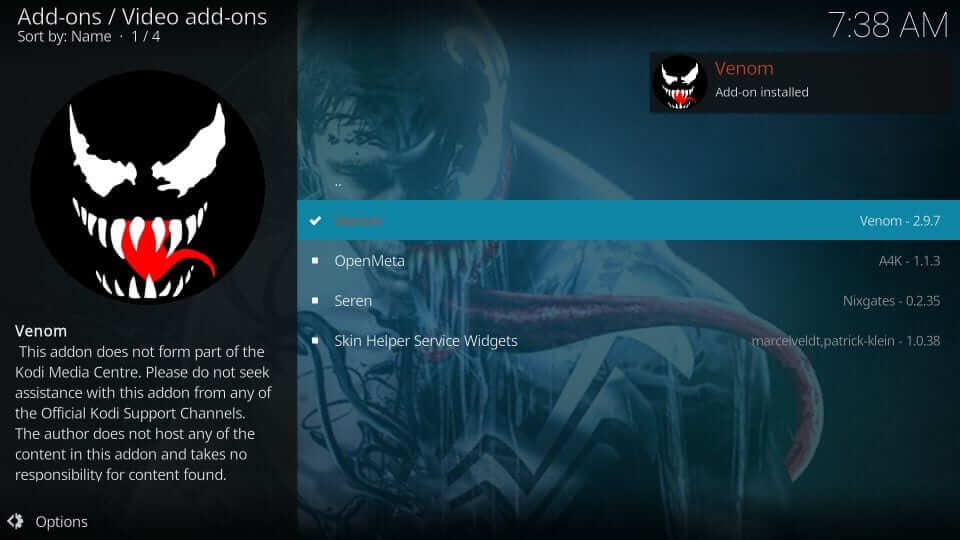
12. If you get the Venom addon installed notification, Venom installation is a success.

Why Use A VPN with Kodi?
Kodi holds many third-party add-ons, so a VPN is always recommended. It unblocks geo-restrictions, and you can stream almost any content. Your online identity will be safe with a VPN, and no one can track what you stream over Kodi. It also prevents video buffering issues by unblocking ISP throttling. So, you install any of the best VPNs for Kodi to unblock the geo-restricted content and protect your privacy.
1. Install a trustable VPN like Express VPN or IPVanish on your Firestick or Kodi.
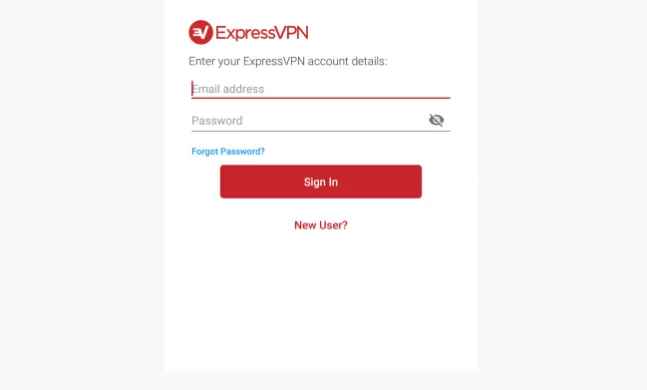
2. Launch the app and log in with your account details.
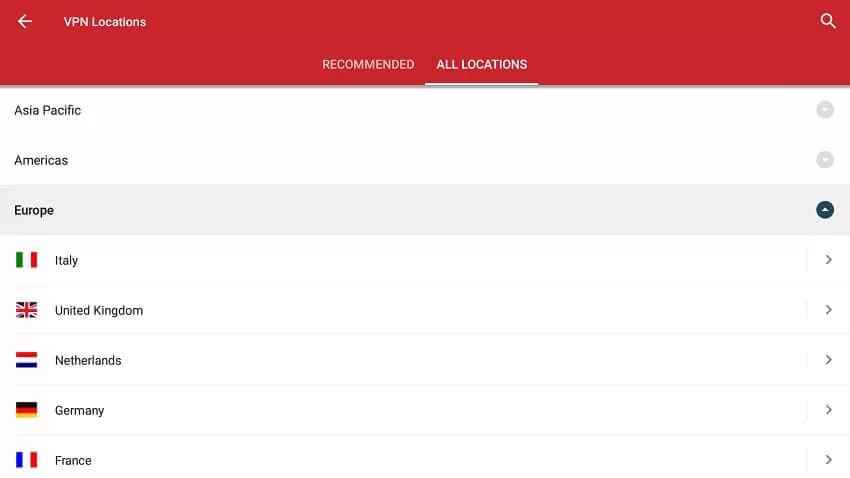
3. Follow the prompts and select any server location.
4. Click Ok/ Connect and start using Venom Kodi Addon with a VPN.
How to Use Venom Addon on Kodi
If you have installed the Venom addon on Kodi, follow the steps below to use it.
1. From the Kodi home screen, select the Add-ons option from the left pane.
2. Choose Video addons and click on the Venom tile on the right side.

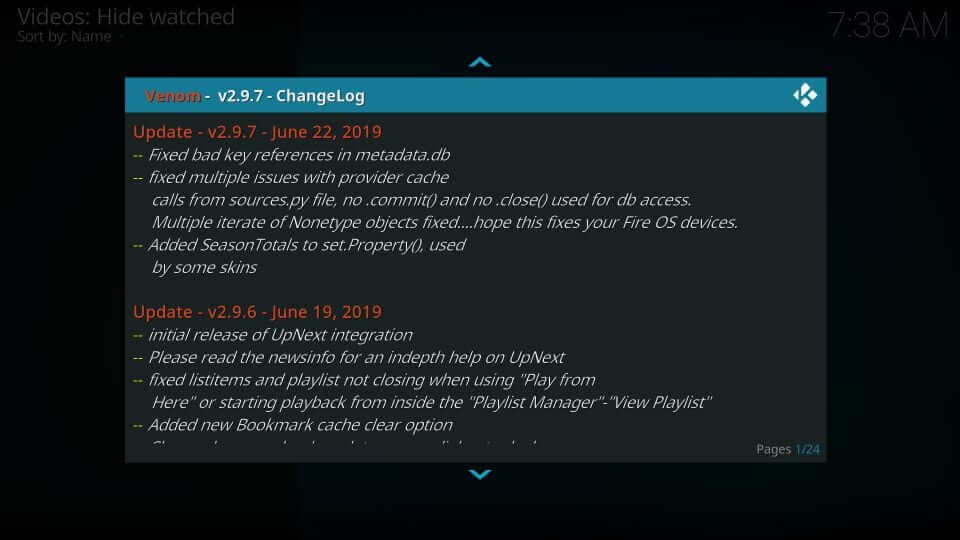
3. New users will get a ChangeLog prompt, and you shall dismiss it.
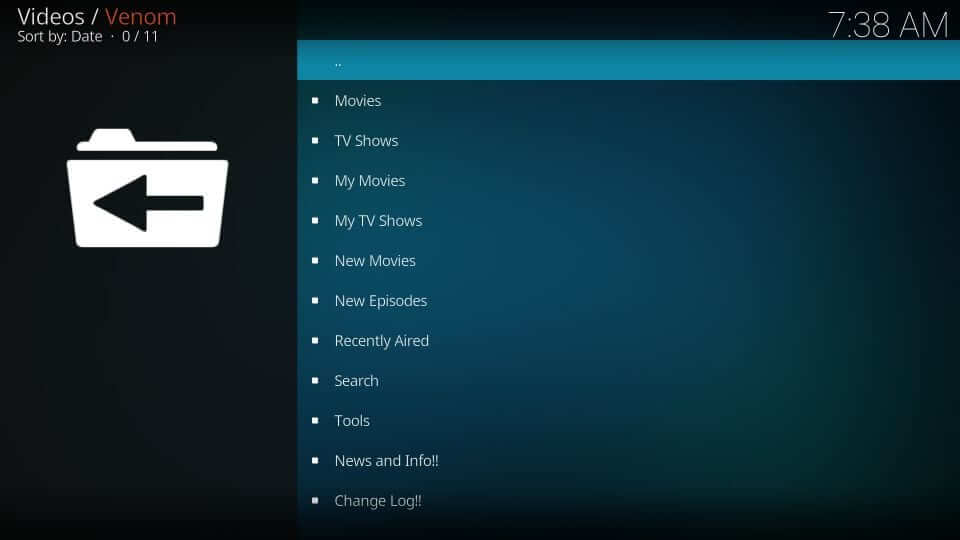
4. On its main screen, you will find menus listed below.
- TV shows
- My Movies
- New Movies
- Search
- Tools, and more.
How to Fix issues with Venom Kodi addon
If you can’t find an adequate number of video content to watch, there may be some issues with the Venom Kodi addon. To fix Venom Kodi Addon not working issue, go to Tools > Open Scrappers Settings. Then, select the General tab and tick on the Check Box near Enable All Providers. And the exact fix is not yet found. However, there is a 50-50 probability that this fix may work.
Venom Addon Alternatives
Here are some of the best alternatives for Venom Addon on Kodi
Frequently Asked Questions
Yes. Venom addon requires integrating it with the Real Debrid account. With this, you will get high-quality streams.
No. Venom isn’t legal to use because it has content from an illegal website. So, connect to a VPN to anonymously stream on the Venom Kodi addon.
Some of the alternatives to Venom include Crackle, Netflix, Popcornfilx, etc.
Venom is a lightweight Addon to stream movies, shows, series, etc for free.
Yes, you can integrate Real Debrid with Venom Addon on Kodi.
You can install Venom as a Kodi Addon on Firestick.


