Amazon Firestick is a popular streaming device that comes with a Firestick remote, USB cable, AAA batteries, and an adapter in the box. Each model of Firestick device has different types of Alexa voice remote. The Firestick remote is well designed and made of hard plastic to protect it from several physical damages. Due to its hard structure, opening the Firestick remote is quite difficult. If you want to change the batteries, you need to remove the back cover of the remote. The back cover of your Firestick remote is tight and you will not find any loose points to remove the back cover. If you’re a new Firestick user, you will find difficulty removing the back cover of your Firestick remote. In this article, let’s look at the steps to open the Firestick remote.
How to Open Firestick Remote to Replace Batteries
Steps to Open Firestick Remote 2018 (2nd Generation Alexa Remote)
The 2nd Generation Alexa Voice remote is the latest Firestick remote that comes with the Firestick 4K and Fire TV Cube device. The remote in this battery is vertically arranged. So, you can easily remove and replace the batteries within minutes.
1. Initially, flip the remote and look for the small indent at the back.
2. Next, hold the remote vertically in a way that the top side of the remote should face you.
3. Move the indent in an upwards direction using your thumb finger.
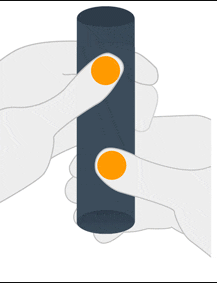
4. Do it until the back cover of your Firestick remote slides out.
5. Once removed, take out the old batteries on your remote and replace them with the new AAA batteries.
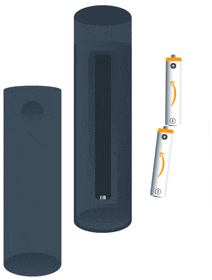
6. After replacing the batteries, slide down the back cover and close it. Now, pair the Firestick remote to your Firestick-connected TV and use the remote for navigation.
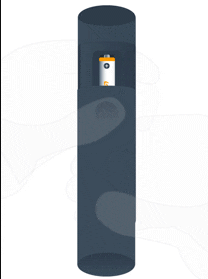
Steps to Open the Firestick Remote 2017 (1st Generation Alexa Remote)
The 1st Generation Alexa Voice remote comes with the Fire TV (2nd and 3rd generation) and Firestick device. This remote is entirely different from the 2nd Generation Alexa remote. You can remove the entire back cover in this remote. The batteries in this remote are arranged parallel to each other.
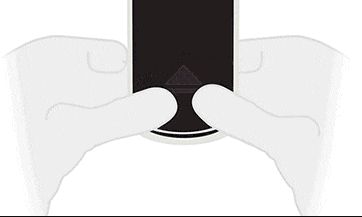
1. Turn back your remote and locate the Arrow indent at the bottom of the cover.
2. Hold the remote vertically in a way that the bottom of your Firestick remote should face you.
3. Use your thumb finger and move the back cover upwards.
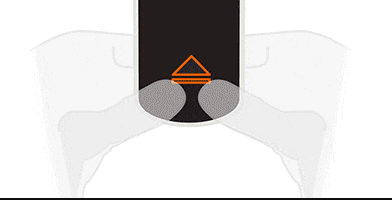
4. After removing the cover, take out the two AAA batteries.
5. Insert the new AAA batteries in their respective places.
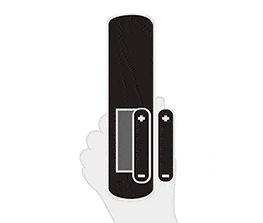
6. Now, place the back cover on your remote and slide it down to close.
Alternative Way: How to Open the Firestick Remote using the Plastic Opener
You can also use the plastic opener to remove the back cover of the Firestick remote. Place the plastic opener in between the thin line of the back cover and lift it up. If you are lucky enough, the back cover will open. Now, you can change the batteries and can use the Firestick remote for navigation.

Replacing the batteries is one of the best ways to fix the Firestick remote not working issue. You can follow any of the above methods to remove the back cover of your Firestick remote and can change the batteries. Tools like plastic openers can cause damage to the back cover if the pressure is applied more. So, instead of using a Plastic Opener or some other tools, use your hand to remove the back cover of your Firestick remote.
Frequently Asked Questions
Yes. You can use a plastic opener to open the Firestick remote.
* To Open the Firestick remote, flip your remote and hold it vertically.
* Slide upwards to remove the back cover and change the batteries.


