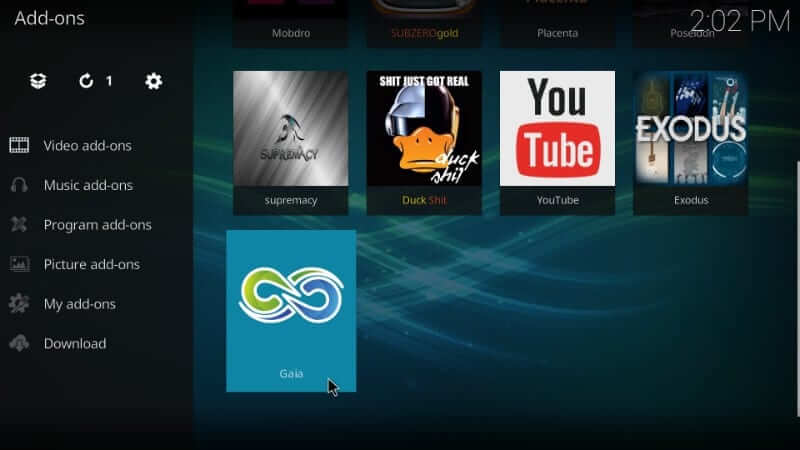
Gaia is a third-party Kodi addon that features a huge collection of movies and TV shows. It is a fork of the popular addon called Bubbles, and it is one of the best Kodi addons. With Gaia, users can access movies, TV shows, and more in high quality. It fetches scrapes from the web from different sources. It supports IMDb, Emby, Trakt.TV, and more. So, you get the chance to choose from a wide range of streaming links. Gaia is better for binge-watching episodes on the go. You can install Gaia Addon on Kodi-compatible devices like Android, Android TV, Amazon Fire Stick, Mac, Windows, etc.
Why should you use a VPN on Kodi?
You should use a VPN while streaming on Kodi for several reasons. One of the main factors is legal issues. Not all the addons in Kodi are official. There are several unofficial addons on Kodi that have copyrighted content. Streaming those copyright contents may end up having legal issues. Thus, VPN helps to mask your identity and stream anonymously with complete privacy. All you require to do is install the best VPN for Kodi or Firestick. Moreover, VPN lets you stream geo-restricted contents without any buffering.
How to Download Gaia Kodi Addon
To use Gaia on the Kodi platform, you shall need to follow the steps given below.
Configure Kodi
Gaia is a third-party Kodi addon. So, you should carry out the below steps first.
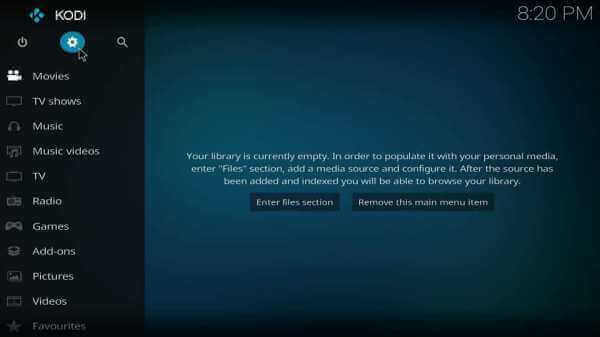
1. After you launch the Kodi app on Firestick, click on the Settings (Gear icon) available below the Kodi logo.
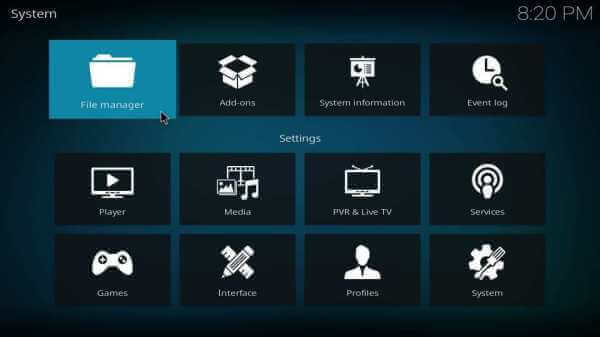
2. Select the System Settings tile on the System window to open it.
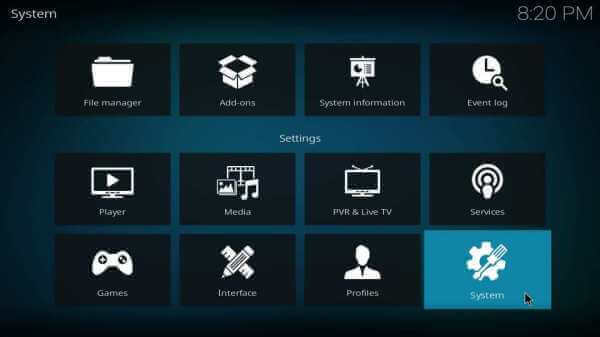
3. Choose the Add-ons option on the left panel.
4. On the same window, click the slider of Unknown Sources to enable it.
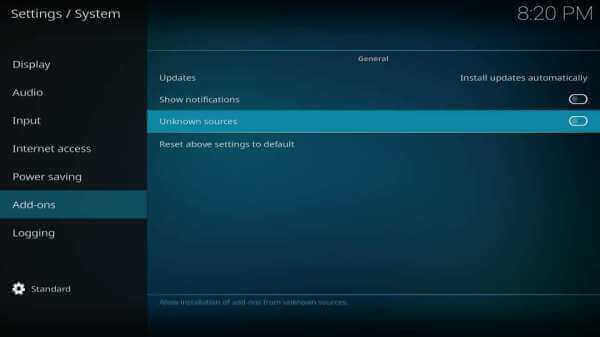
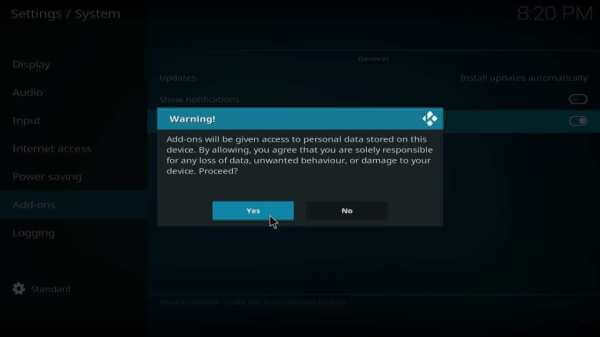
5. If a warning prompt appears, select Yes to accept the end result of using third-party add-ons on Kodi.
How to Add Gaia Kodi Repo Source on Kodi
The steps given below are all about adding the repo source of Gaia on Kodi, respectively.
1. On the Kodi home screen, navigate to select the Settings icon.
2. Then, select the File Manager tile on the System window.
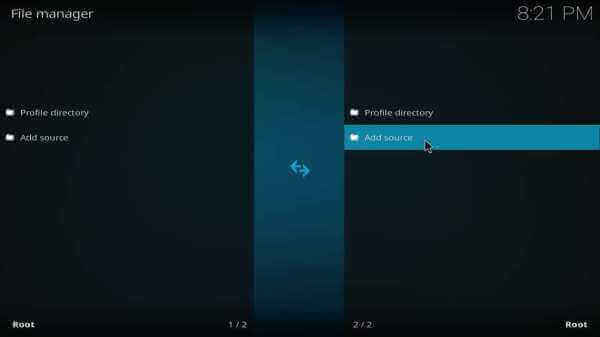
3. Choose the Add source option either from the left or right panel.
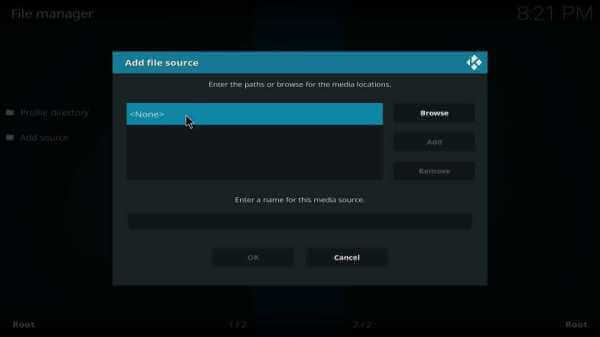
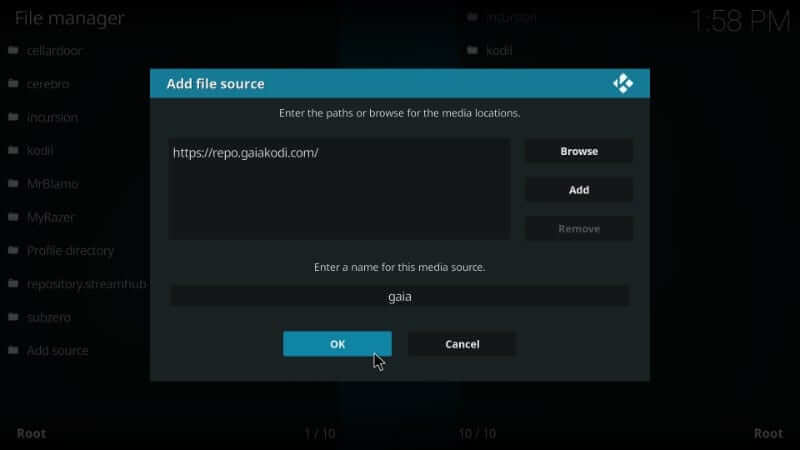
4. Select the <None> option on the Add file dialog box that appears on-screen.
5. On the following window, enter the source URL of Gaia using screen keys and press OK.
Gaia Source URL: https://repo.gaiakodi.com/

6. On the source name field, type as Gaia and press the OK button.
How to Install Gaia Repo and Gaia Addon
After adding the Gaia source, you shall proceed with installing the Gaia repository and the addon.
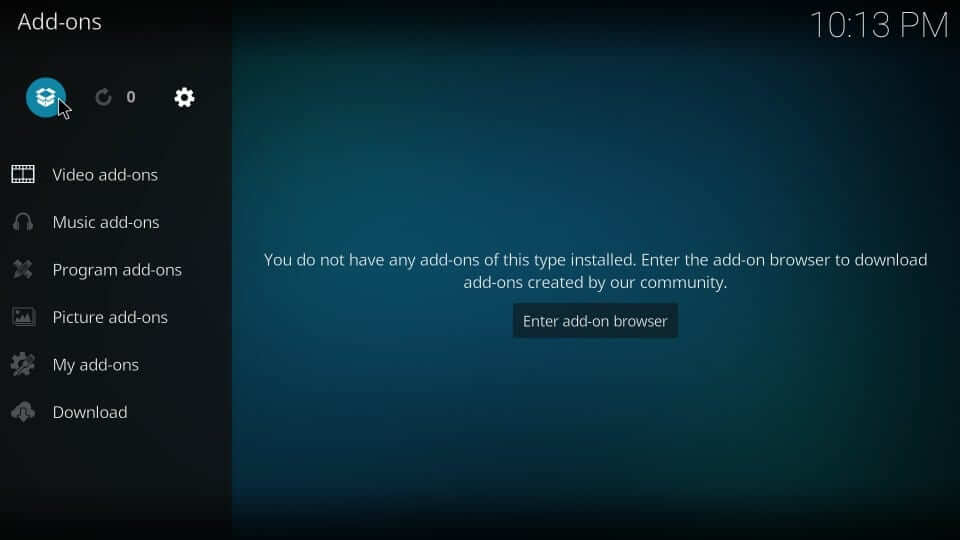
1. On the Kodi home screen, select the Add-ons option from the left pane.

2. Select the Package Installer icon from the top-left.
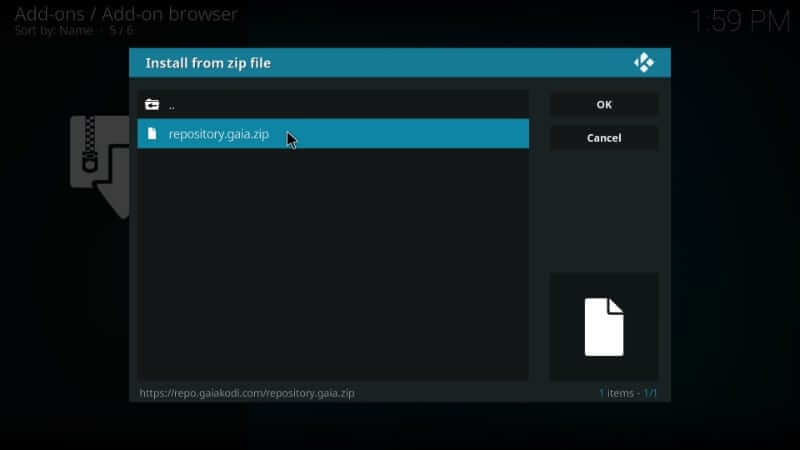
3. Choose the Install from zip file option.
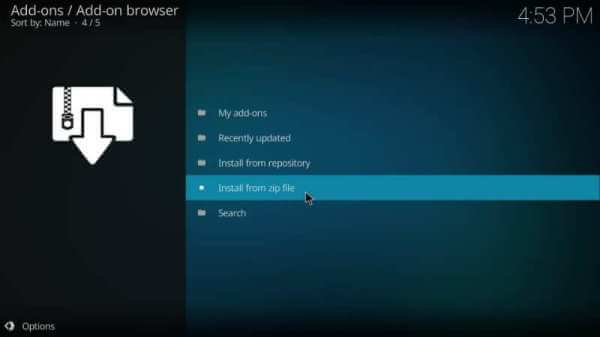
4. On the following dialog box, select Gaia, the source name you provided earlier.
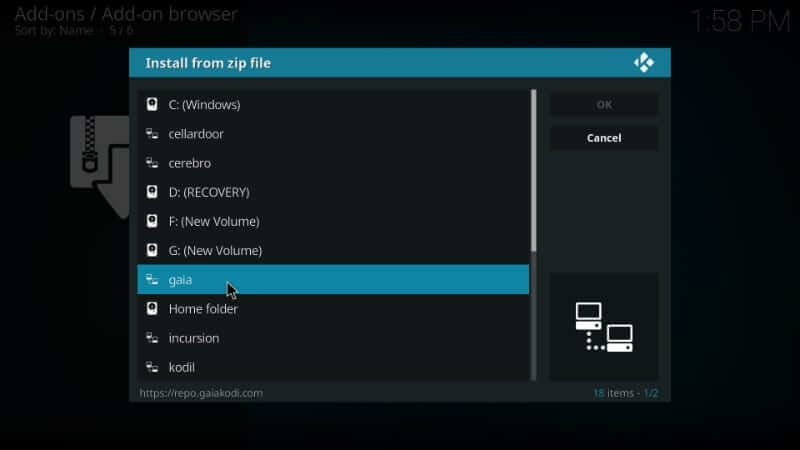
5. Select the Zip file of the Gaia repository and press OK.
6. If you get the Gaia Repository add-on installed message, select Install from repository.
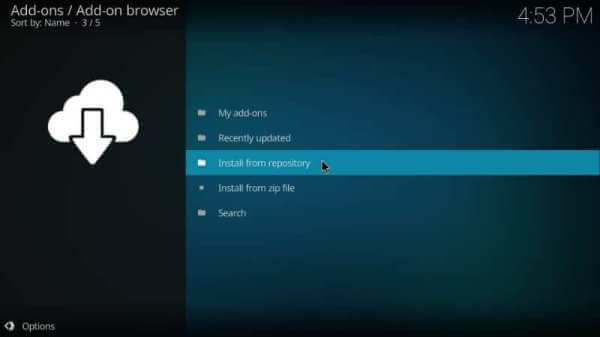
7. Navigate on the list of the installed repositories to select Gaia Repository.

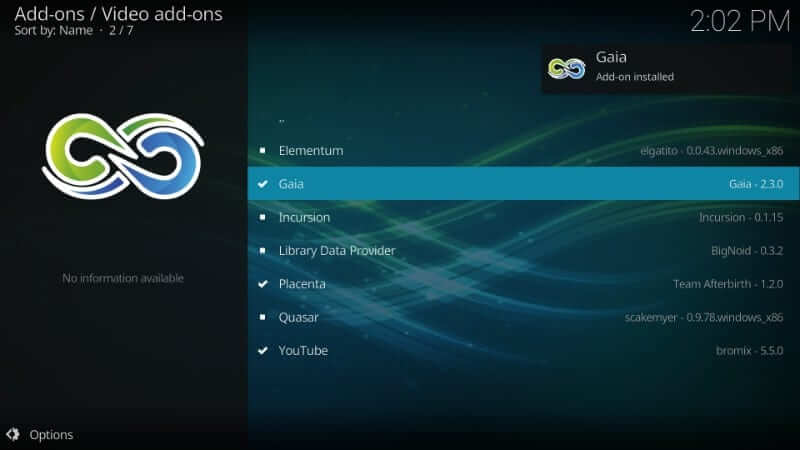
8. Choose the Video add-ons option on the Add-ons window.
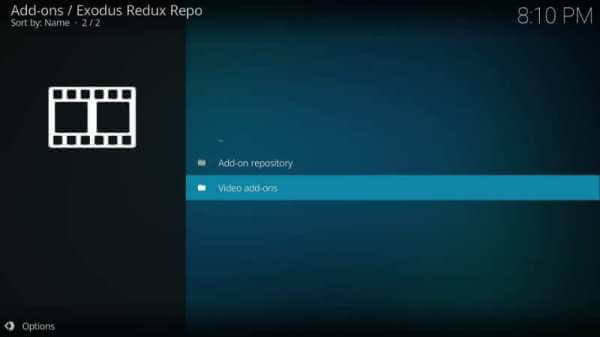
9. From the available addons, select Gaia to proceed.

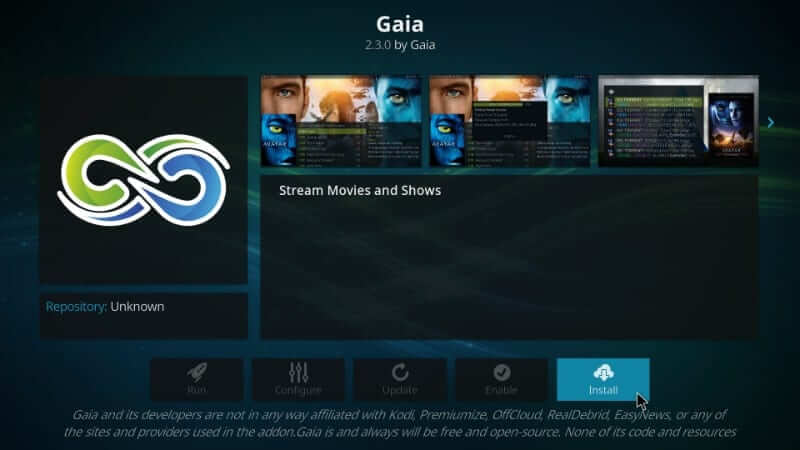
10. Select the Install button to start its installation on your Kodi.
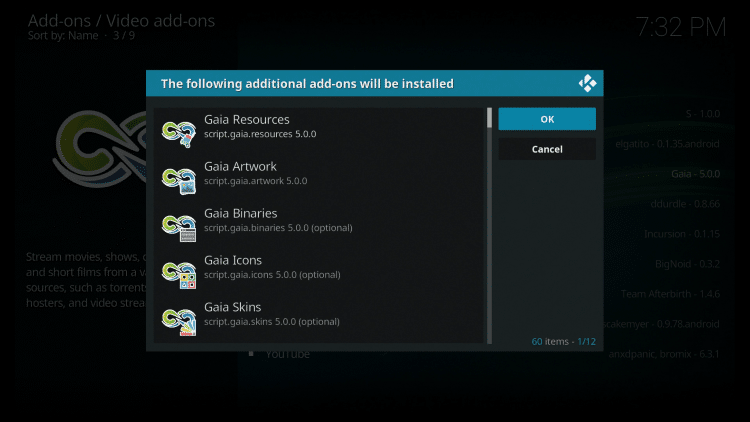
11. You need to wait for the Gaia add-on installed notification to appear on the screen.
12. Select the Ok button when Gaia shows the add-ons that will be installed.
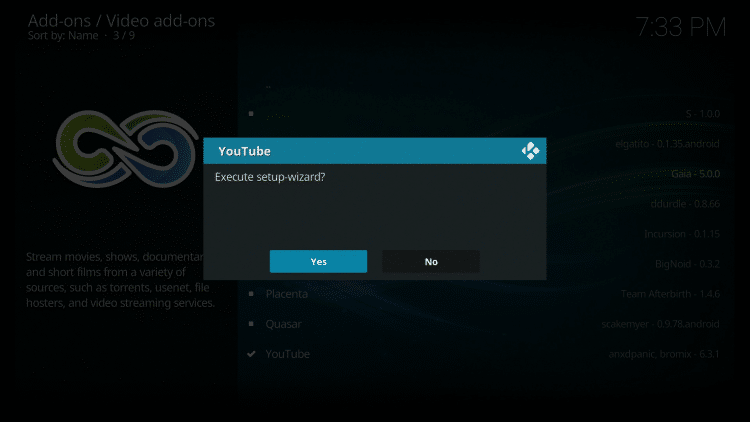
13. To set up YouTube, press Yes.
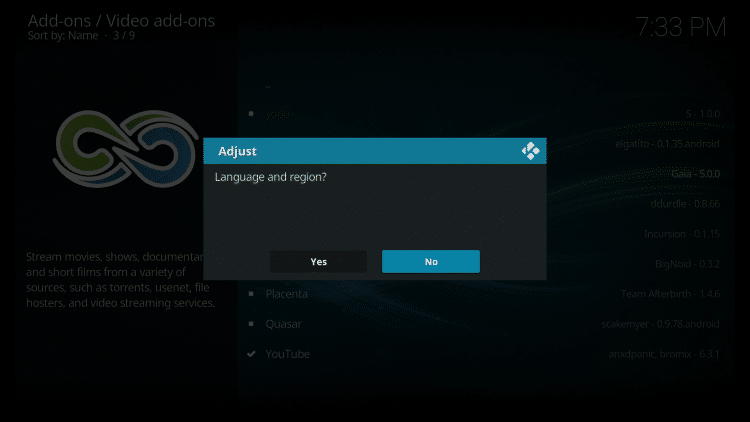
14. Select Yes or No whether you want to adjust language and region.
How to Use Gaia Addon on Kodi
Upon installing Gaia on Kodi (Leia or Krypton), you shall proceed with the steps to use Gaia on your Kodi-installed device.
1. From the Kodi app’s home screen, select Add-ons from the left pane.
2. Select the Video add-ons option and then highlight the Gaia addon.
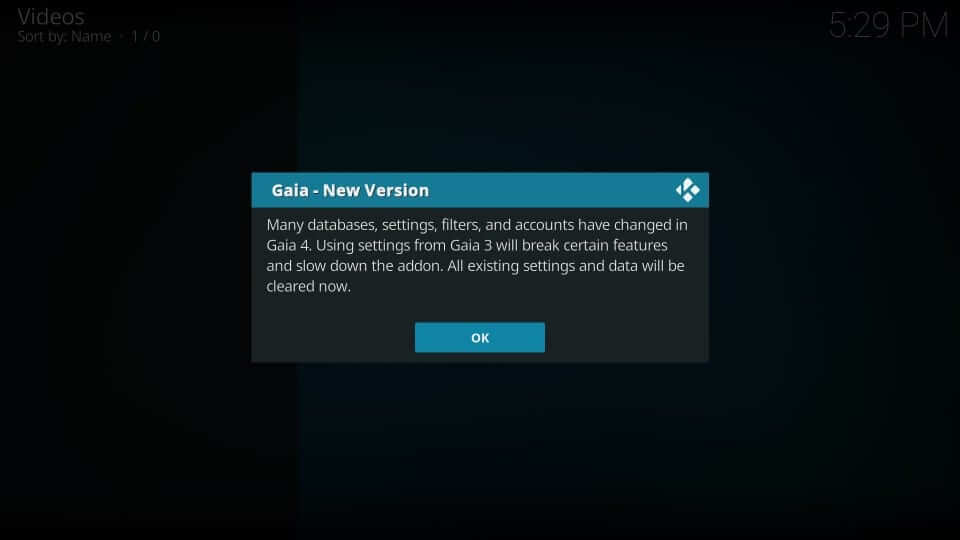
3. Upon opening Gaia addon for the first time, you will get the update prompt. Press OK.
4. Choose the Agree button if you get a Disclaimer prompt.

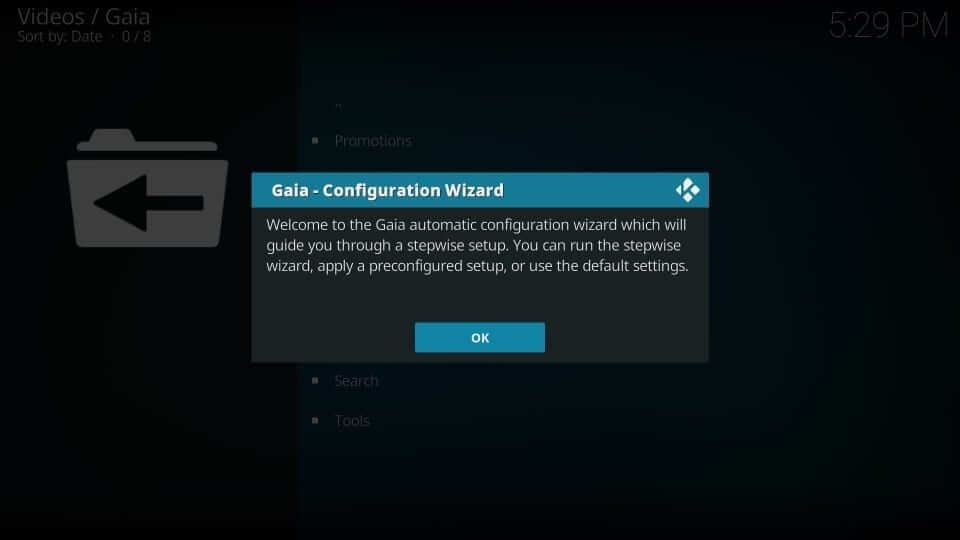
5. On the configuration wizard, select the OK button.
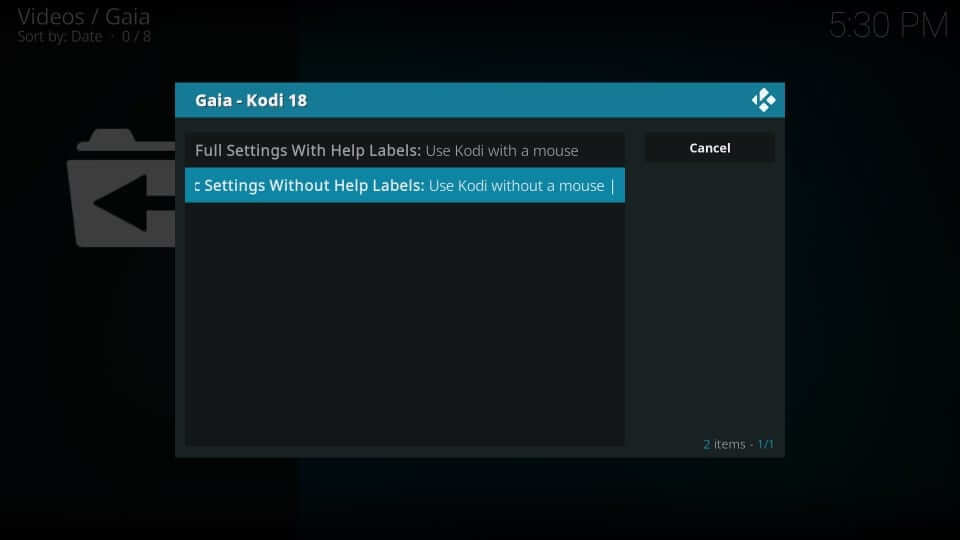
6. Based on the Kodi version, you will get Basic Settings without Help Labels or Full Settings with Help.
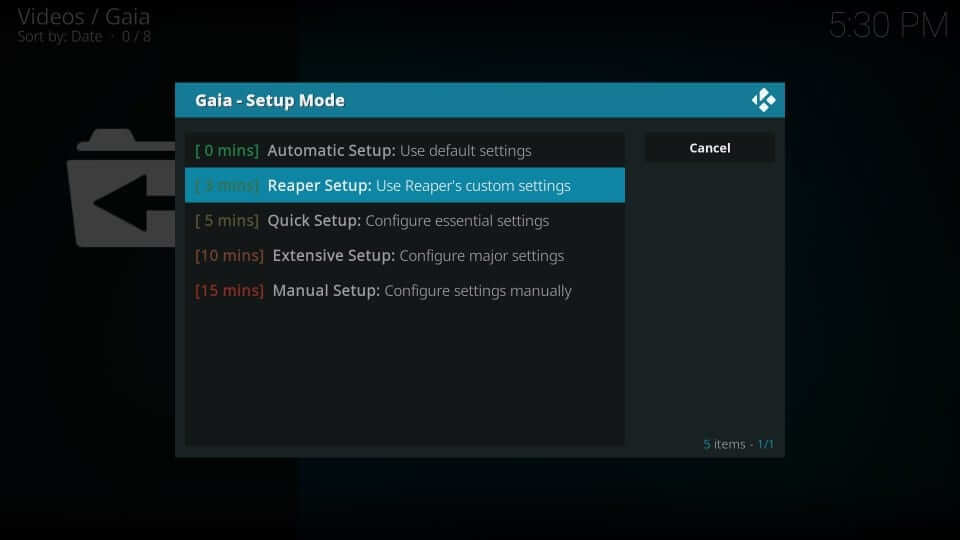
7. Choose the Reaper Setup option on the Setup Mode window.
8. On the following pop-ups, select Yes and then Continue.

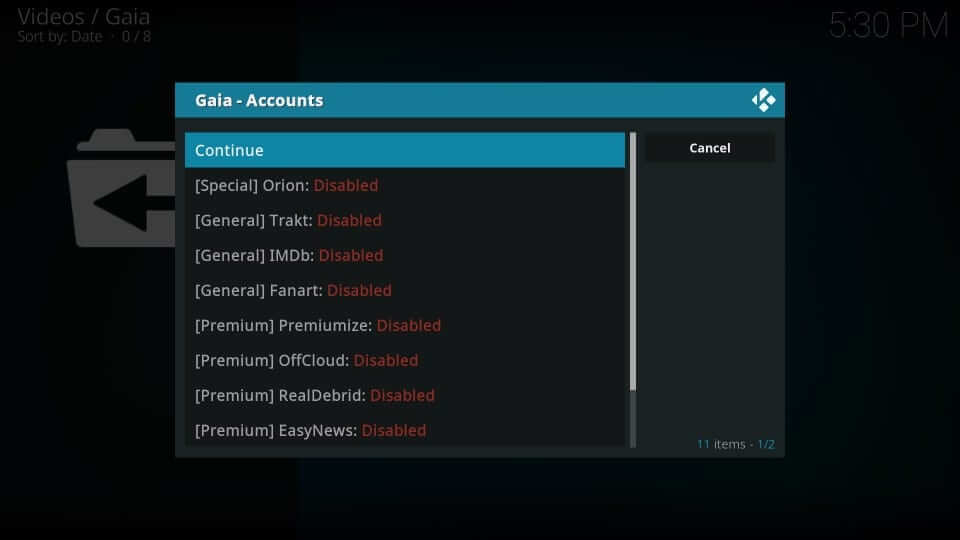
9. Select Continue on the Accounts window.
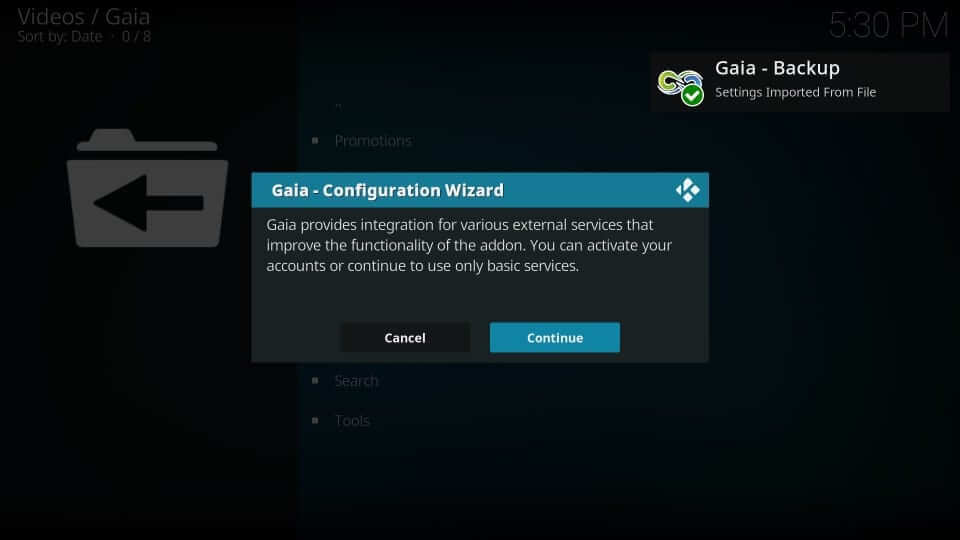
10. When you get the configuration wizard, select Continue.
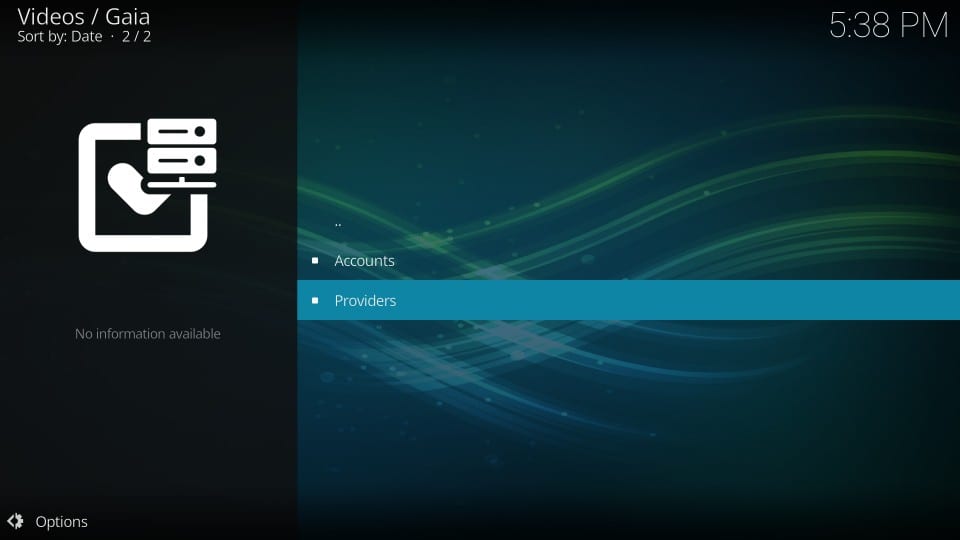
11. On the Providers window, choose Continue.
12. Select between Manual or Automatic playback.
13. When you get the Announcement window, make click outside it.
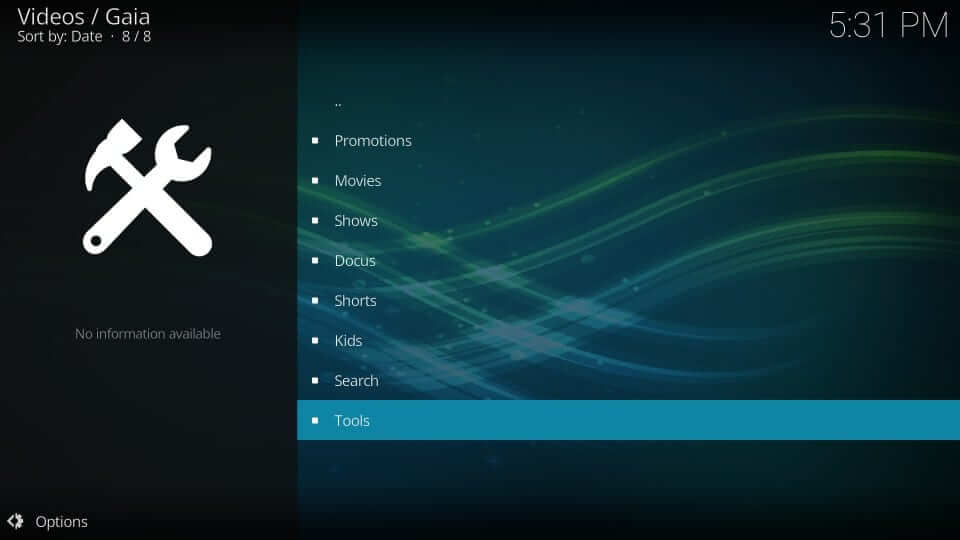
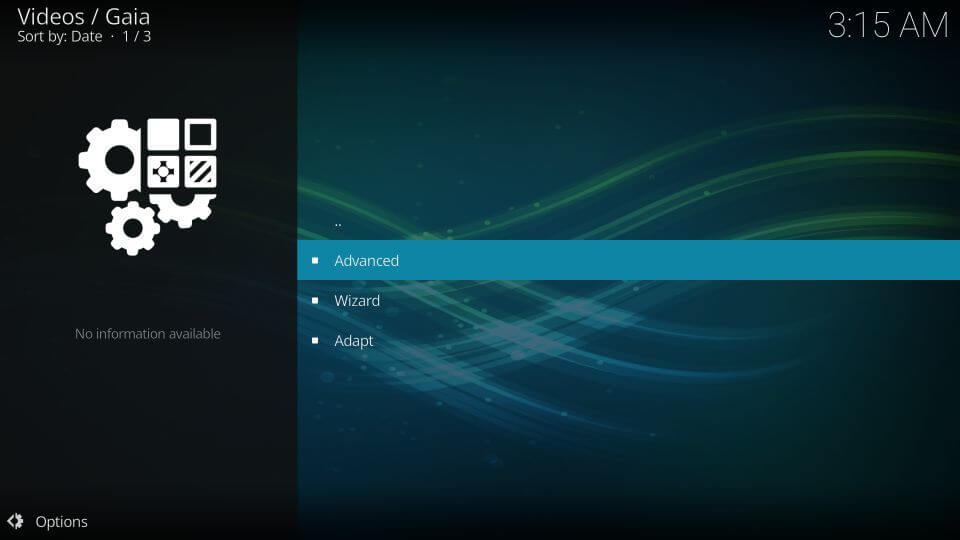
14. The main screen of Gaia will appear. Choose Tools.
15. Select the option Settings on the Videos screen.
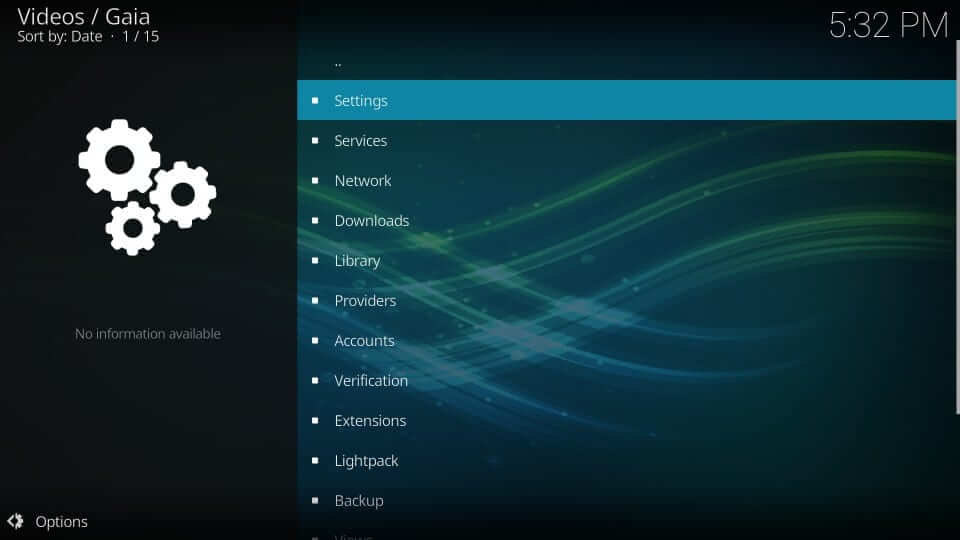
16. Click on the Advanced option.
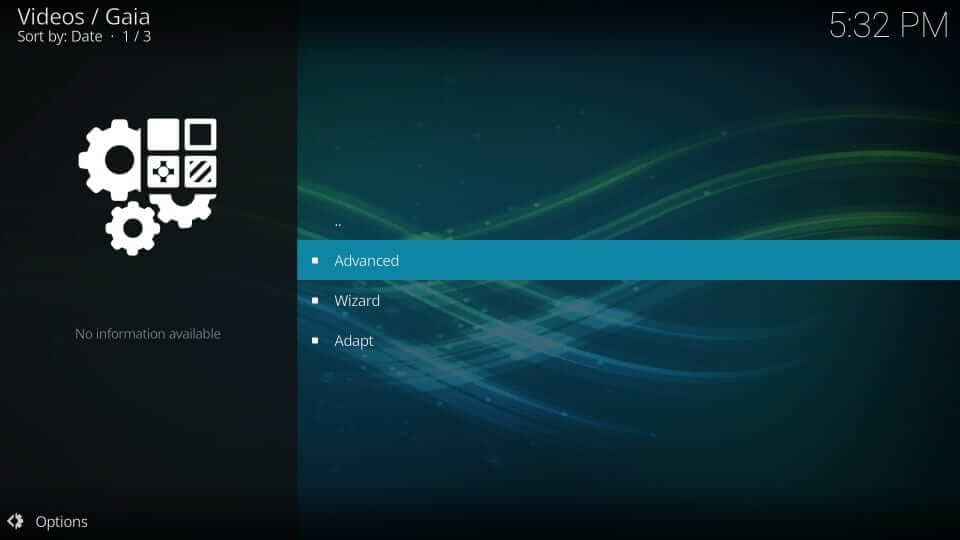
17. Choose Providers 1 on Kodi 18 or Providers on Kodi 17.6.
18. On the same screen, click Installation or Defaults.
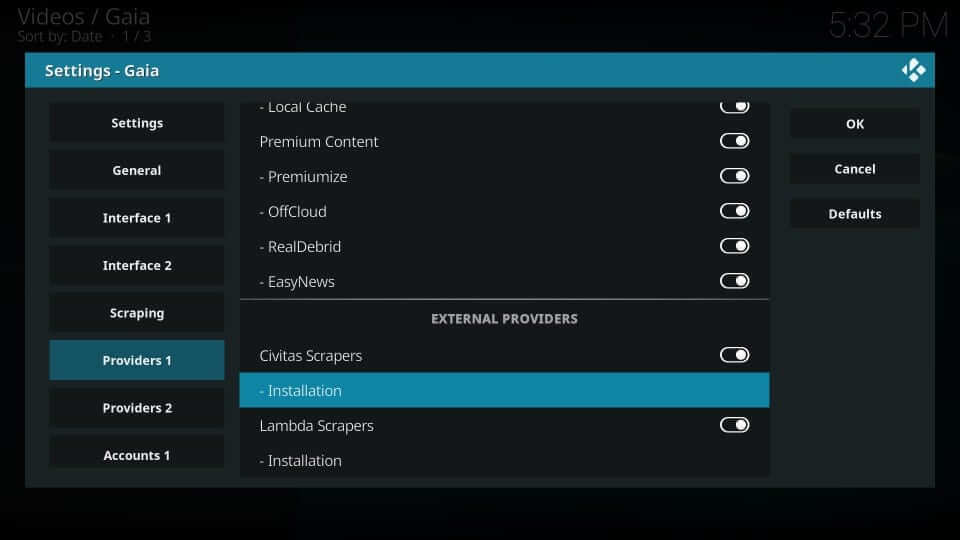
19. When you get the prompt, select Yes to finish the installation.
How to Verify Providers on Gaia Kodi Addon
The below steps are all you need to verify the providers on the Gaia addon.
1. Navigate to Tools to select Settings and click on Providers 1.
2. Under the External Providers section, choose Providers.
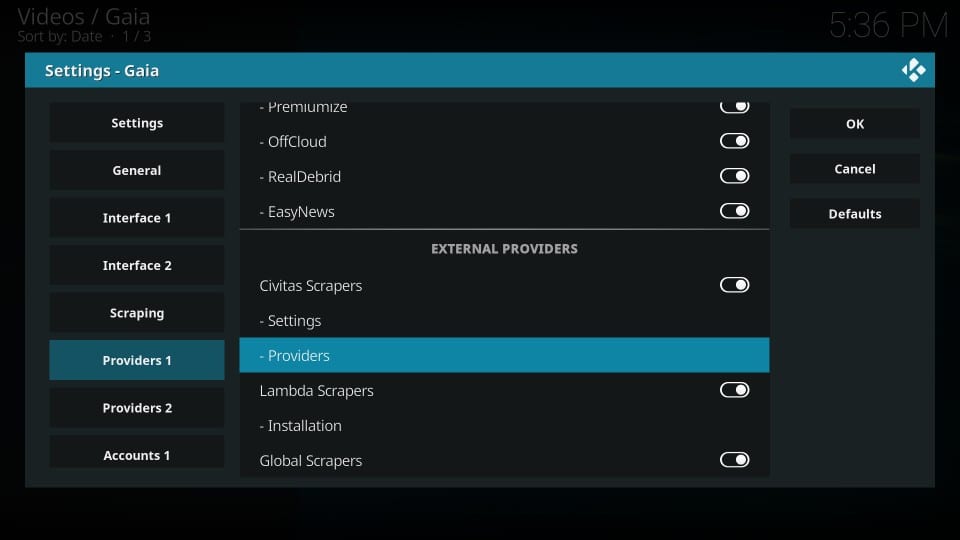
3. Select Disable All option on the Gaia – Providers settings.
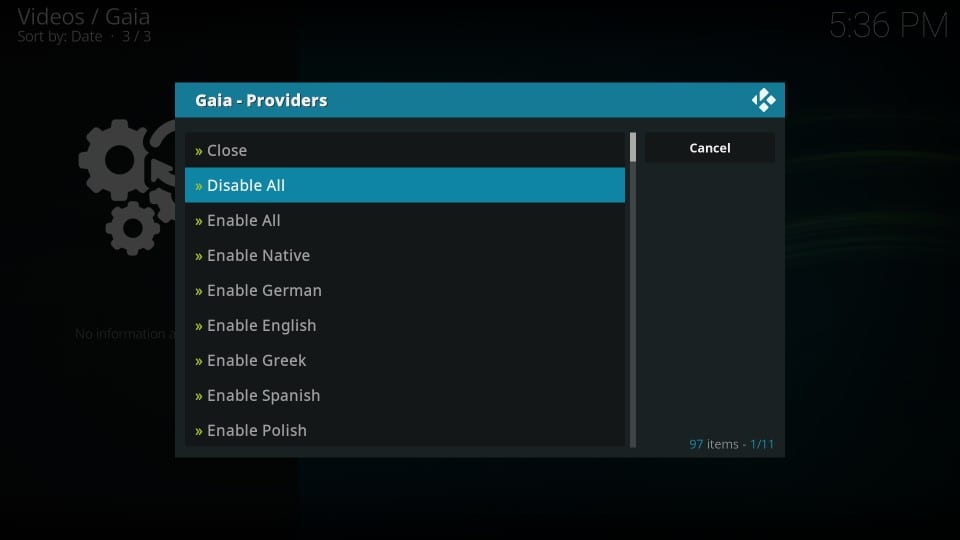
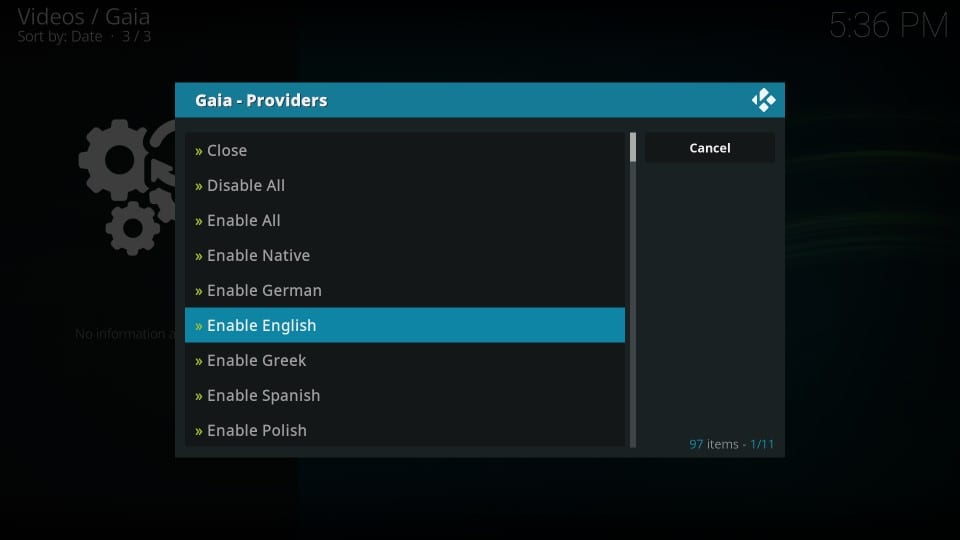
4. Choose to Enable English option.
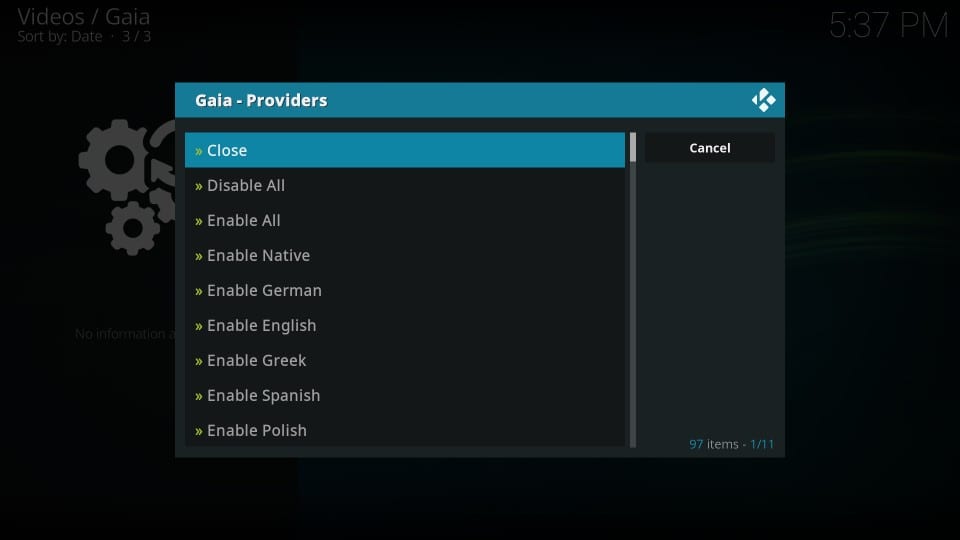
5. Select Close on the following window.
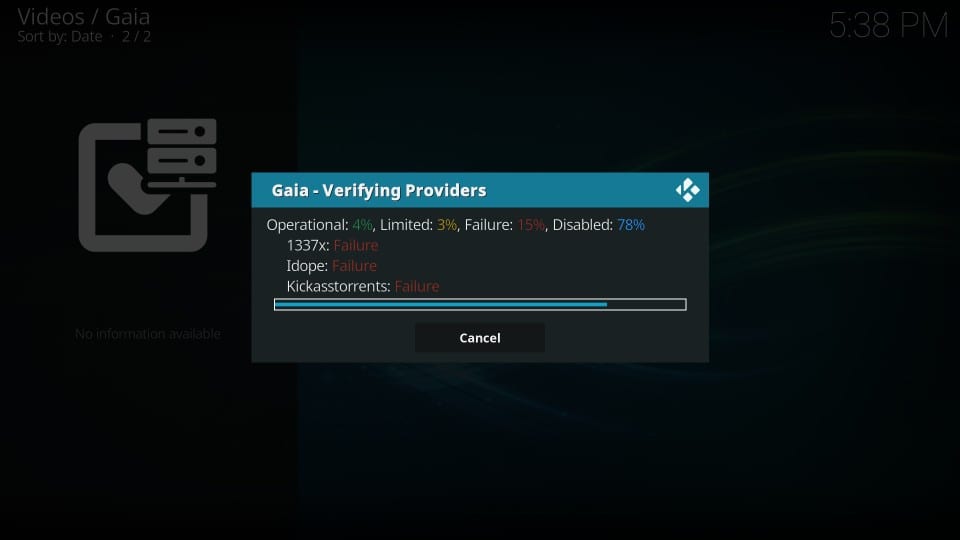
6. From the main screen of Gaia, choose Tools and select Verification.
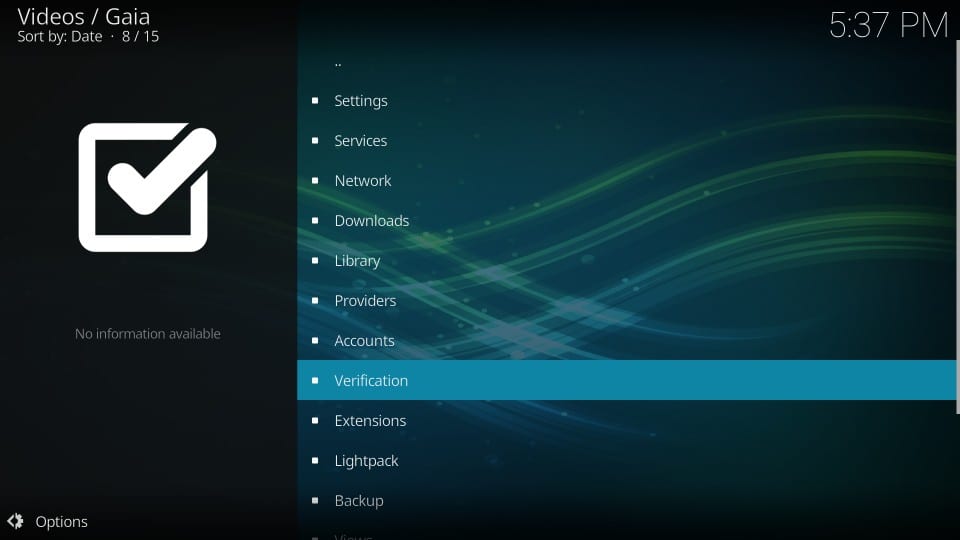
7. Highlight and select the Providers option.
8. Allow the verification process to end.
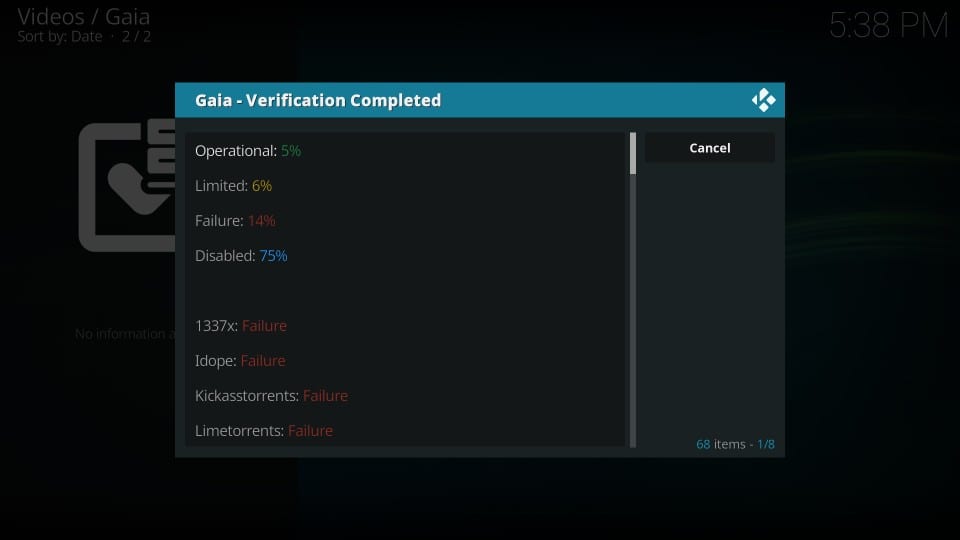
9. On the verification completed window, press the back button.
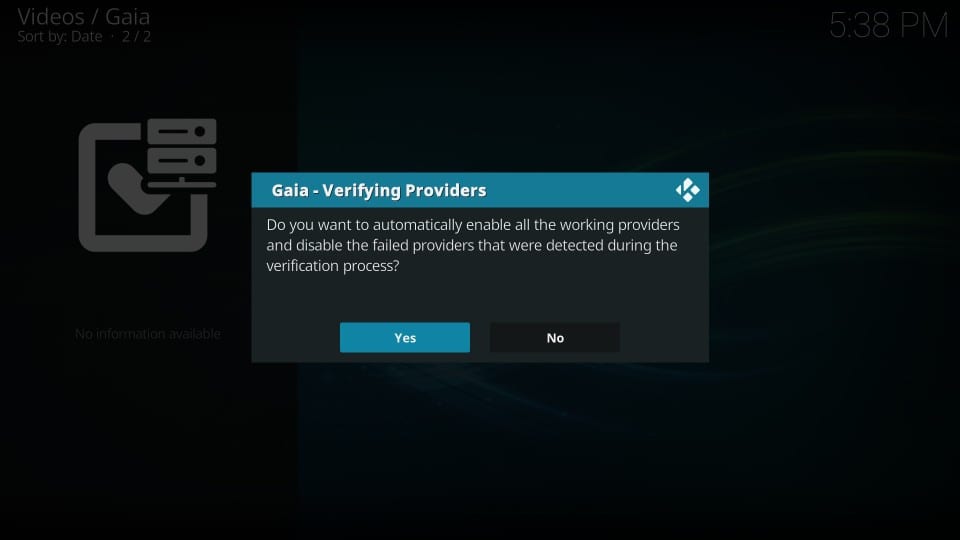
10. Select Yes on the verifying Providers pop-up.
How to Integrate Real Debrid with Gaia Addon
Gaia Kodi Addon supports Real Debrid. Therefore, you can get all the premium links for a better streaming experience. Here are the steps to use Real Debrid with Gaia Kodi Addon.
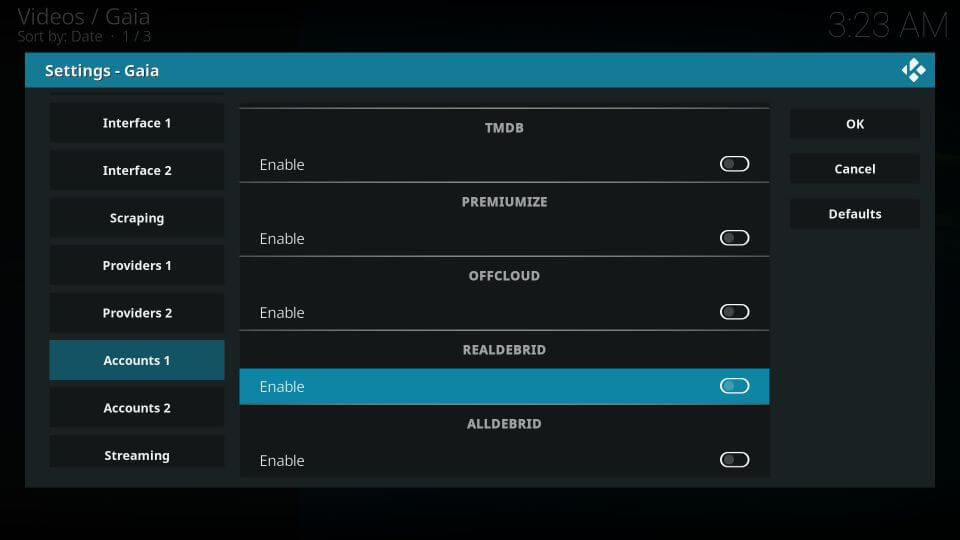
1. Go to Tools and click on Settings.
2. Select Advanced and click Accounts 1.
3. Scroll down to enable Real Debrid.
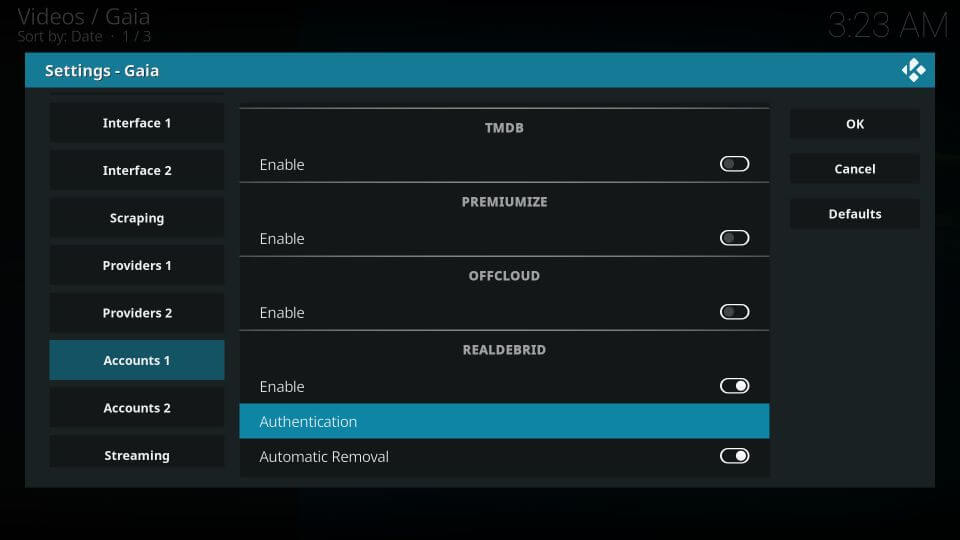
4. Choose Authentication to receive an activation code.
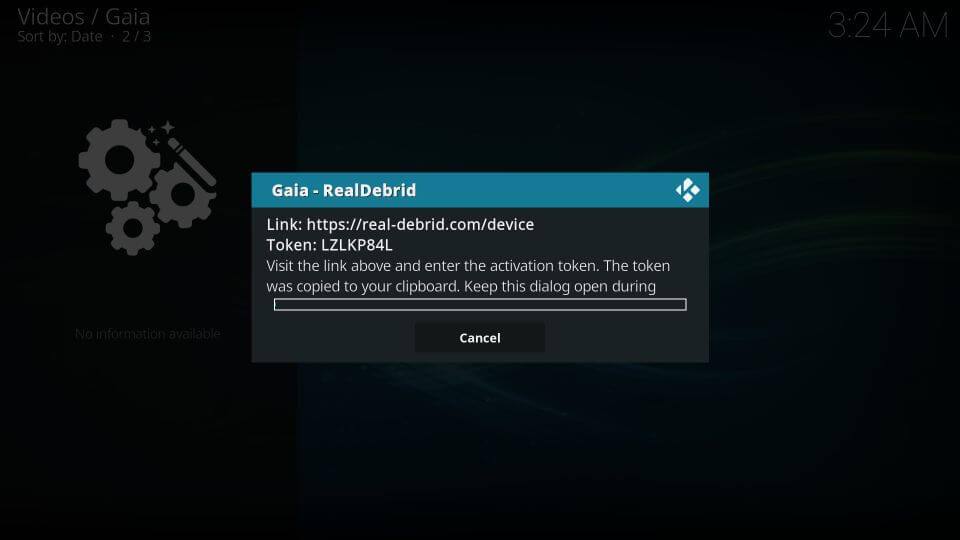
5. Visit https://real-debrid.com/device to activate.
6. Enter the code and click Continue.
7. Once the authentification is confirmed, a notification will be displayed on your TV screen.
That’s all. Installing and using the Gaia Kodi addon requires all the above steps to be carried out. For any other clarifications, you shall ask us through comments.
Frequently Asked Questions
Yes, you can install Gaia Kodi Addon on Firestick.
Gaia offers a trial pack for 7-days which you can access for free.
No, there is no access to Gaia with Amazon Prime.
You shall resolve this issue by clearing the cache memory of Kodi. With this, you can access the Gaia addon without any issues.
Few titles get removed from Gaia, and when you try streaming them, you will see no stream available message.