Kodi is a unique open-source platform for entertainment needs like movies, television shows, music, and photos. Additionally, it offers a bunch of addons to watch videos, listen to songs, and even play retro games. Most users prefer Kodi mainly to record live TV shows and movies they watch using addons. Kodi is compatible with popular devices like Amazon Fire TV Stick, Android TV, Smart TV, Windows, Android, iOS, macOS, Apple TV, and much more. Kodi features hundreds of best Kodi Builds that help you stream videos instantly. However, the guide explains the detailed procedure to install Hard Nox Kodi Build on Firestick.
What is Hard Nox Kodi Build?
Hard Nox is a user-friendly Kodi Build developed by Misfits Mods Wizard. It lets you access popular addons on the go, which gradually improves your streaming experience. Moreover, you can enjoy movies, TV shows, live sports, kids, gaming content, and much more. It has unique sections to binge horror, grit, ladies night, fitness, urban, doc spot, amigos, etc. Hard Nox Kodi Build uses colorful and attractive Aeon Nox Silvo skin to navigate the app easily.
Guide to Install Hard Nox Kodi Build
The entire process is quite long, so we have divided it into five parts to make it clear for you. Just follow the instructions one by one to install Hard Nox Kodi Build.
Note: The below installation procedure is common for Amazon Fire TV, Windows, Android, Mac, Nvidia Shield, Mi Box, and other Kodi-compatible devices.
Configure Kodi
To enable access to install third-party builds and addons on Kodi, follow the below steps.
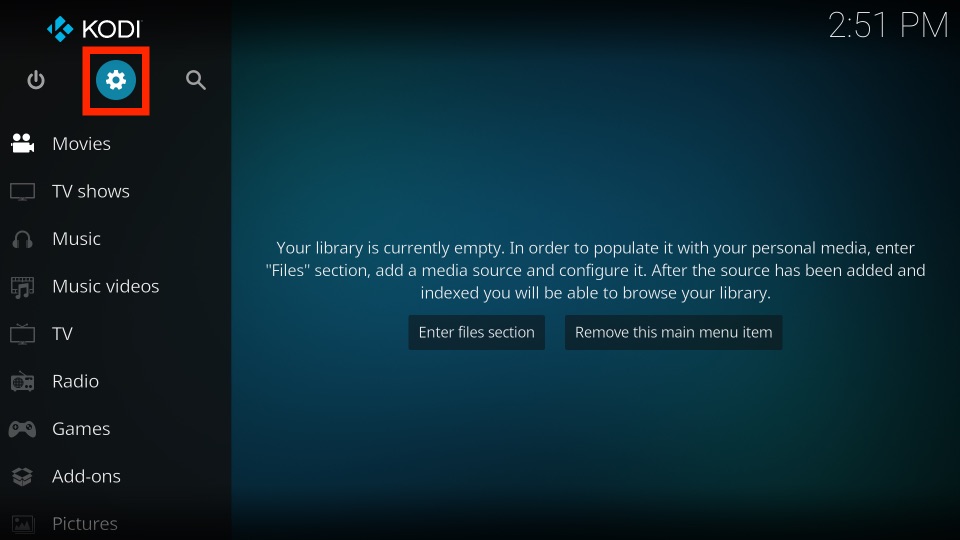
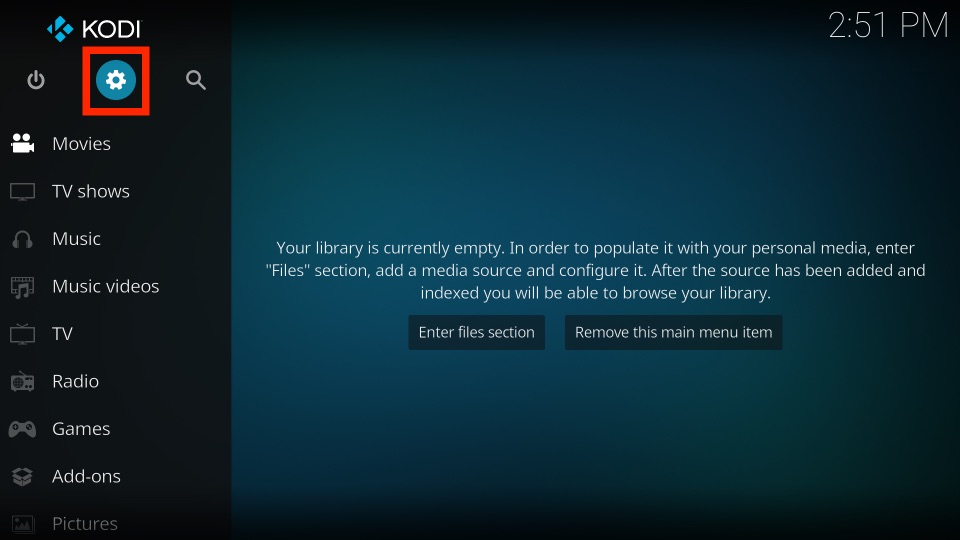
1) Launch the Kodi app on your device and tap the Settings gear icon in the top left corner.
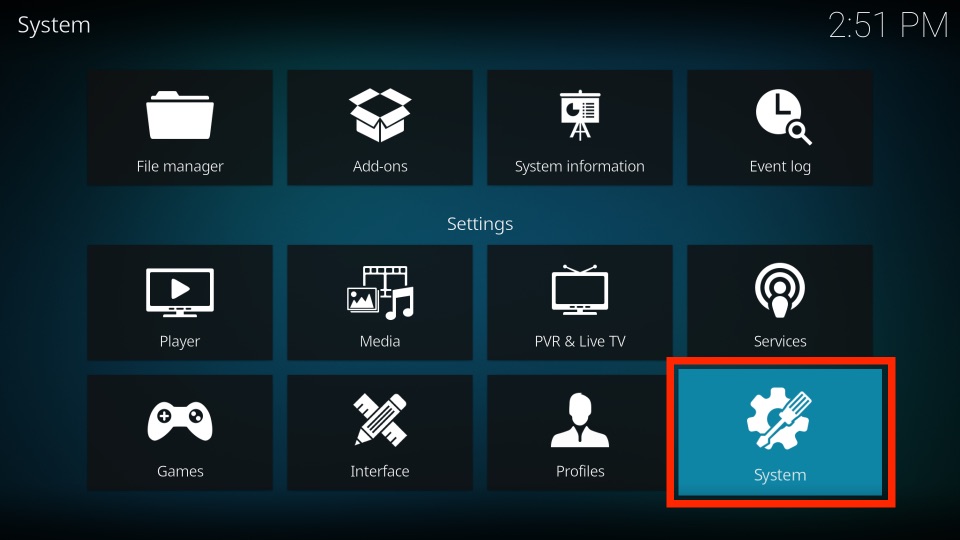
2) From the following screen, click the System option.
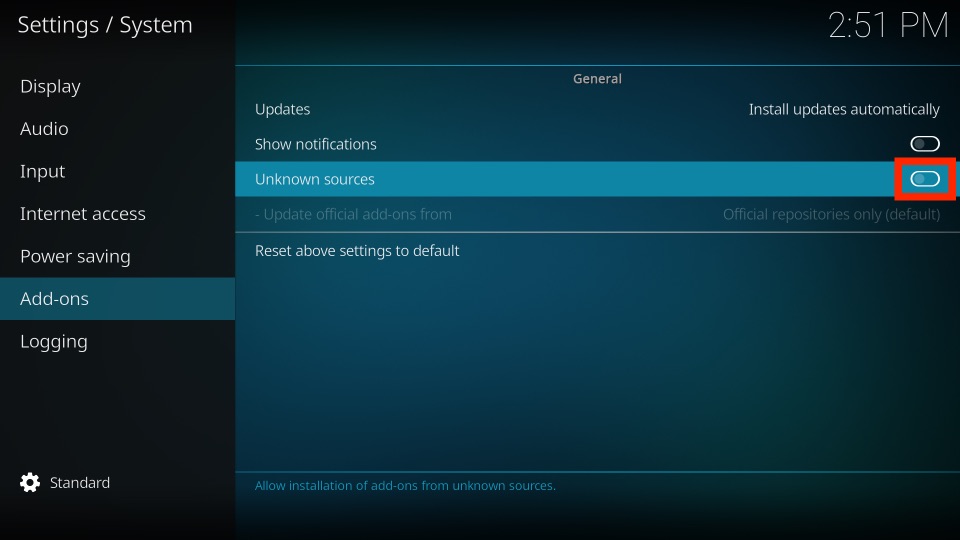
3) Further, choose the Add-ons tab on the left.
4) Next, toggle the Unknown Sources option located next to it. Clock it to ON status.
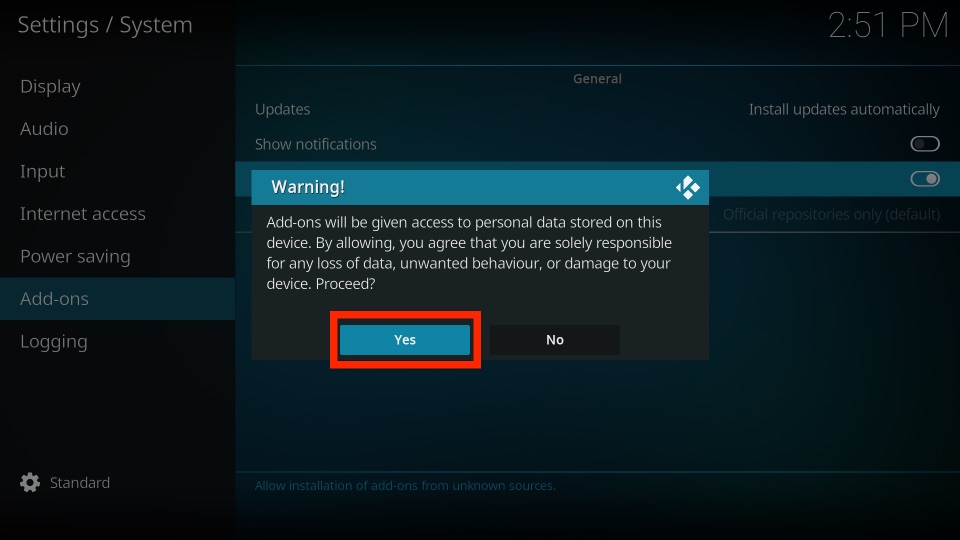
5) If it prompts you with a warning message, click Yes to continue.
Steps to Add the Repository Source
Follow the steps carefully to add the source file.
1) Go back to the Kodi home screen and select the Settings icon beneath the Kodi logo.
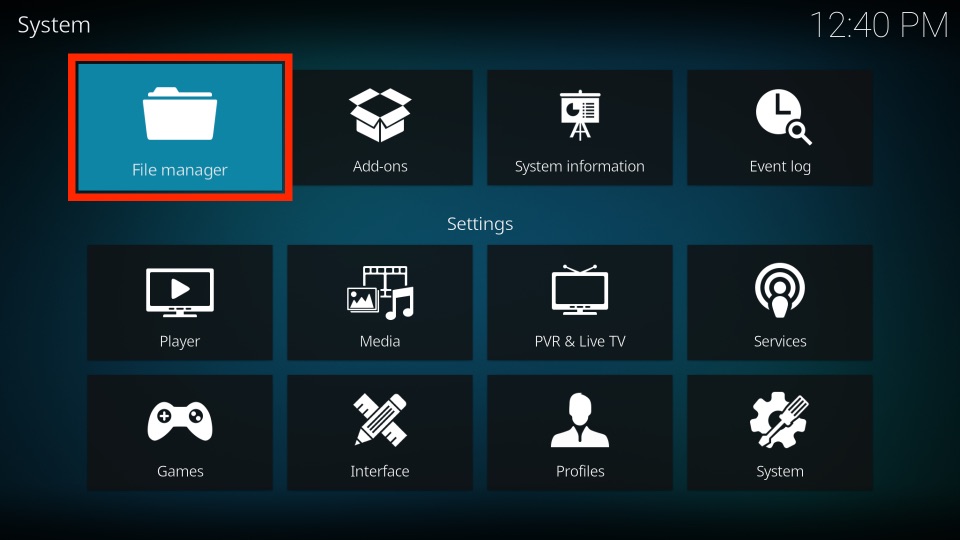
2) From the list of available options, click File Manager.
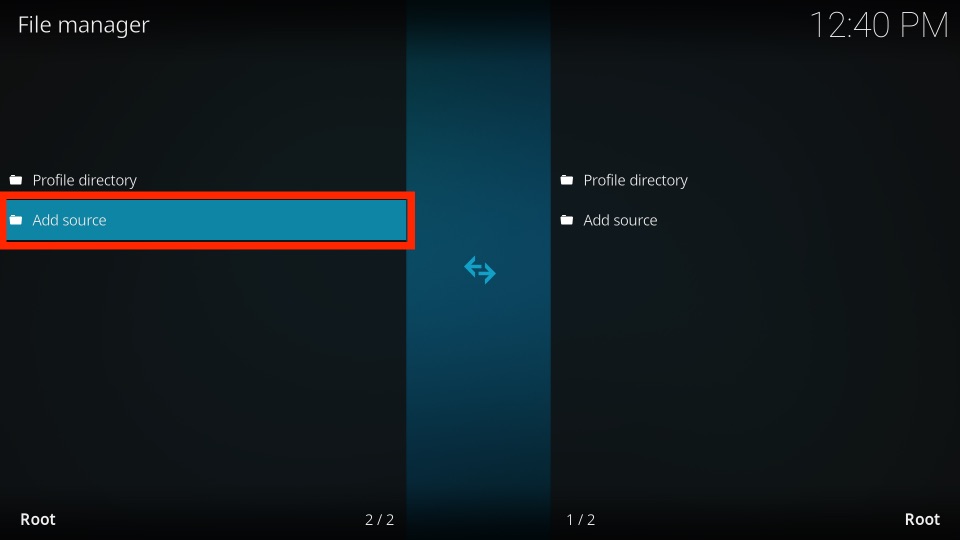
3) After that, choose Add Source.
4) Further, click on the <None> option.
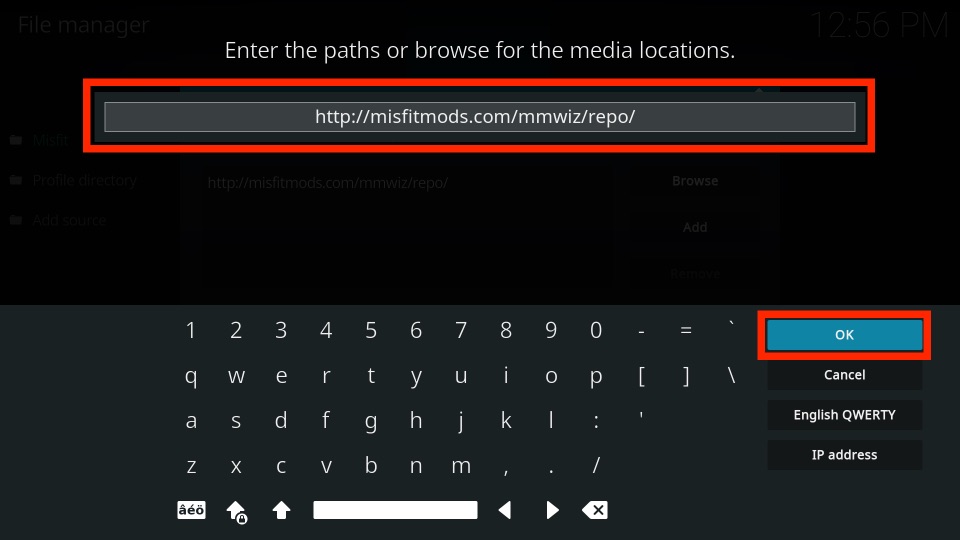
5) A pop-up window appears with the on-screen keyboard. Enter the URL as given below.
- http://misfitmods.com/mmwiz/repo/
6) Click OK once after entering the URL without any errors.
7) Now, click on the Enter a name for this media source field.
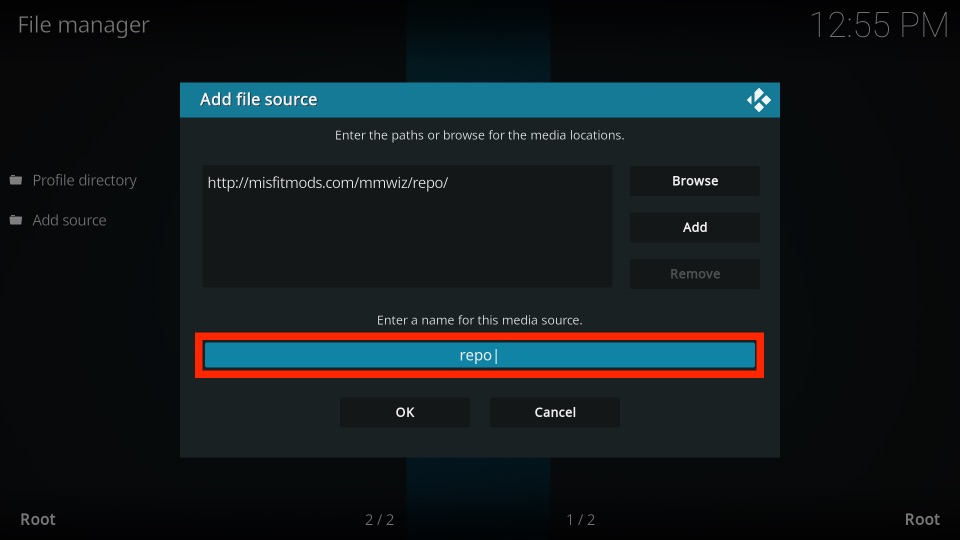
8) Enter the name as Misfit using the on-screen keyboard and click OK to confirm.
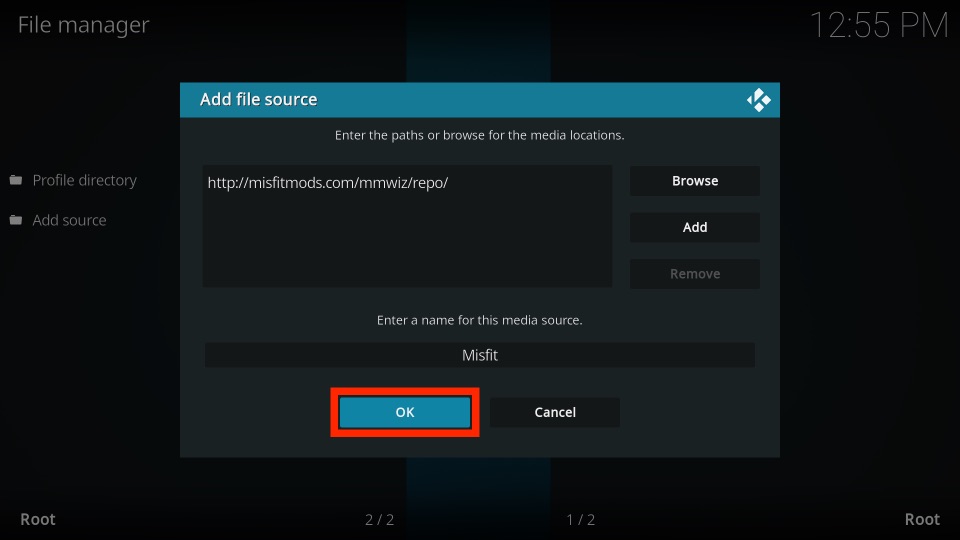
9) That’s it! The Repository source file is created successfully.
Steps to Install the Misfit Mods Repository
These are the simple steps to install the Misfit Mods Repository on the Kodi app.
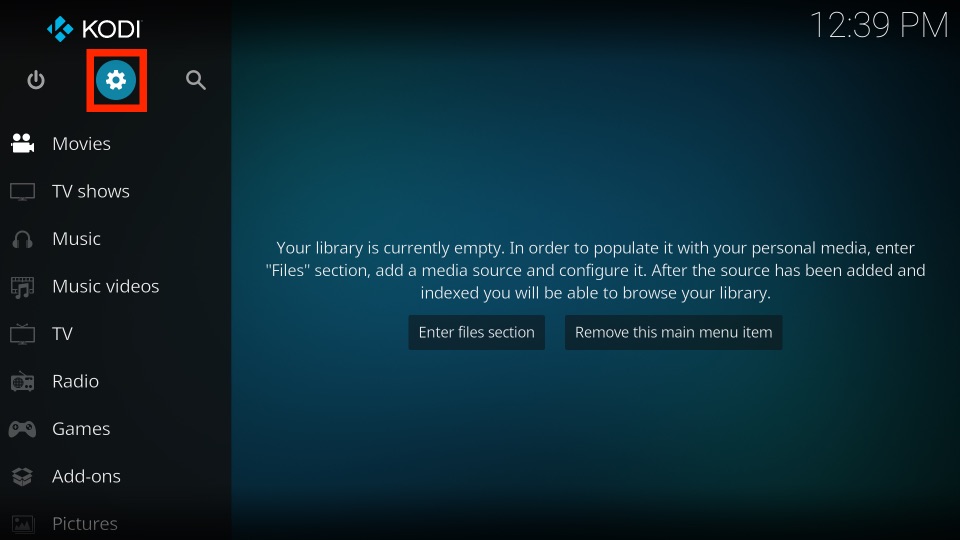
1) Again, go to the home screen of Kodi and tap the Settings gear icon.
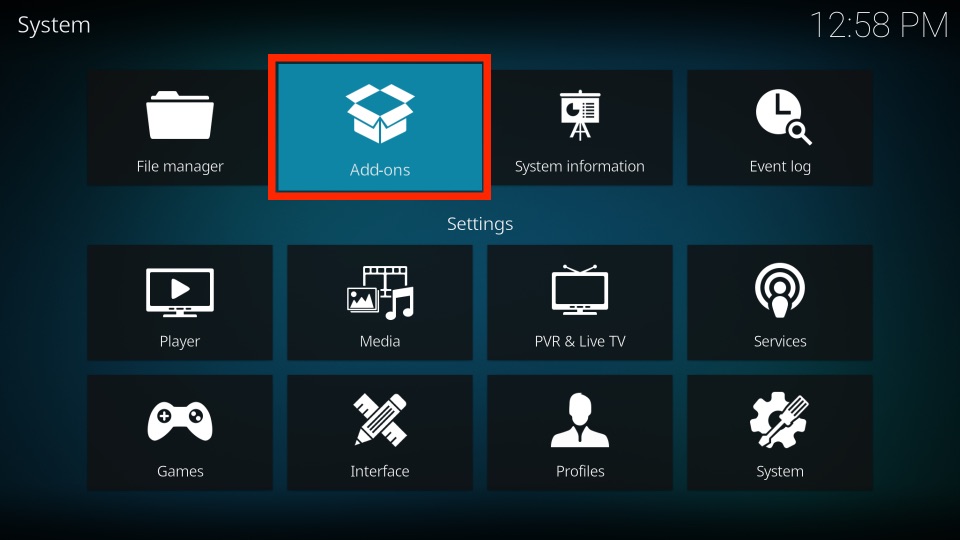
2) Next, click on Add-ons under the list.
3) After that, choose Install from zip file.
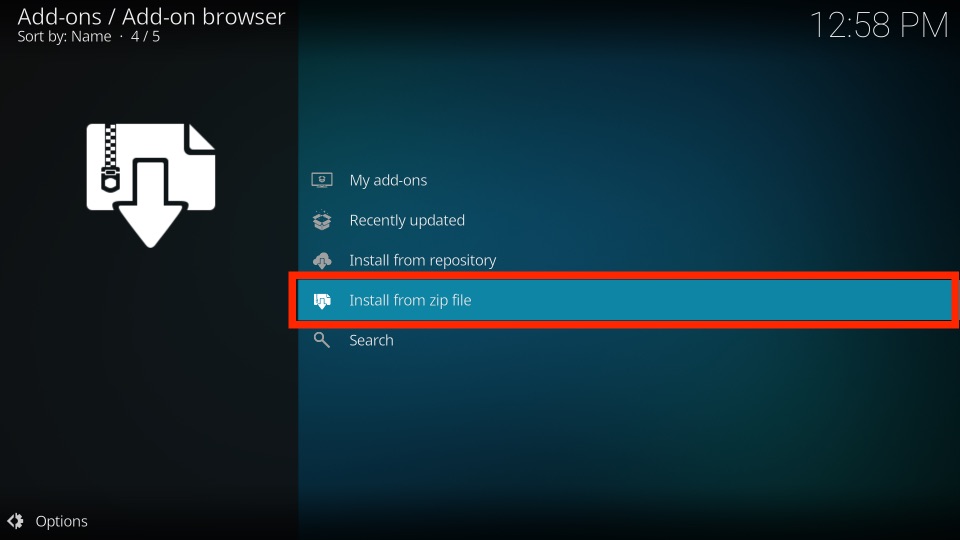
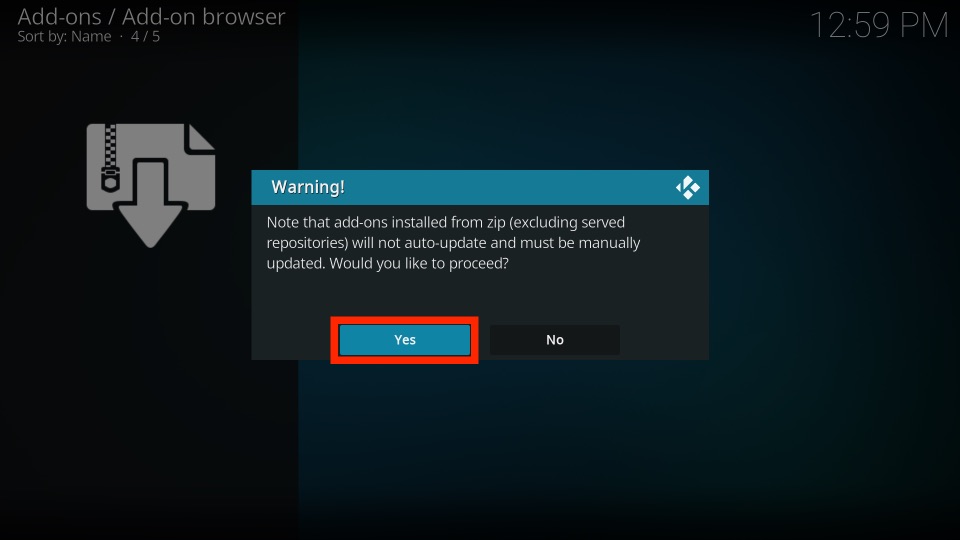
4) Tap Yes to proceed if it shows any pop-up warning.
5) Scroll down to select the repository source name that was created before. Here, we will click Misfit.
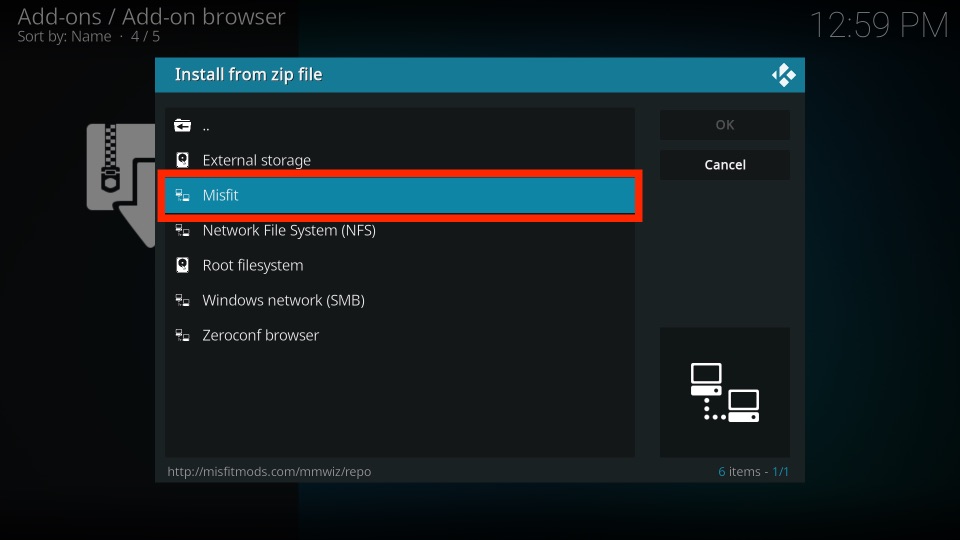
6) It will show you a bunch of folders and zip files.
7) Select the file repository.misfitmods.zip from the list.
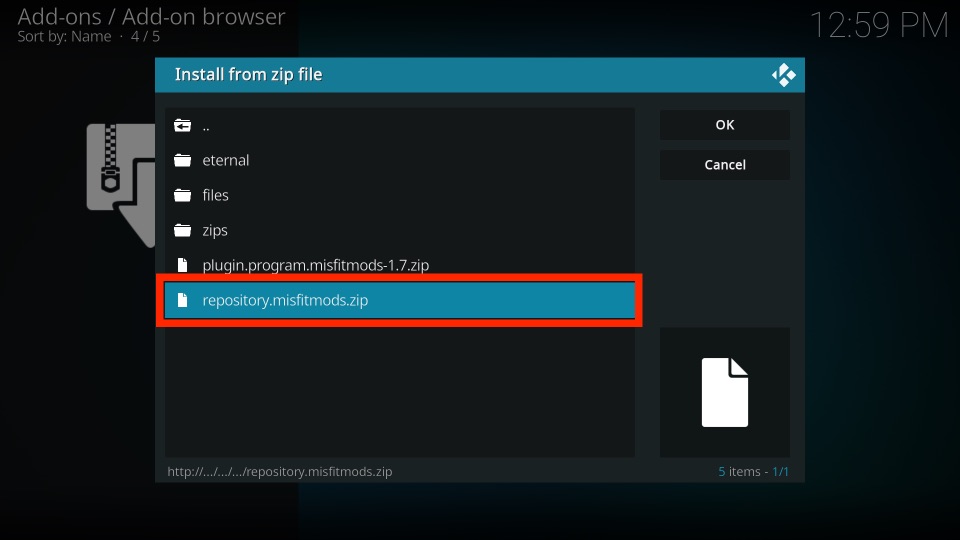
8) Misfit Mods repository will be installed within a few minutes.
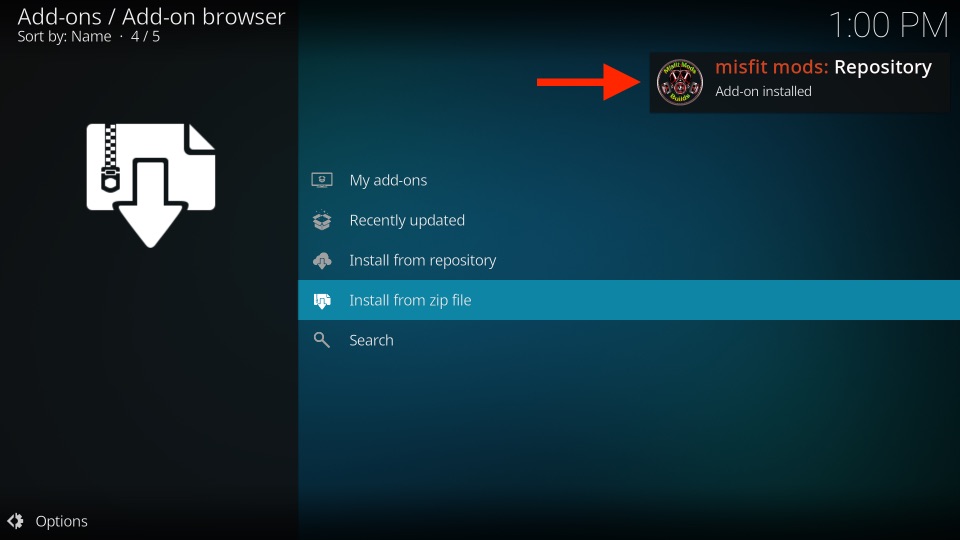
9) A notification will appear as misfit mods: Repository Add-on installed when the process gets complete.
Steps to Install the Misfit Mods Wizard
Here is a guide for installing the Misfit Mods Wizard on Kodi.
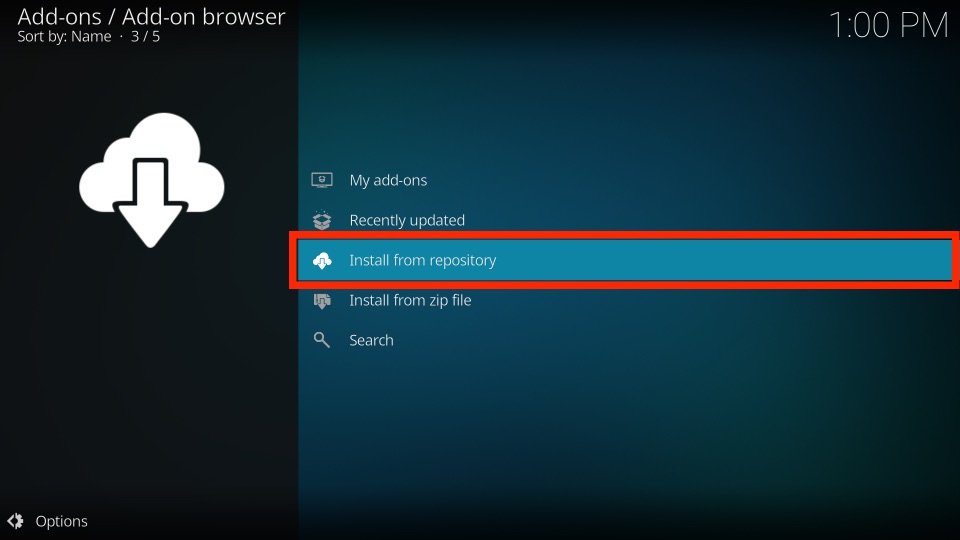
1) On the same screen, click the Install from repository option.
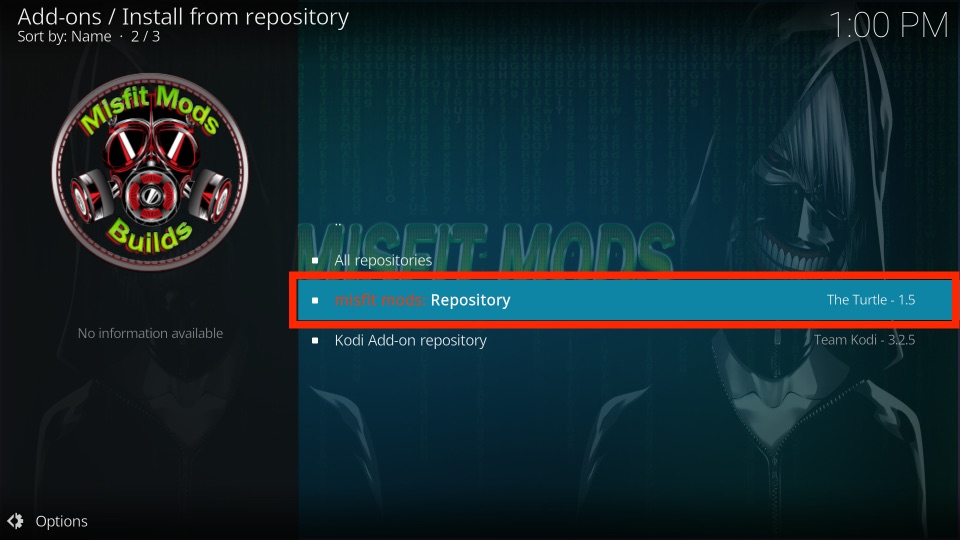
2) Next, click on misfit mods: Repository.
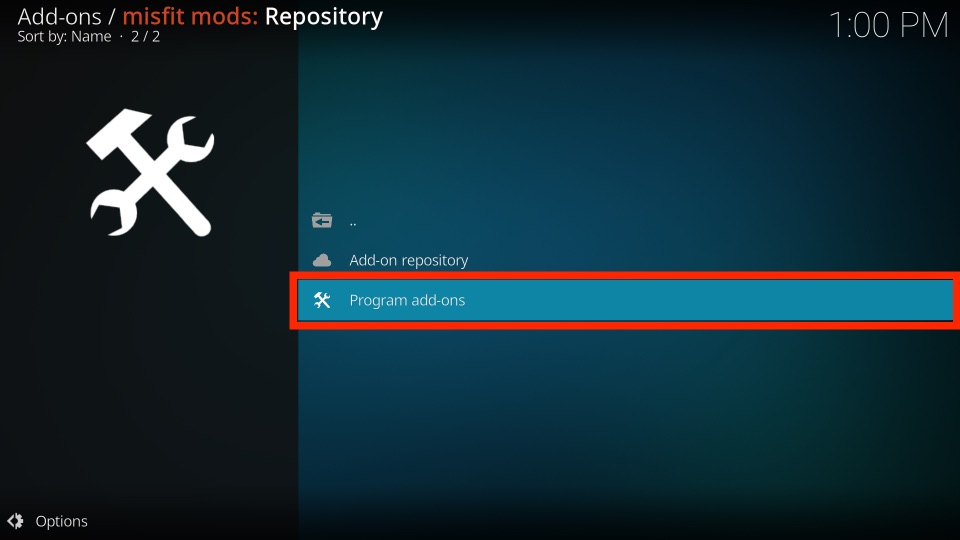
3) After that, select Program add-ons.
4) Following that, choose Misfit Mods Wizard or Misfit Mods Wizard 19.
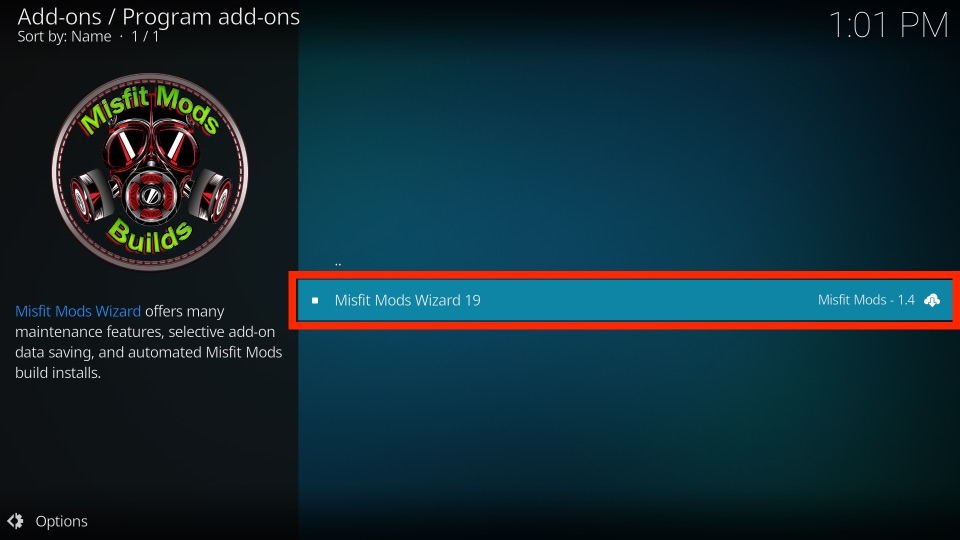
5) Later, tap the Install button at the bottom left.
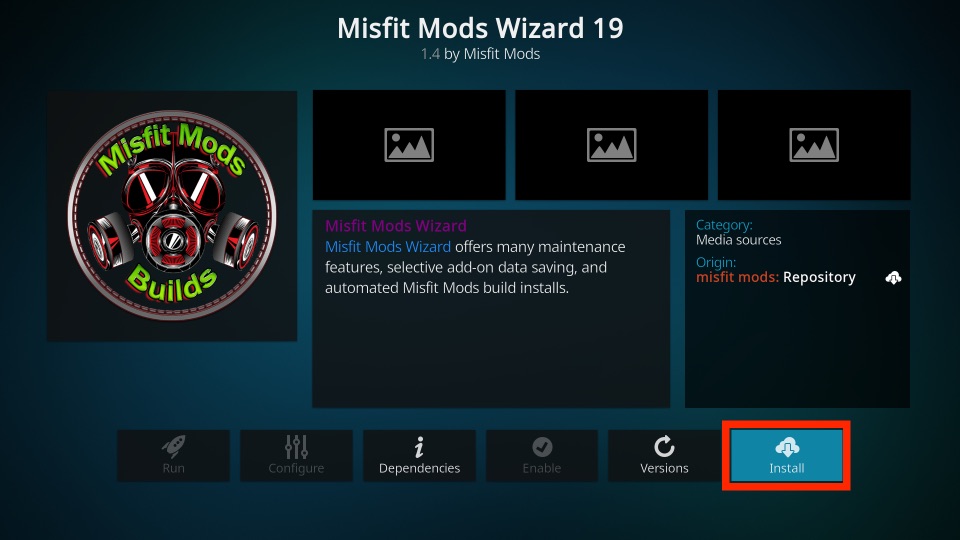
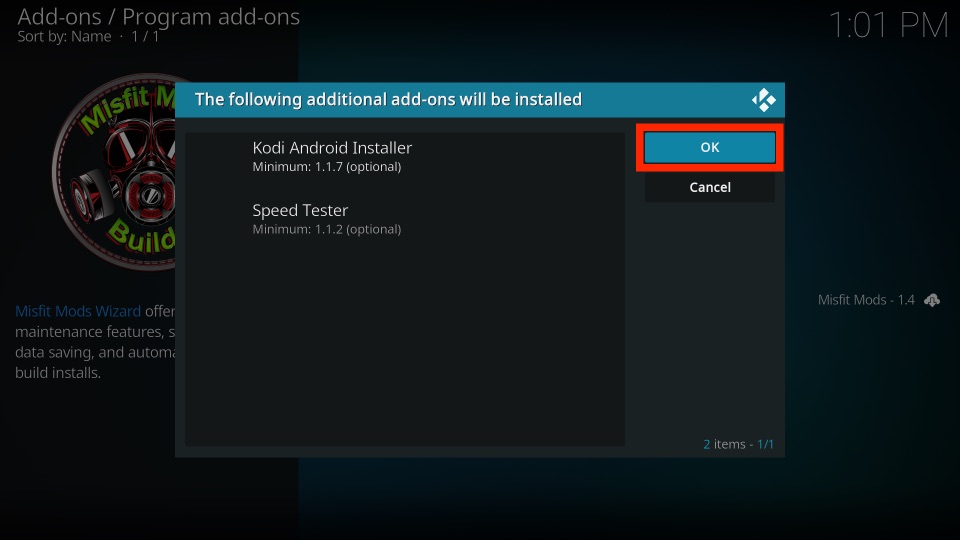
6) The following window shows the list of add-ons that need to be installed. Hit OK.
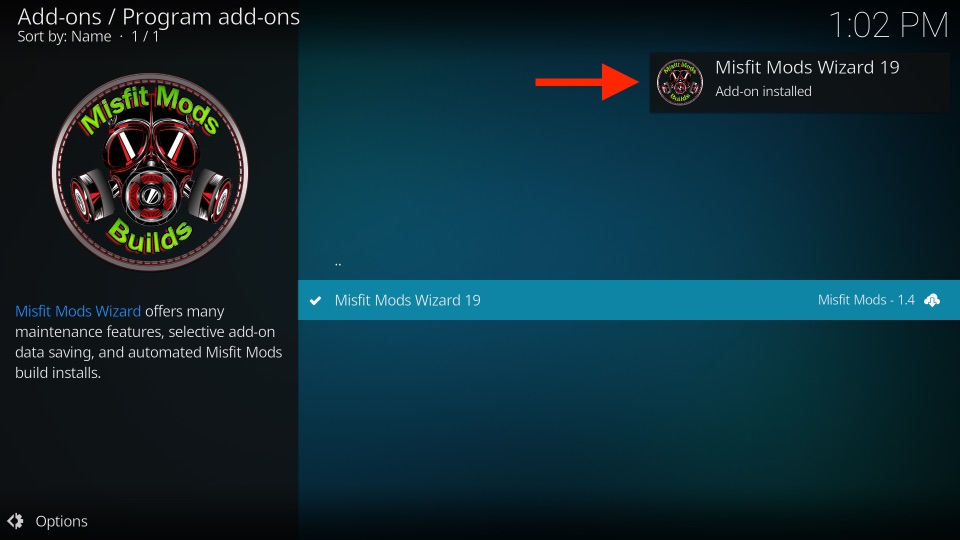
7) Once done, it will display a pop-up message as Add-on installed.
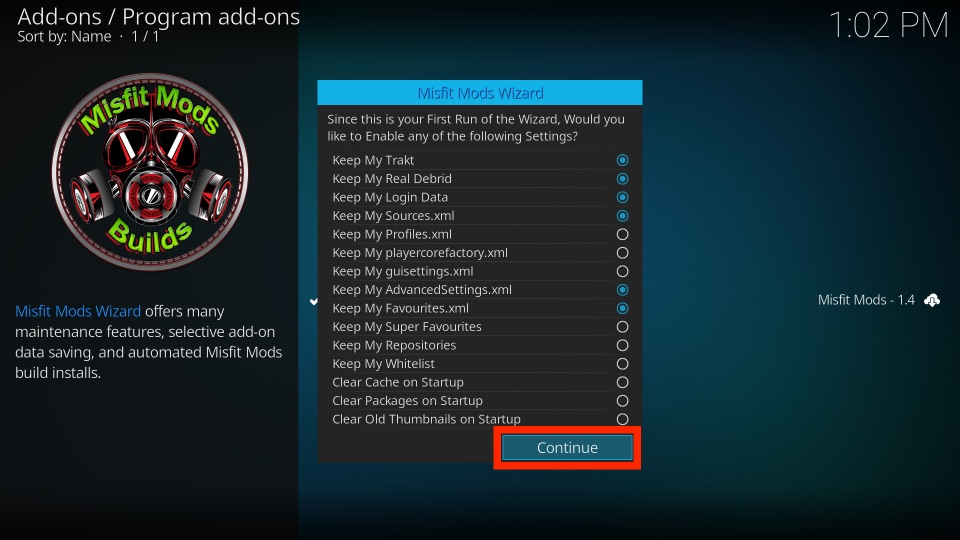
8) If necessary, you can enable some of the settings listed on the screen. In my case, I will click Continue without making any change.
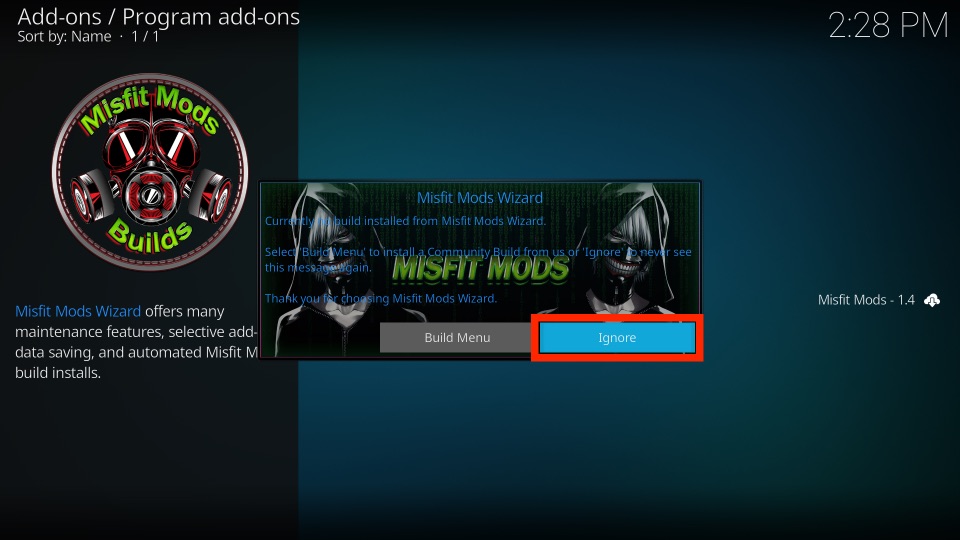
9) Finally, if you wish to visit the build menu instantly, choose the Build Menu button.
10) Click Ignore to learn how to add the build menu on the home screen.
Related: How to Install The Arc Kodi Builds on Matrix, Leia & Krypton
Steps to Install Hard Nox Build on Kodi
Read the instructions given below as it is the final step for installing Hard Nox Build on Kodi.
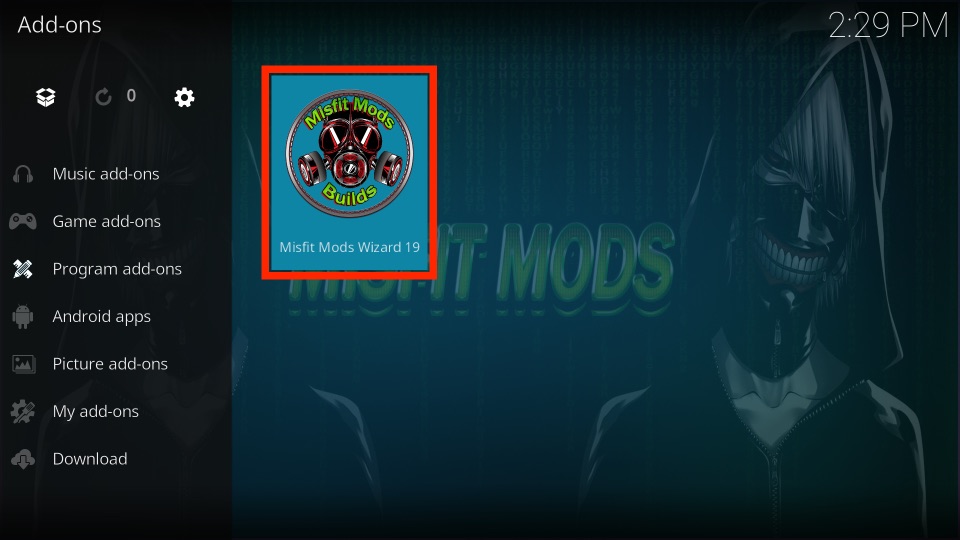
1) Go back to the Kodi home screen and click the Add-ons menu on the left pane.
2) Further, choose the Program Add-ons and click on the Misfit Mods Wizard icon to open it.
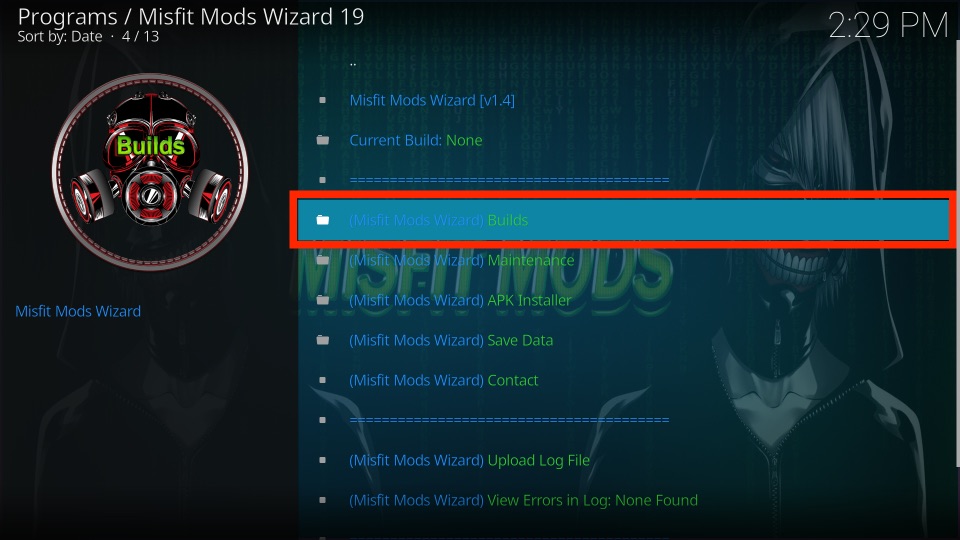
3) From the list, select the Builds folder.
4) Next, pick up either HardNox Ultra or HardNox Xtreme from the list.
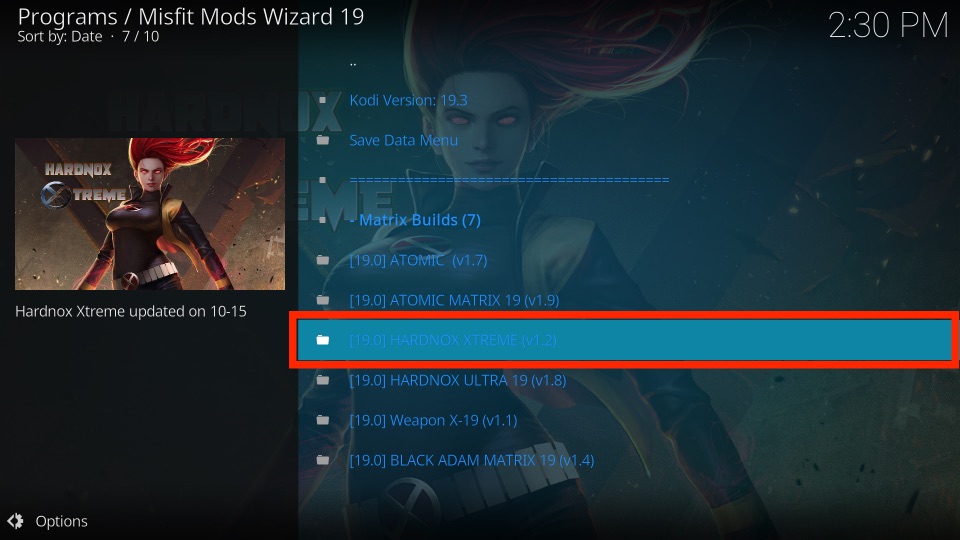
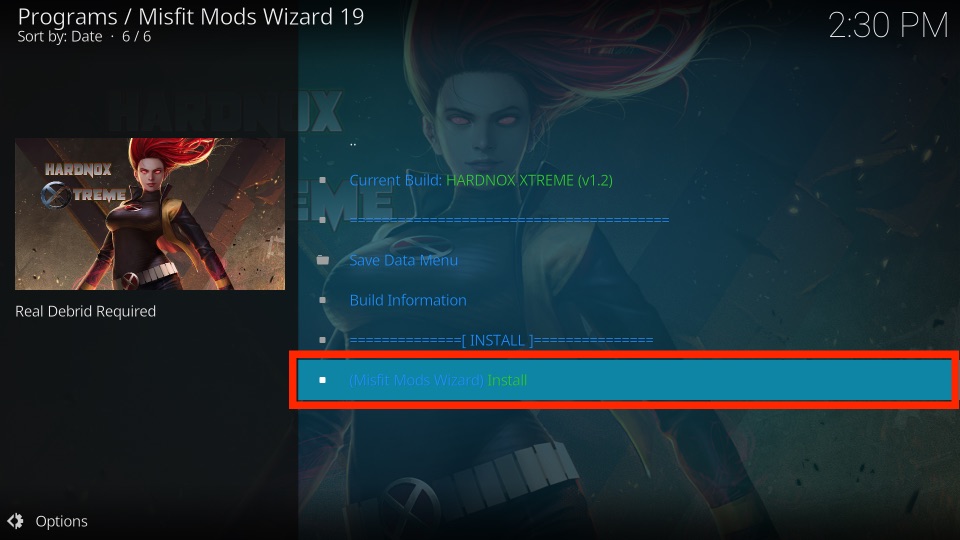
5) Scroll down and tap the Install option.
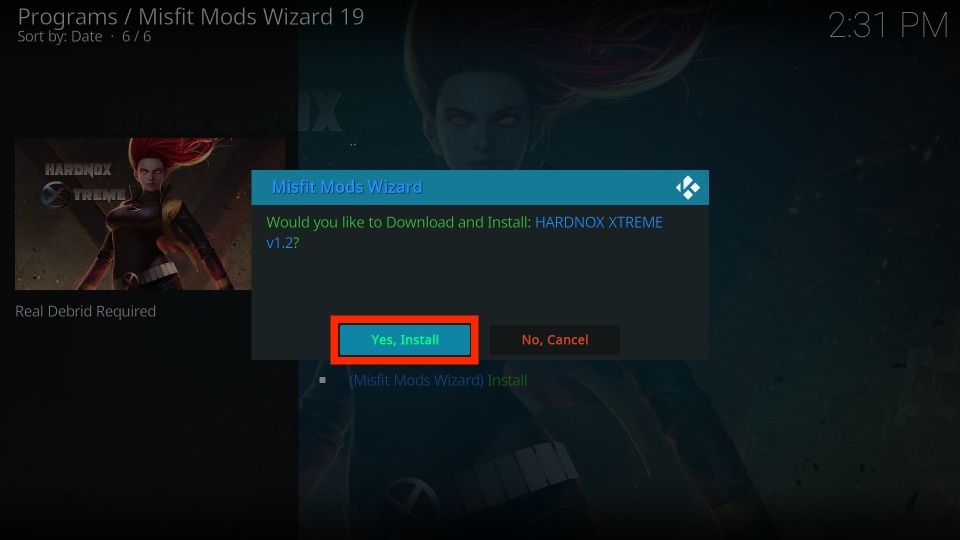
6) If prompted, click Yes, Install.
7) You can see the installation status on the progress bar.
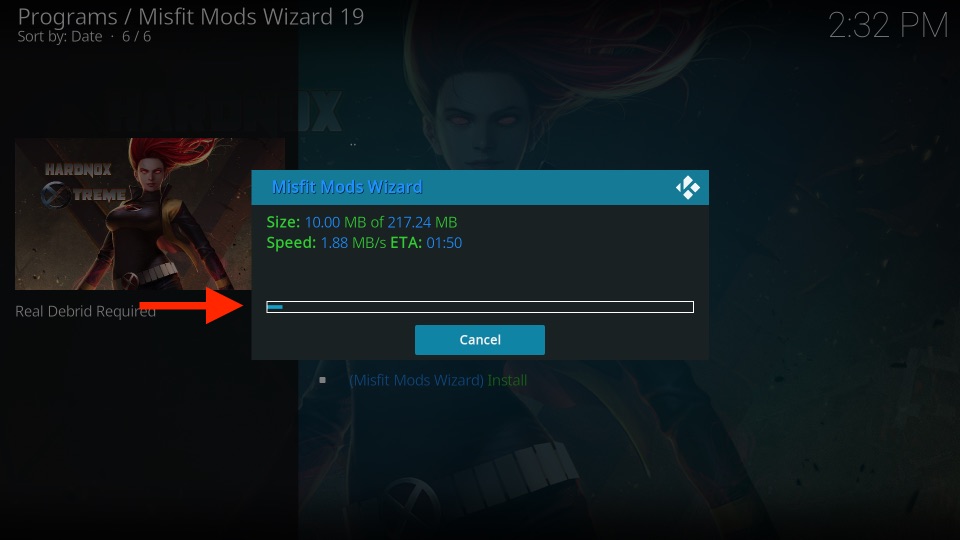
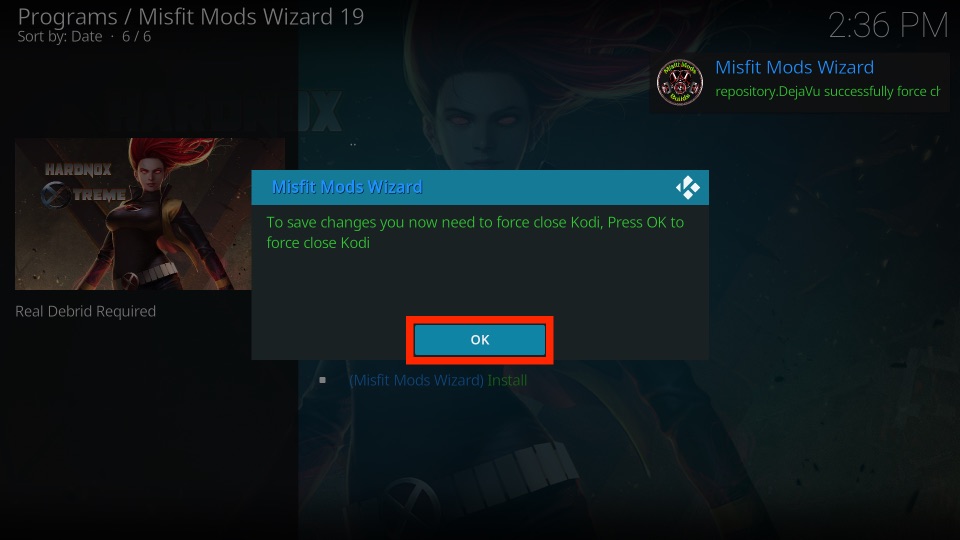
8) Once done, click OK. Hard Nox Build is installed on Kodi successfully.
Why Use VPN on Kodi?
Whenever you use the Kodi app, your online activity will be exposed to the Government and ISPs. Also, you should keep in mind that some addons available here are not approved to use. So you must protect your privacy by using a VPN that lets you stay anonymous and get rid of copyright infringement issues. VPN is also used for unblocking the geo-restrictions with a single tap. You can choose from the best VPN for Kodi for unlimited streaming while staying private.
Guide to Use Hard Nox Build on Kodi
1) Relaunch the Kodi app to see the changes.
2) The home screen of Kodi appears with Hard Nox Xtreme Kodi build.

3) Surprisingly, it comes with preinstalled addons and you can find it in the My Addons section.
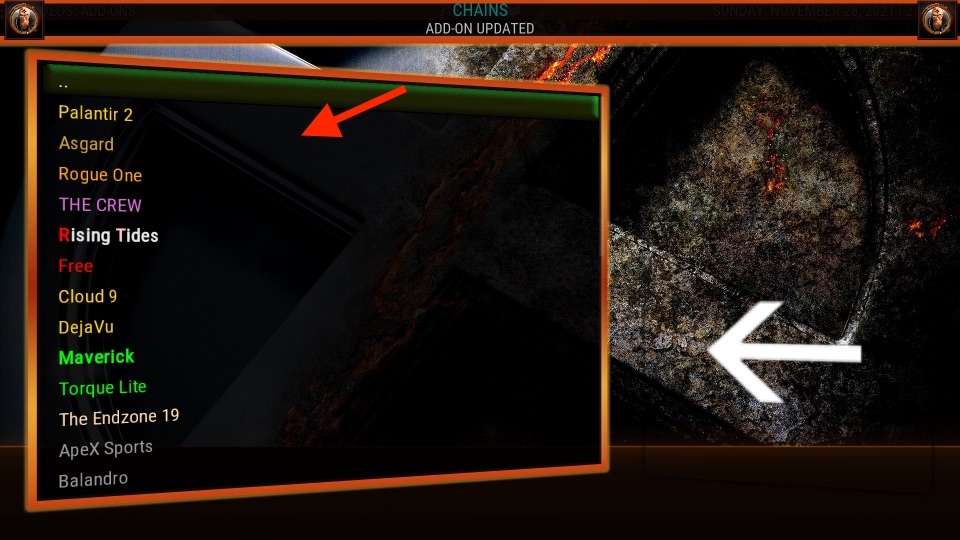
4) Furthermore, it also offers separate addons to watch movies, series, sports, news, live TV, etc.
Frequently Asked Questions
1) What are the sections available in Hard Nox Kodi Build?
It has identical sections like Real-Debrid, Fan Favs, Horror, Grit, Ladies Night, Fitness, Urban, Doc Spot, Amigos, etc.
2) Are Kodi Builds Legal?
They are legal to use but it is recommended to use them with a VPN for your security.
3) Is Hard Nox Kodi Build Safe?
Yes, it is completely safe. The files will be installed only on the Kodi repository source. Hence, it will cause no harm to your device.


