Kodi is an excellent streaming source with several hundreds of add-on support. It tops the list of media players as it is available on most OS and hardware platforms. A community of Kodi users maintains Kodi. It has hence paved the way for the availability of the giant catalog of third-party addons. Among the available add-ons, you will be dealing with Mercury Kodi Addon in detail. You can download and install it on Firestick, Android TV, Android phone, Windows PC, macOS, and other Kodi-compatible devices.
What is Mercury Addon?
Mercury is an unofficial Kodi addon to stream all your favorite content. It features on-demand content with an ever-expanding library. Mercury Addon is a source of high-quality media content, and you can stream them on up to 4K and UHD quality. There are many movies, series, shows, documentaries, etc., available with Mercury addon. Besides, it also has Jukebox, online radio, sports, web series, and more. It keeps its library up-to-date, and thus, you will get endless hours of streaming.
Installation Steps of Mercury Kodi Addon
If you are looking forward to using the Mercury addon on any Kodi compatible devices, you shall proceed with the steps below.
Configure Kodi
The preliminary requirement to install a third-party Kodi addon is to make few changes in its settings. It covers Mercury addon as well.
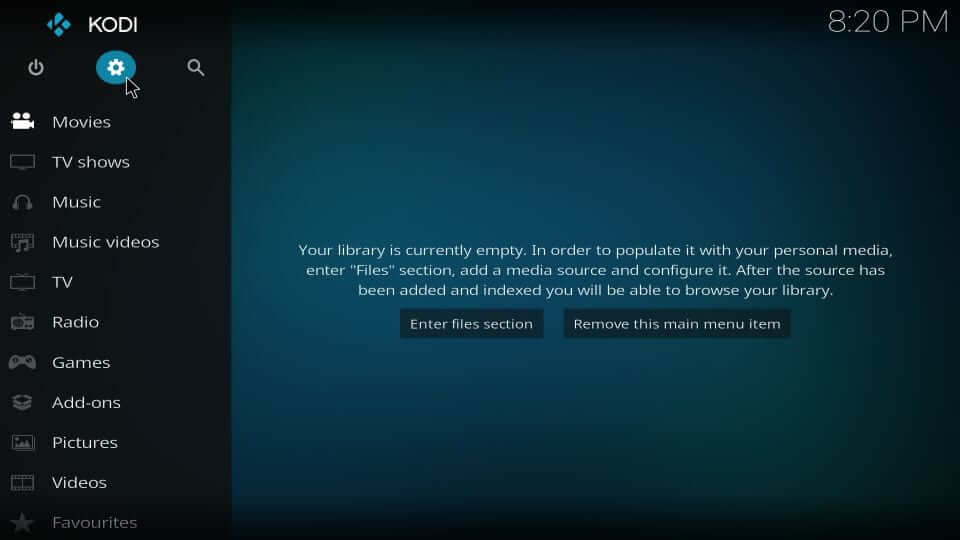
1. Launch the Kodi app on the device you own to select the Settings or Gear icon.
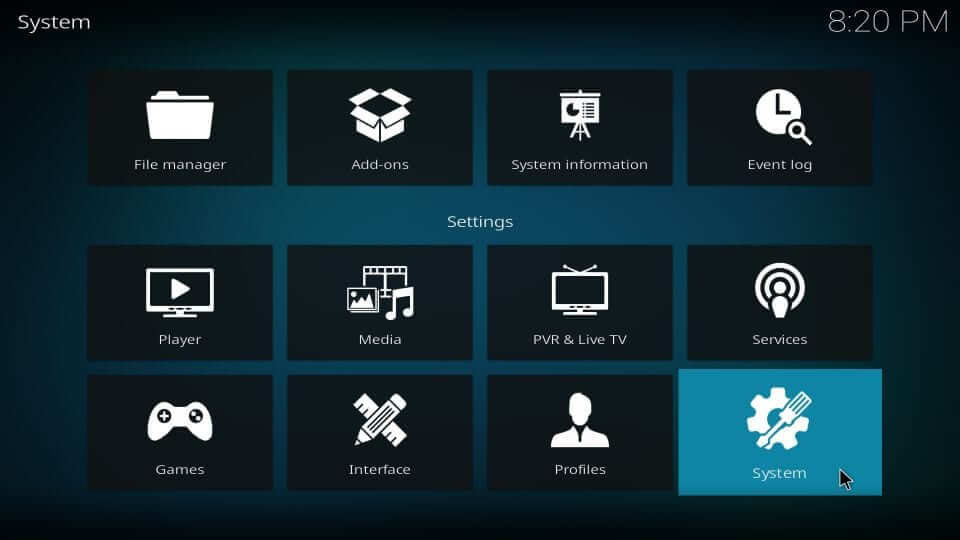
2. On the settings menu, select the System or System Settings tile.
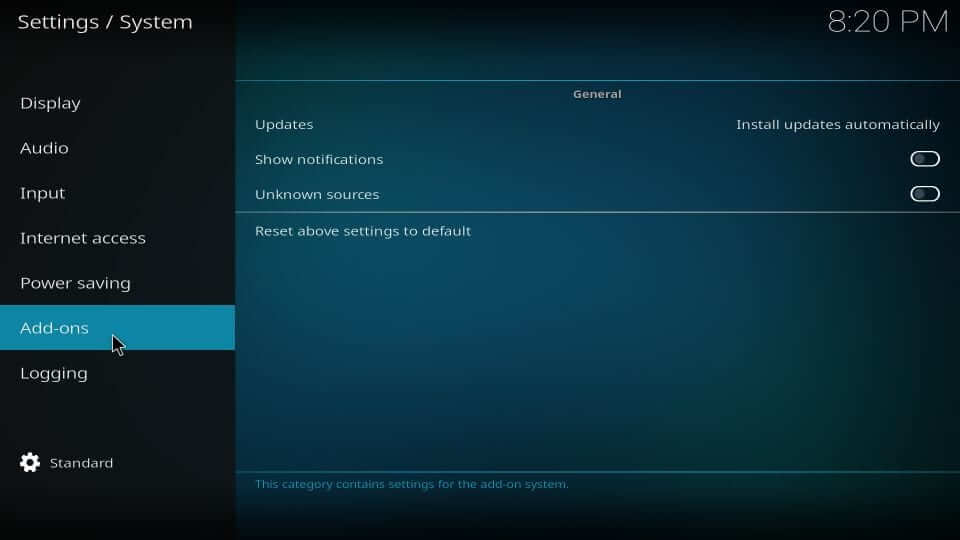
3. Go ahead and choose the Add-ons on the left panel of the screen.
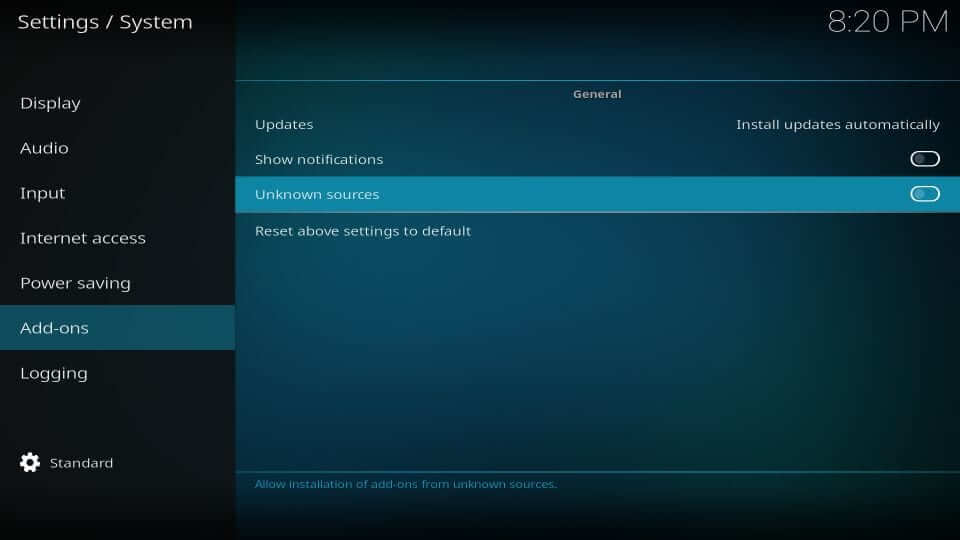
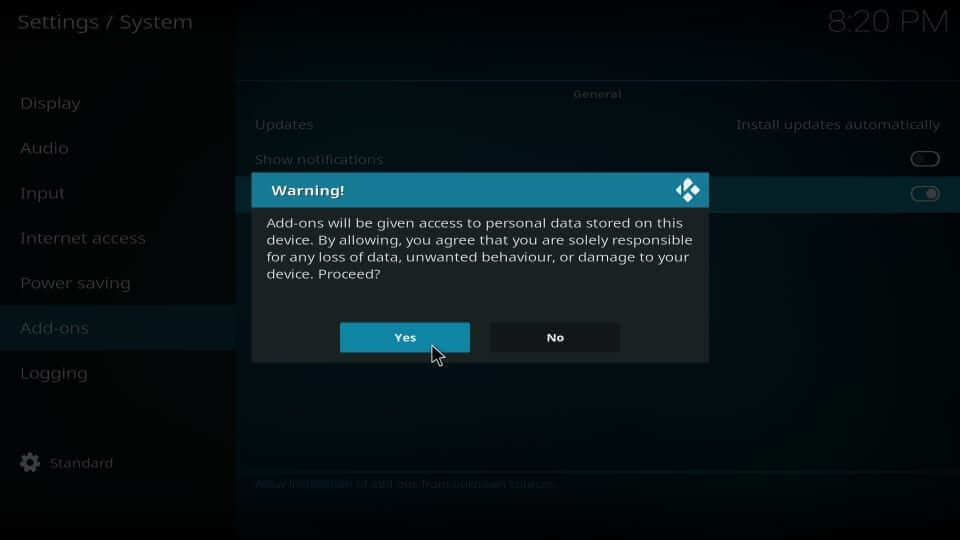
4. Click on the slider available next to the Unknown Sources on the right pane, and toggle it to turn On.
5. When you get a warning pop-up, select Yes as Mercury addon is safe to use.
Related: Learn to Update Kodi on any device
Steps to Add DejaVu Repo Source on Kodi
With the above changes, you shall proceed with adding the source URL of Mercury.
1. From the home screen of Kodi, select the Settings option.
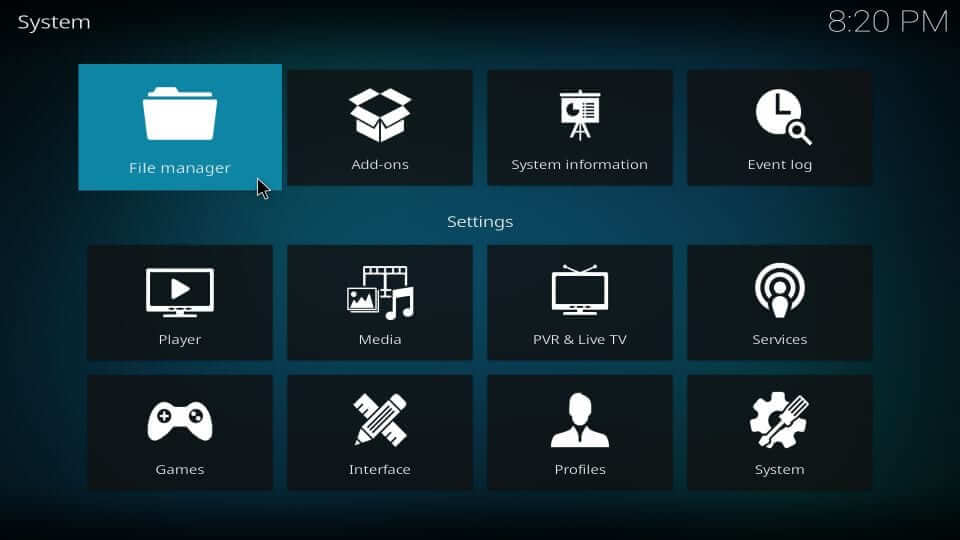
2. Choose the File Manager tile on the screen that appears.
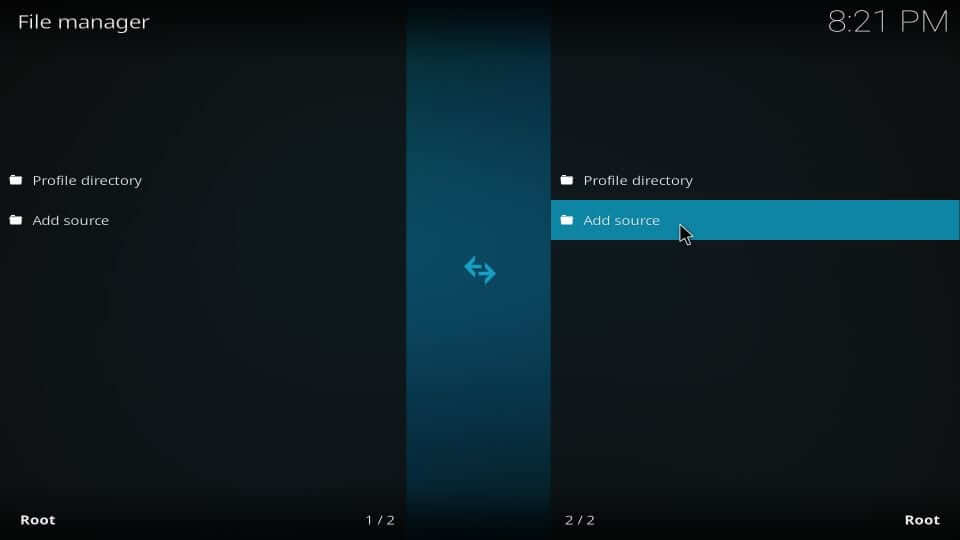
3. Click on the Add source option from either of the sides.
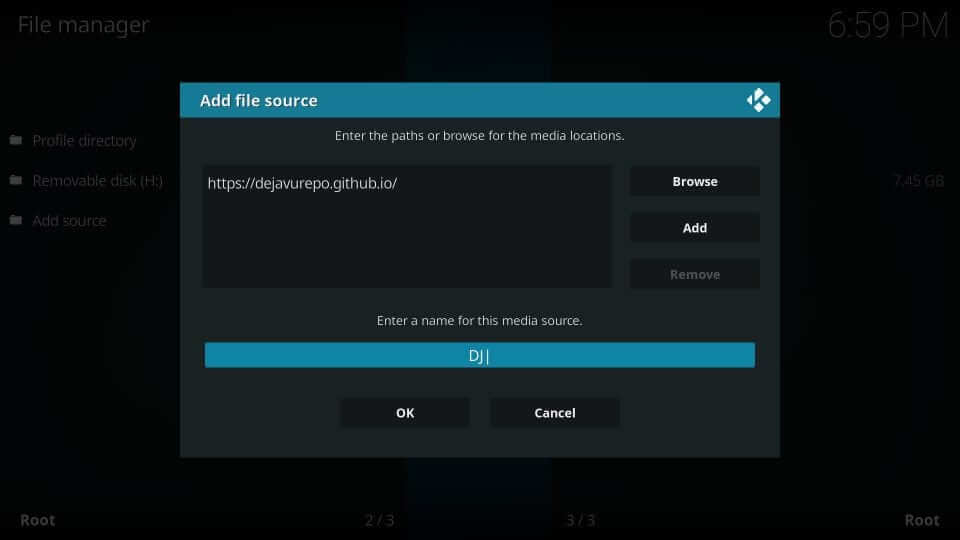
4. On the Add file source window, select the <None> option.

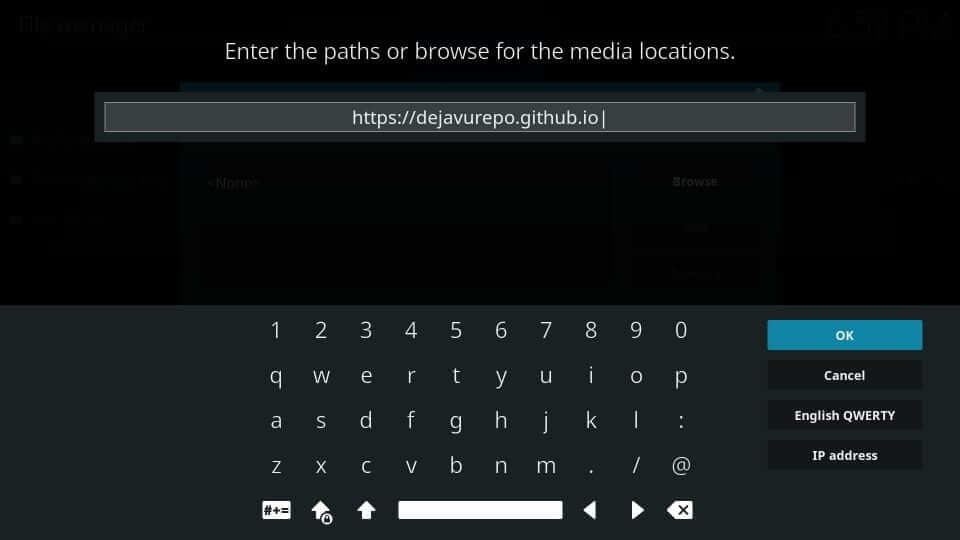
5. Make sure to type the source URL of Mercury addons given below and click OK.
DejaVu Repo Source: https://dejavurepo.github.io
6. Click on the media source name field to input as DJ and press, OK.
Steps to Install DejaVu Repo and Mercury Addon on Kodi Leia or Krypton
Here in this section, you will first install the Mercury addon’s repository, and later with the addon itself.
1. Get back to the Kodi 18 Leia or Krypton home screen and highlight the Settings icon.
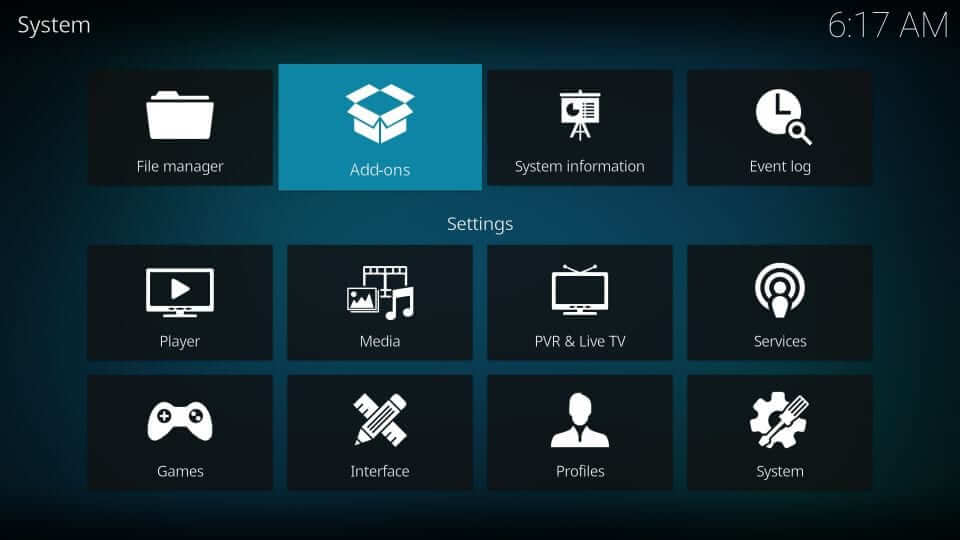
2. Choose the Add-ons tile on the next window.
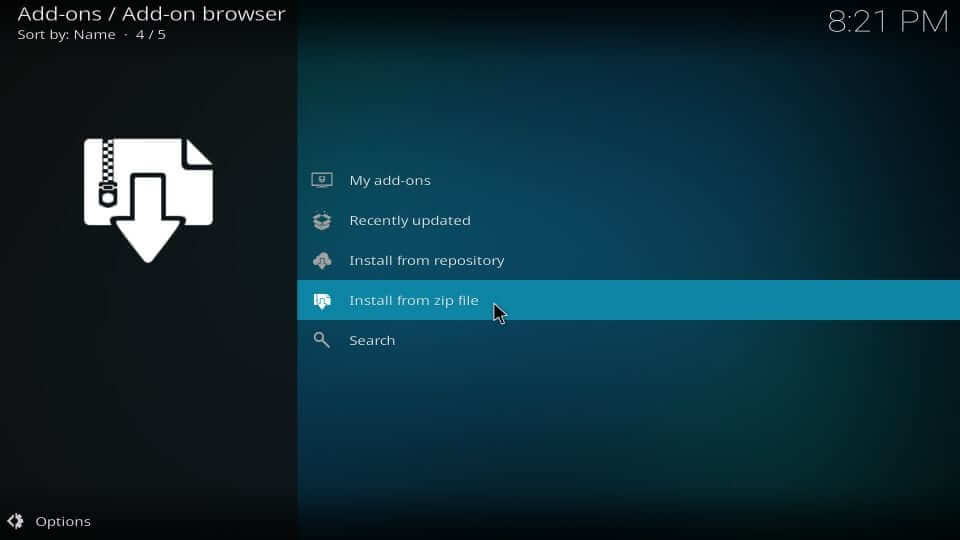
3. Select the Install from Zip file option to proceed.
4. Look for the source name you have provided and click on it. i.e., DJ.
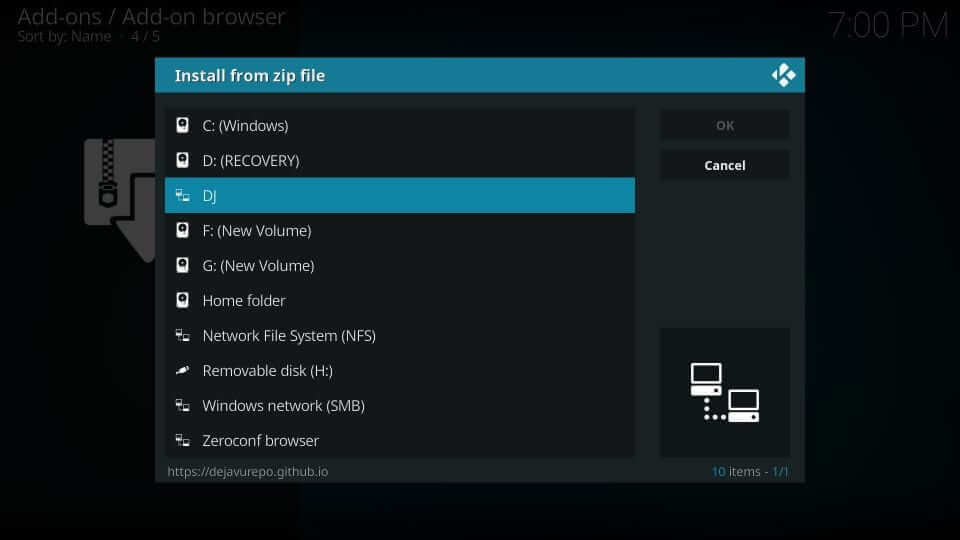
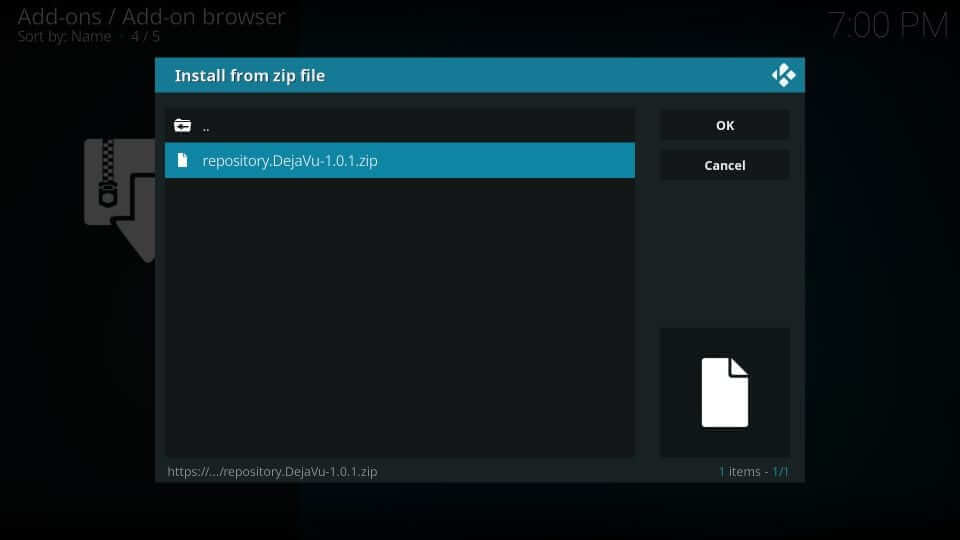
5. When you see the Install from the zip file window, select the zip file associated with the DejaVu repo. Press OK.
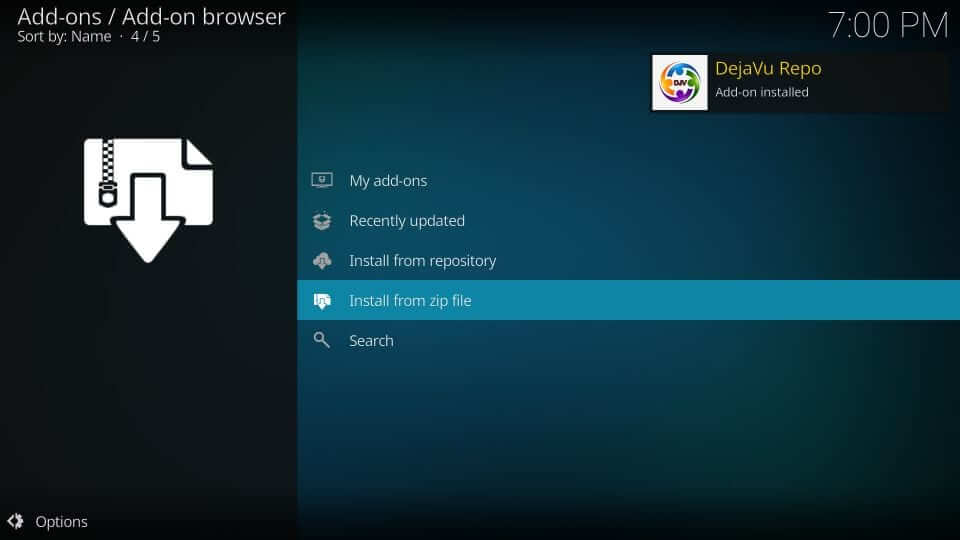
6. Wait for the repo to get installed. You will get the DejaVu Repo addon installed message on the top-right.
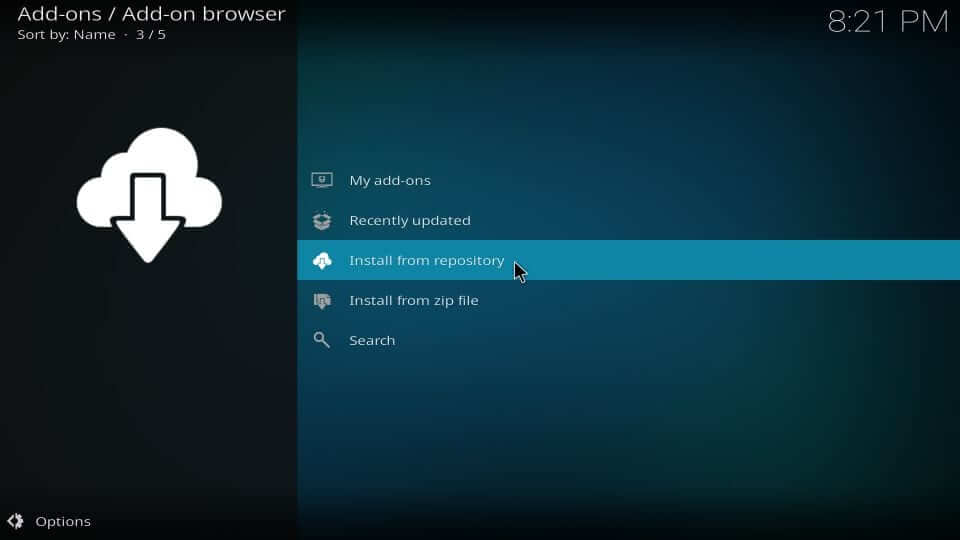
7. Now, scroll down to select the Install from Repository option.
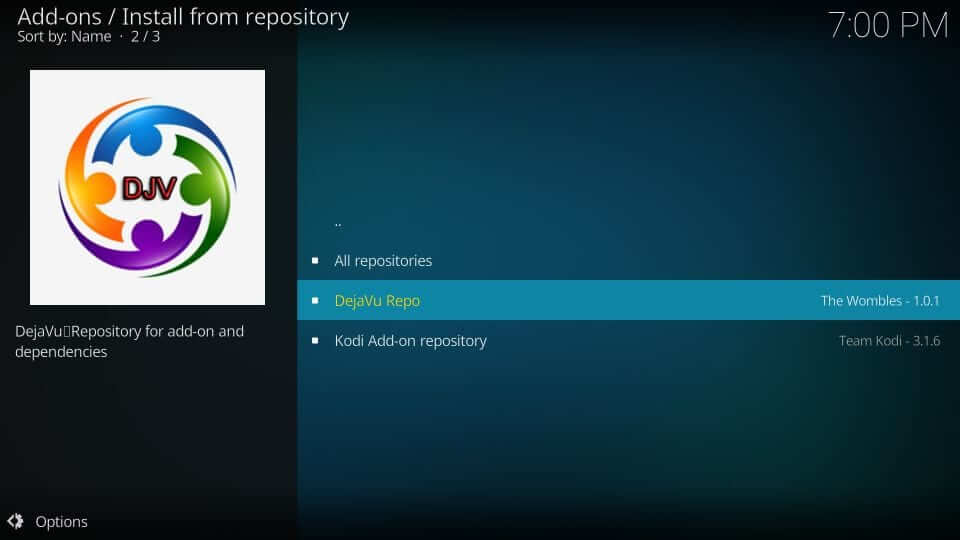
8. From the available repositories, click on the DejaVu Repo.
9. Navigate to click on the Video add-ons option.
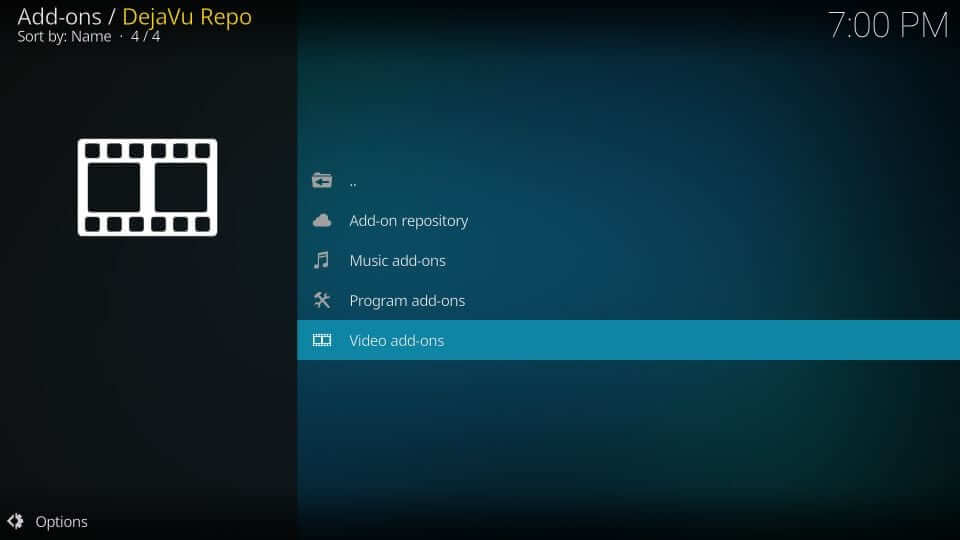
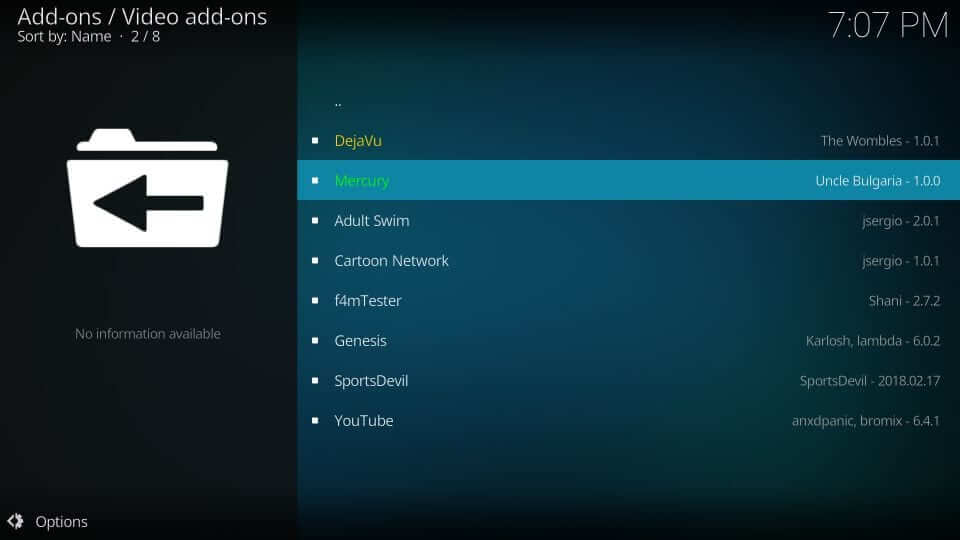
10. Among the available add-ons, you need to click on Mercury.
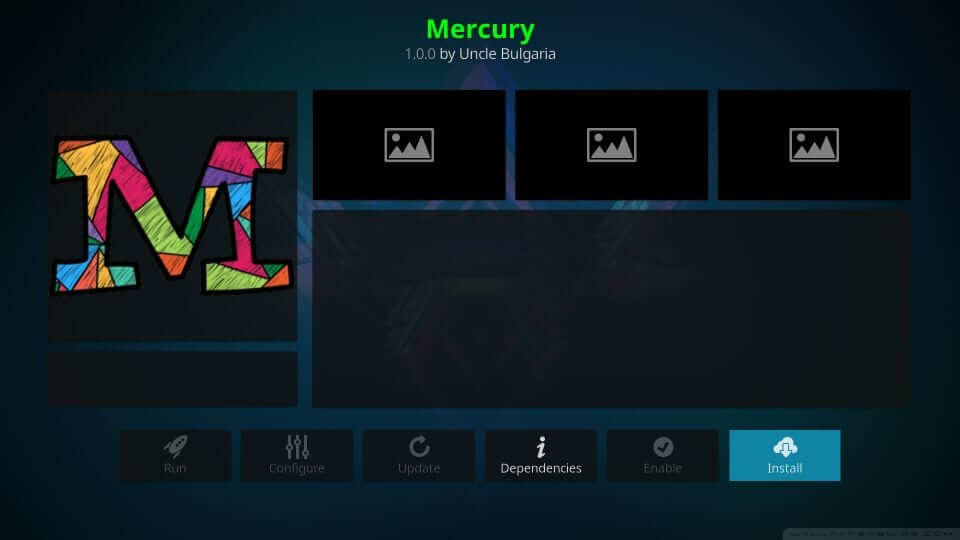
11. Click the Install button to start downloading Mercury addon.
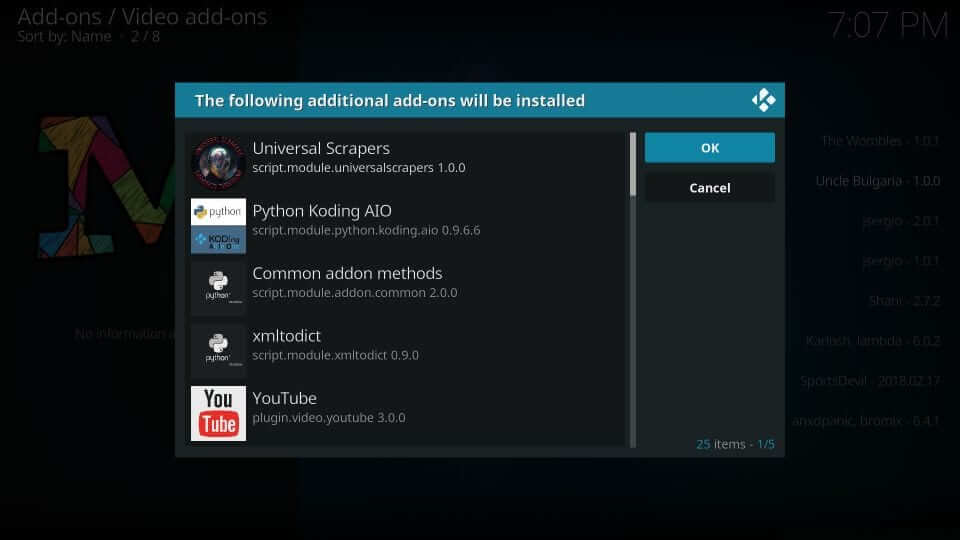
12. If a pop-up appears showing the list of additional addons that will be installed, select OK.
13. On the YouTube prompt box, select No or Yes, based on your preference.

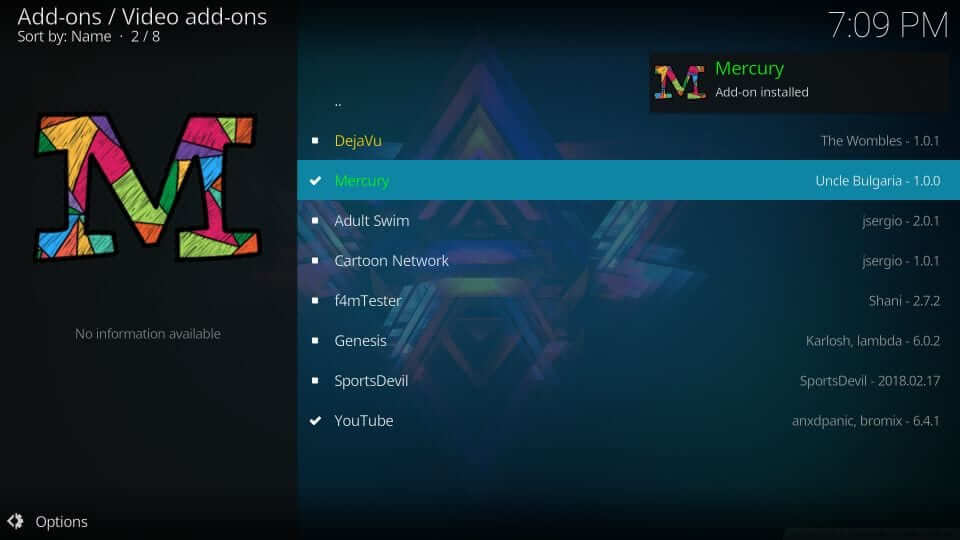
14. Once if you get Mercury Add-on installed message, you shall start using it on Kodi.
Why Use a VPN with Kodi?
Everyone is aware that Kodi is a third-party streaming service. It integrates with numerous third-party add-ons and plugins. As a result, any of its users will come across streaming legal content. Since it attracts legal issues, you are recommended to use a VPN with the Kodi app. It will keep your identity hidden, and no one can track what you stream. Furthermore, a VPN will help you unblock location-specific contents, ISP throttling, and online surveillance.
Guidelines to Use Mercury Kodi Addon
After installing the Mercury Kodi addon, you shall proceed with using its features on the Kodi device. The steps are as follows.
1. From the Kodi app’s home screen, you shall click Add-ons from the left panel.
2. Select Video add-ons and click on the Mercury add-on tile from the right panel.
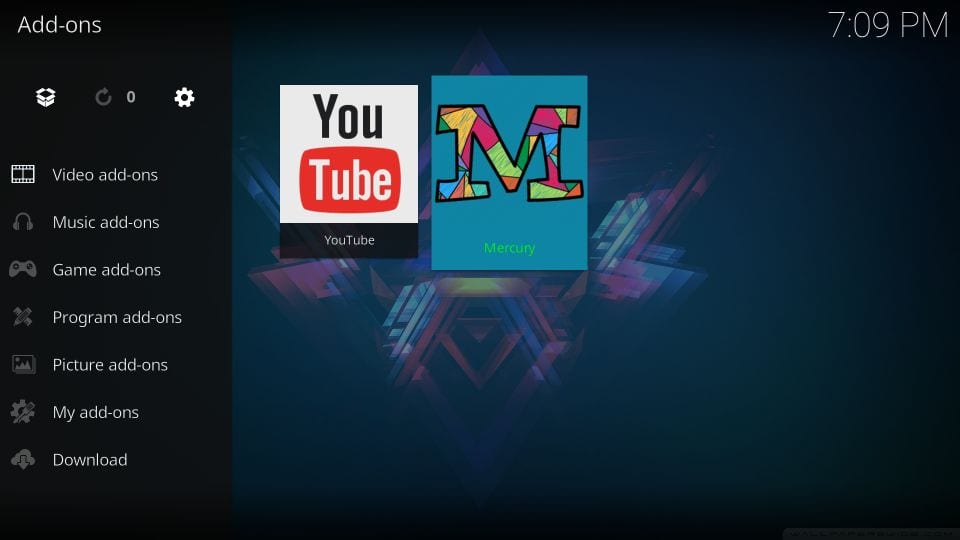
3. When it opens up, you will find the following options on its main window.
- Latest TV Shows Most Popular
- Latest TV Sows People Watching
- Kids Movie Boxsets
- Movie Genres
- Trakt Lists
- Live In Concert
- Online Radio
- Mercury Tool Box and more
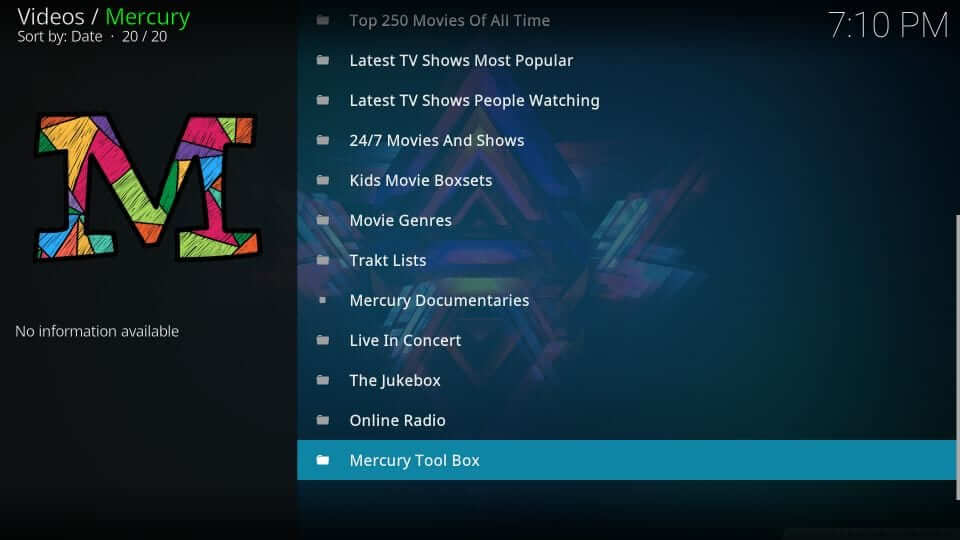
4. To access its settings, select Mercury Tool Box, and the following options are available
- Real Debrid Re-Authorise
- All Debrid Re-Authorise
- Openload Pair Online Here
- Clear the Cache
- General Settings
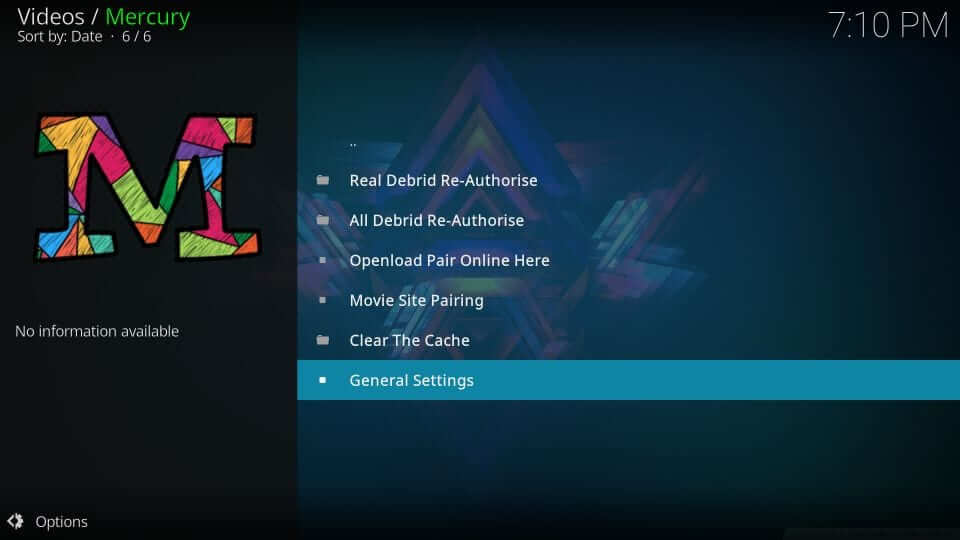
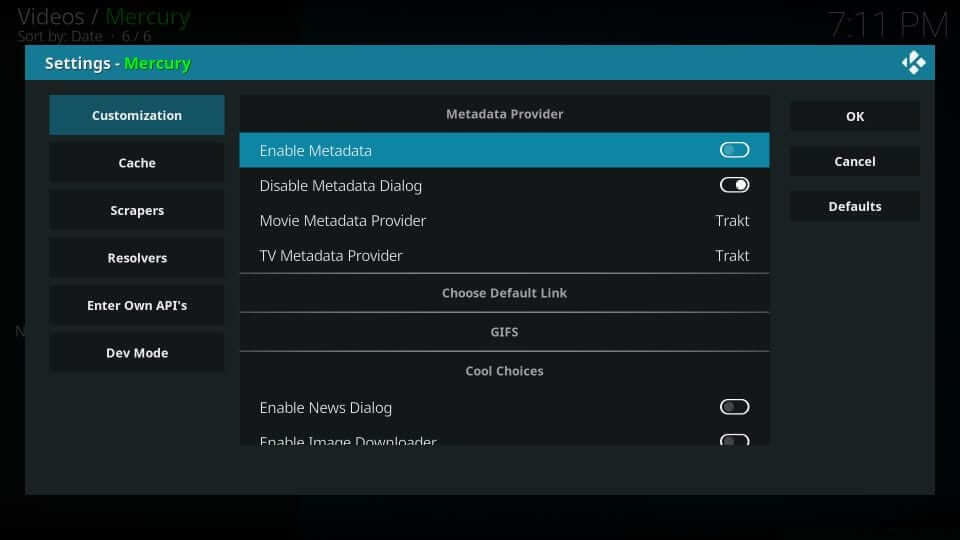
5. Select General Settings to click on the Customization tab on the left.
6. To turn off metadata, click the slider next to the Enable Metadata and press OK.
Related: Check out our Best Kodi Builds
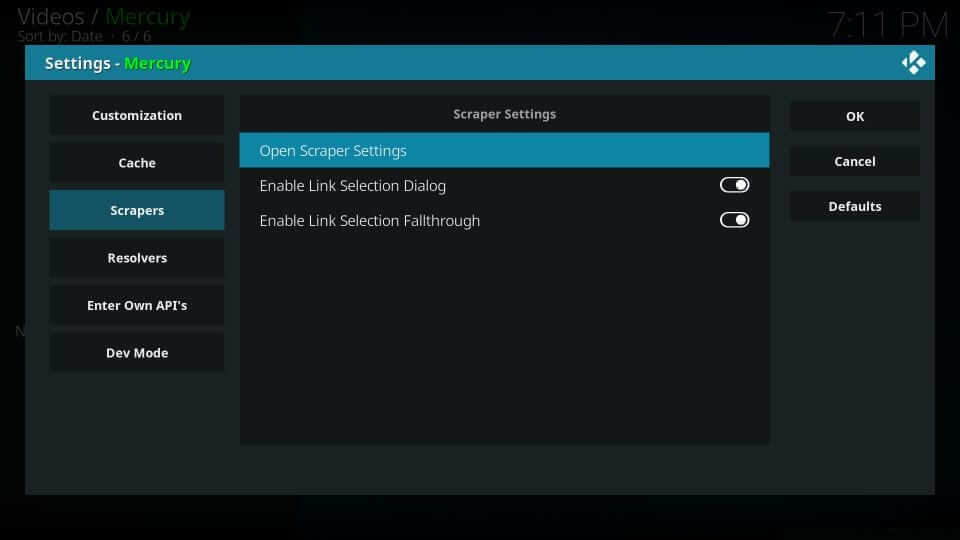
7. Select Scrapers on the left pane to click on Open Scraper Settings on the right pane.
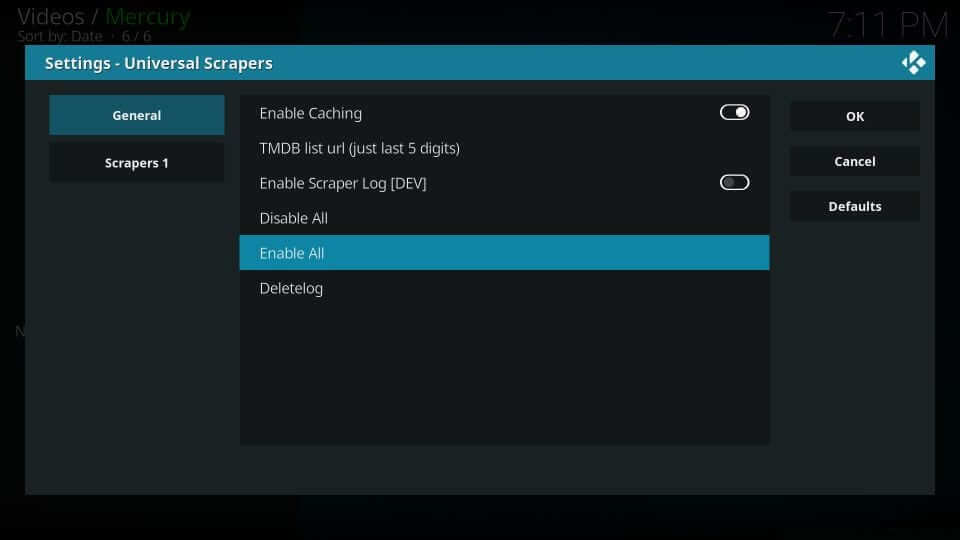
8. Choose the General tab to select Enable All to get more streams for the video you request.
Frequently Asked Questions
Is Mercury addon Real Debrid compatible?
Yes. You can integrate the Real Debrid account with Mercury addon to stream high-quality content.
Is Mercury addon legal and safe?
Yes. It is a safe-to-use third-party Kodi addon. However, users are recommended to use a VPN for absolute privacy.
What are the non-Debrid contents Mercury addon offers?
You can expect the non-Debrid contents, including WWE, boxing, UFC, AEW, and many documentaries.


