Maverick TV is one of the add-ons that Kodi supports. It offers excellent stuff with which you will never miss watching your favorite content. It provides a wide range of content like movies, live TV, sports, news, kids, etc. The library of this Kodi addon is extensive, and it gets updated with the latest content. With this addon, you need not rely on other addons as it gives unlimited entertainment. You can install the Maverick addon on all Kodi-supported devices like Firestick, Android TV Box, smartphones, etc.
Update: Maverick TV addon is no longer available as its repo is down. However, a few claim that it is still working. So, we aren’t sure if or not the addon is still working. But, even in the worst case, you shall expect new repo support. So stay tuned for it. You can check out the alternatives for Maverick Kodi Addon in the below section.
Why Use a VPN with Maverick Addon?
The purpose of a VPN is to safeguard your privacy from ISP and third-party sites. It will ensure you stay anonymous when accessing third-party add-ons, including Maverick TV. So you will never get into trouble in case of streaming copyright-protected content. Moreover, with a VPN, you can do unlimited streaming without buffering issues.
How to Install Maverick TV Kodi Addon
Installing Maverick TV isn’t straightforward, as it is a third-party Kodi addon. So, make sure you follow the steps given below in the correct order to experience its features.
Configure Kodi Settings
You need to change Kodi settings to install third-party addons like Maverick TV.
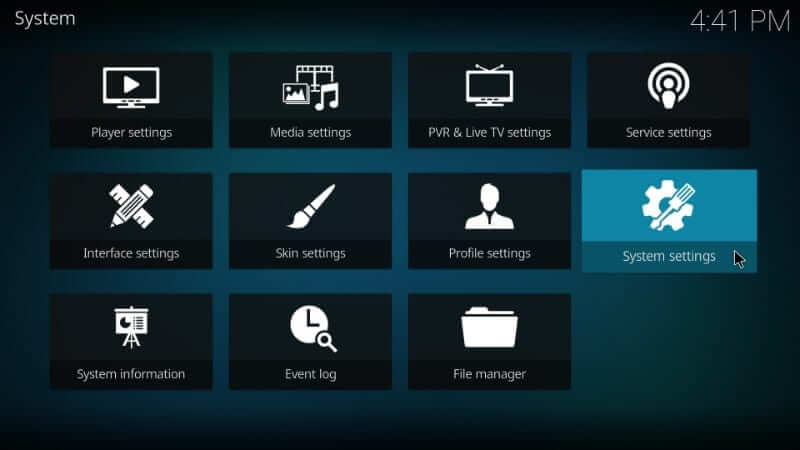
1. On the home screen of the Kodi app, select Settings, which looks like a gear icon.
2. In the System screen, go ahead to click on the System Settings option.
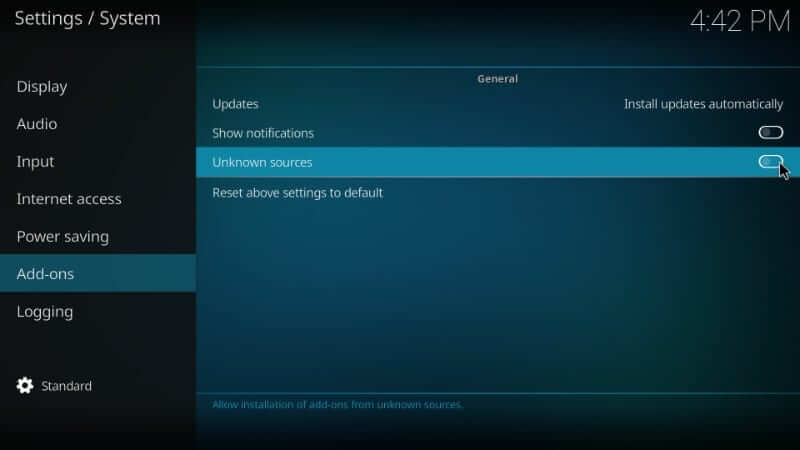
3. Further, select the Add-ons option on the left panel and turn on the Unknown Sources slider.
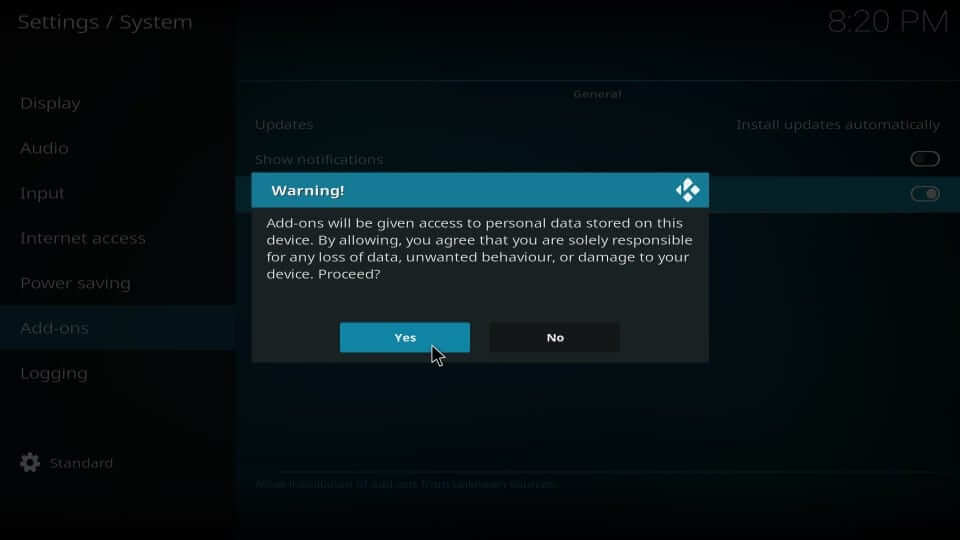
4. If you get a warning pop-up, select the Yes button to proceed to let the addon access your personal data.
Steps to Install Maverick Repository
The series of steps given below will help you with installing the Maverick repo on Kodi.
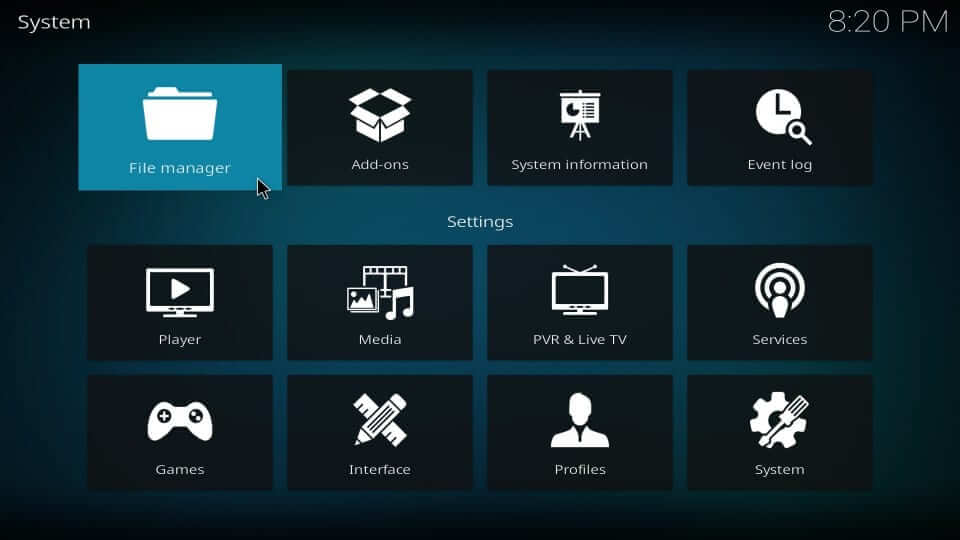
1. Get back to Kodi’s main screen by clicking on the Settings icon from the upper-left portion.
2. Make sure to select the File manager tile on the System window to open the options.
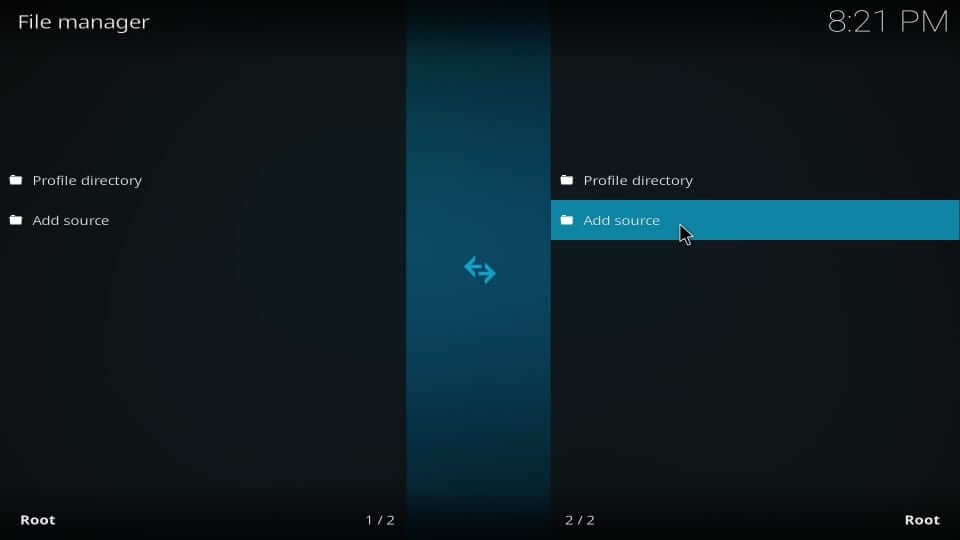
3. On the following screen, select Add source either from left or right.
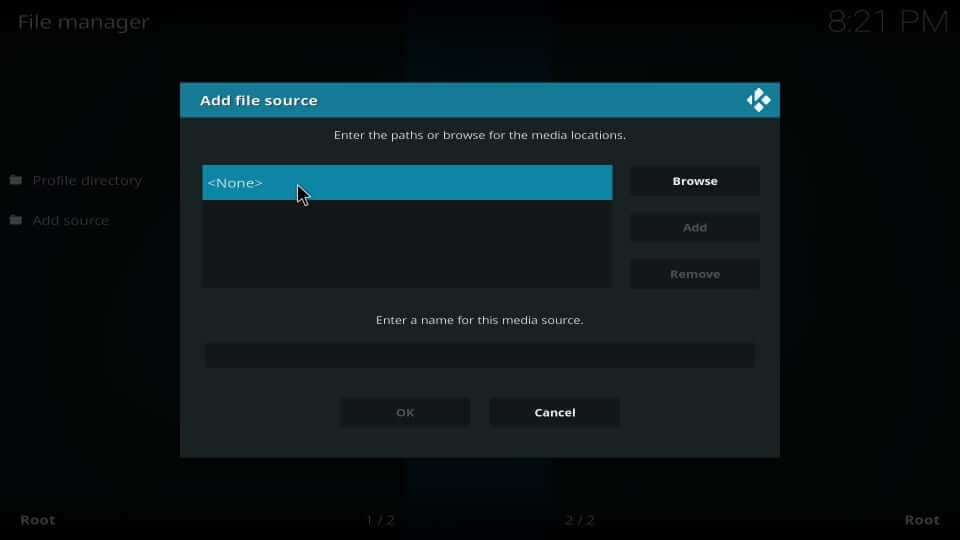
4. Wait for Add file source pop-up to appear. Click on the <None> option.
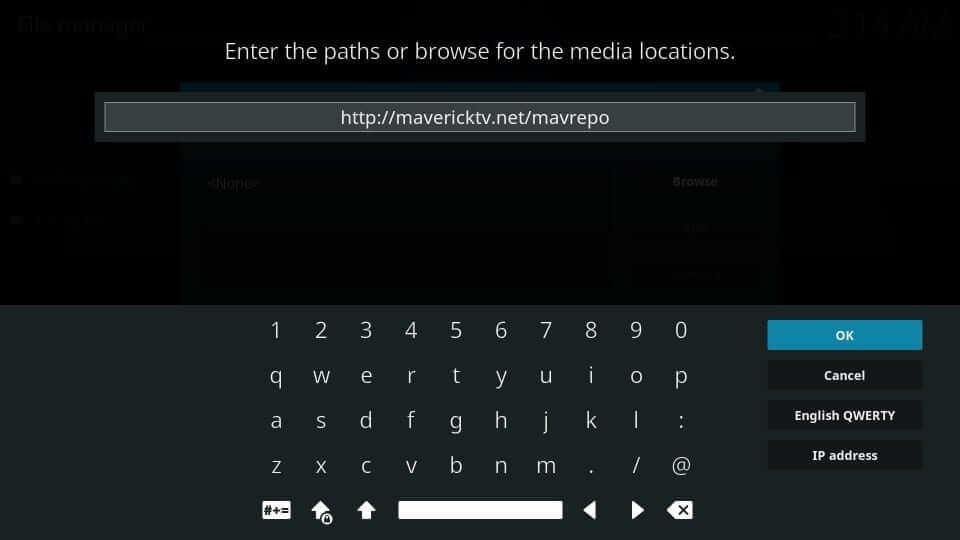
5. Input the URL of the Maverick repo using on-screen keys on the designated field and press OK.
Repo URL: https://maverick.net/mavrepo
6. When you are asked to enter the name of the media source, type mavrepo and press OK.
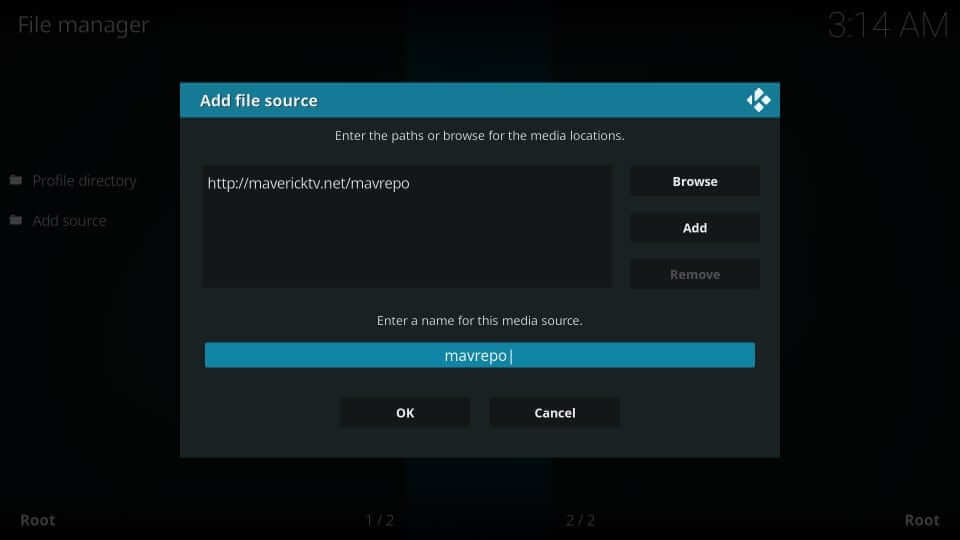
With this, the Maverick repo will be downloaded and installed on the Kodi screen.
Steps to Install Maverick TV Addon
Upon adding the source URL of the Maverick repo, you shall proceed with the steps below to install the addon.
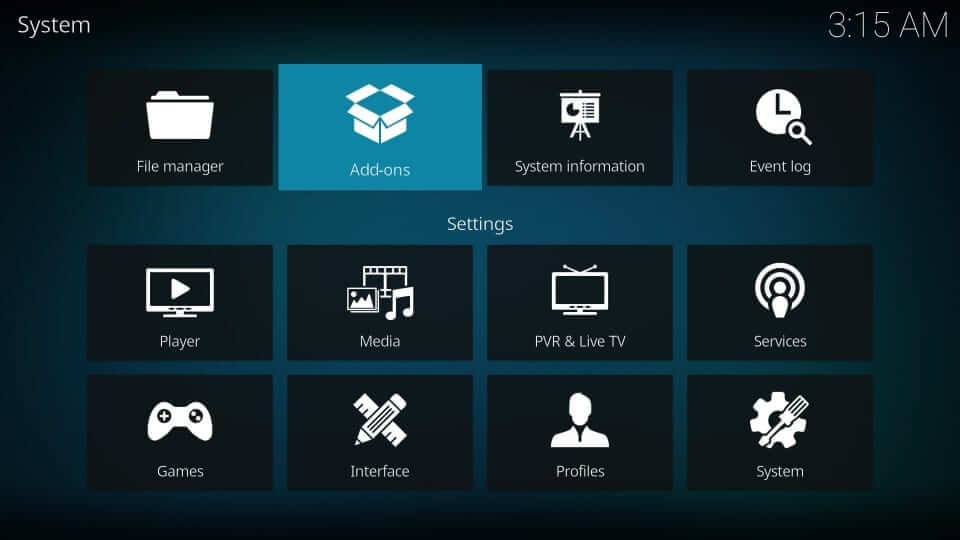
1. Start from the Kodi home screen by selecting Settings.
2. You need to choose the Add-ons tile from the settings window.
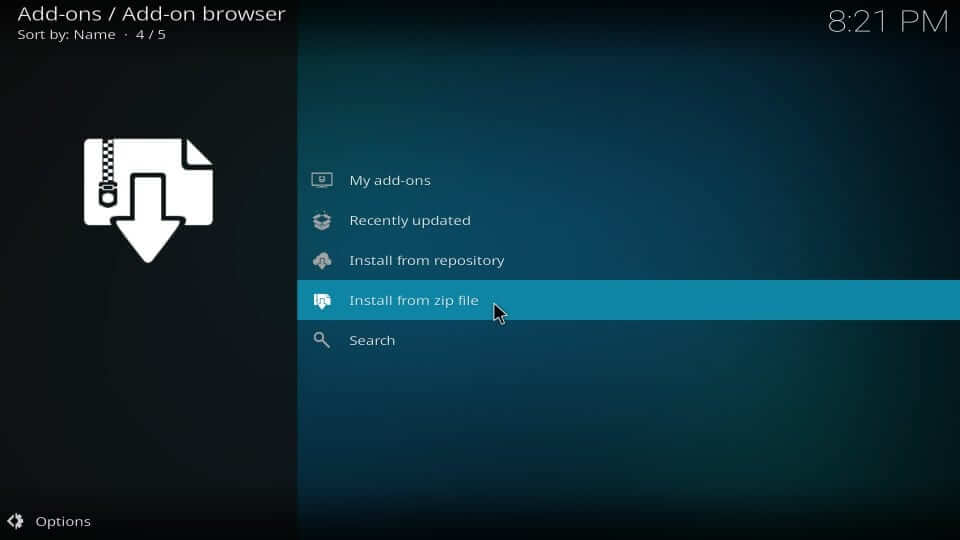
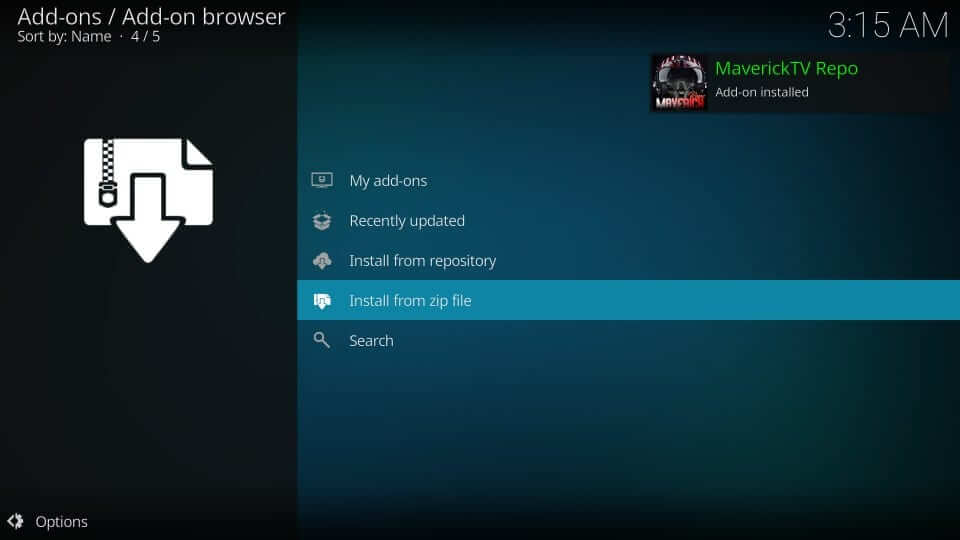
3. Ensure to select Install from zip file option.
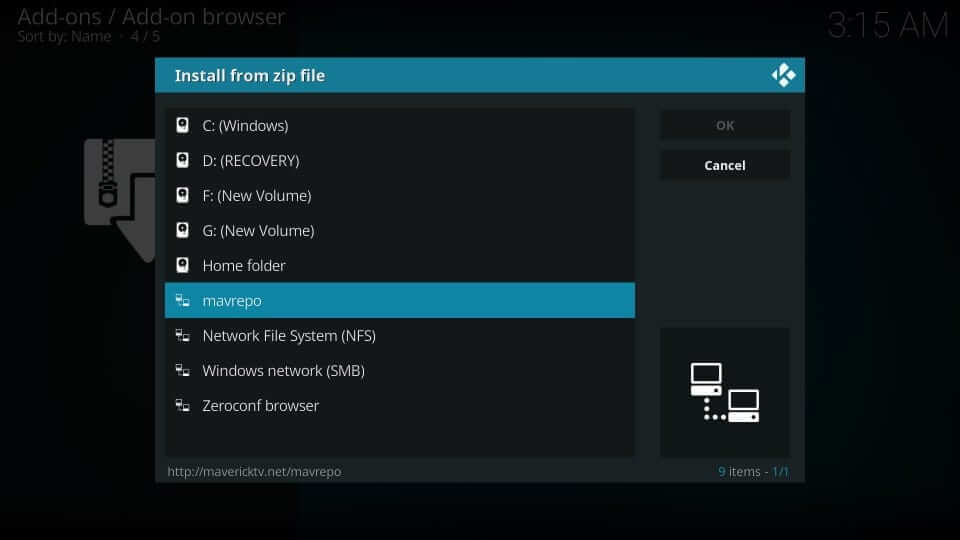
4. Choose mavrepo or the name which you provided earlier.
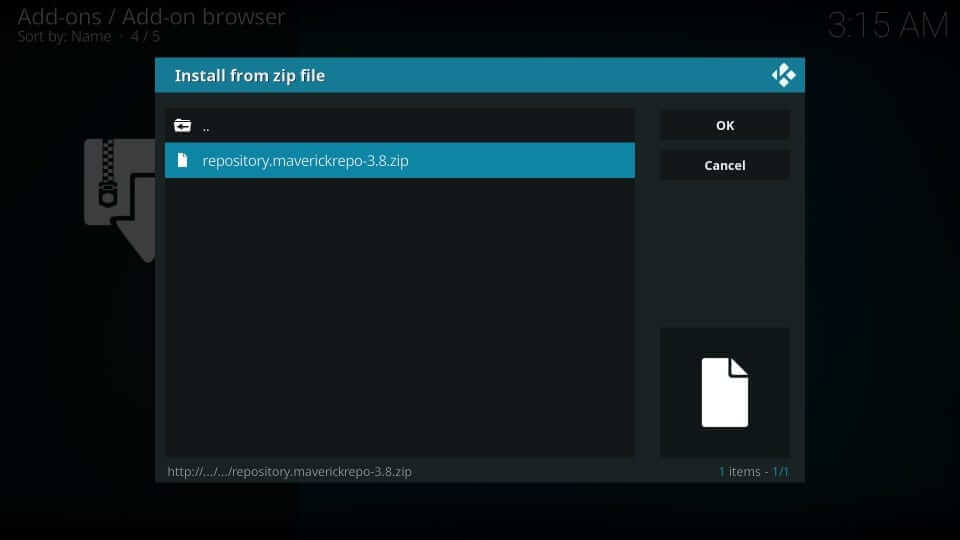
5. On the following pop-up, click on the zip file repository.maverickrepo-x.x.zip where x.x represents the version.
6. If you can see the MaverickTV repo addon installed notification, proceed.
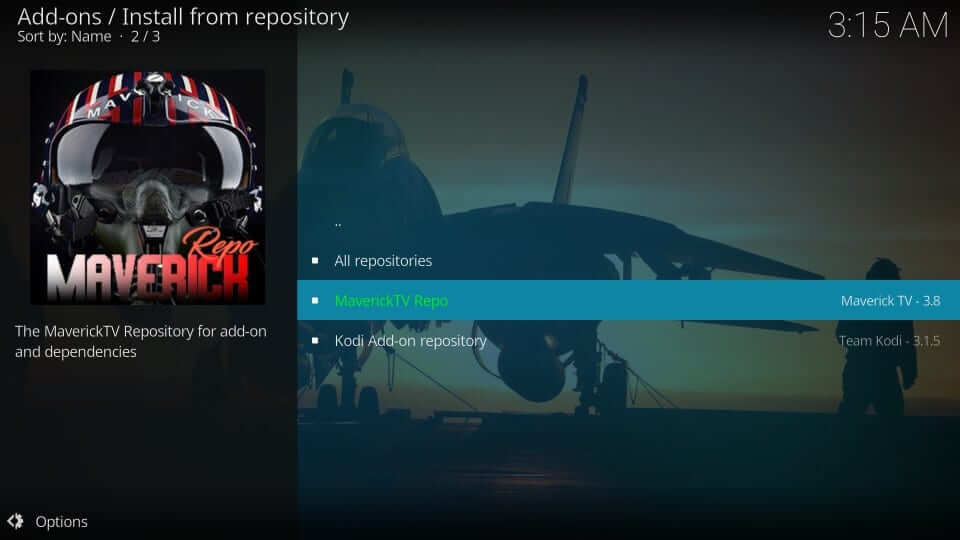
7. Select Install from repository to install the Kodi app on the repo.
8. Click on the MaverickTV Repo option on the following screen.
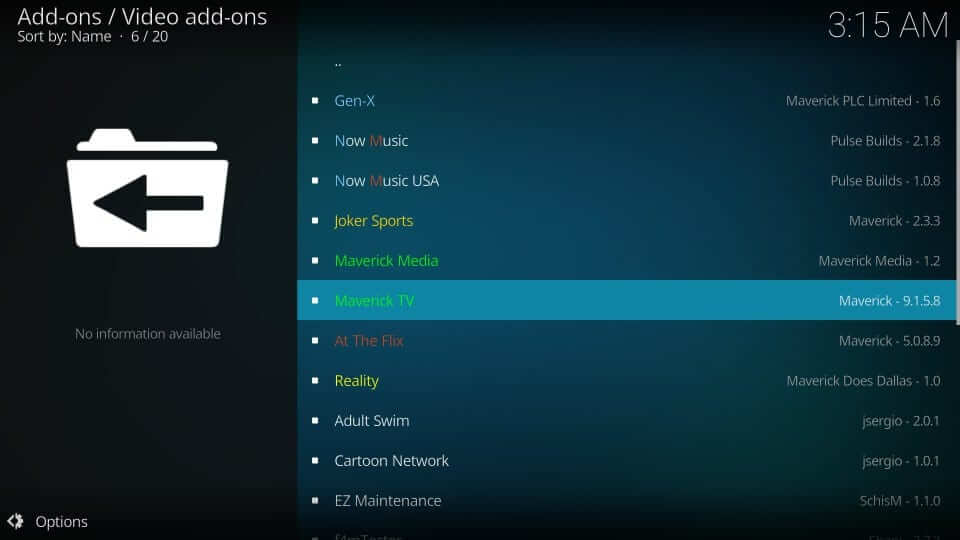
9. Make sure to select Video addons.

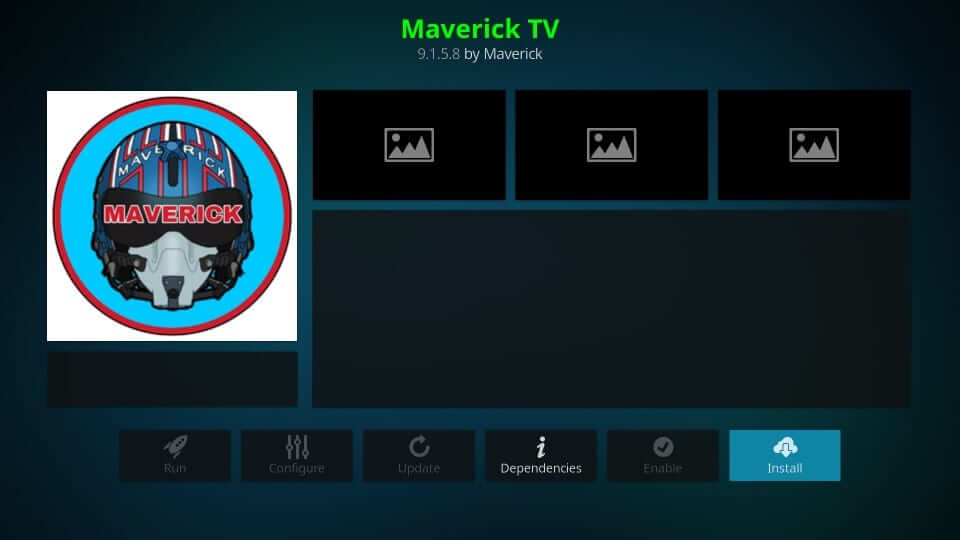
10. Tap on Maverick TV to launch it on your Kodi screen.
11. Then, tap on the Install button to get the Kodi addon on your device.
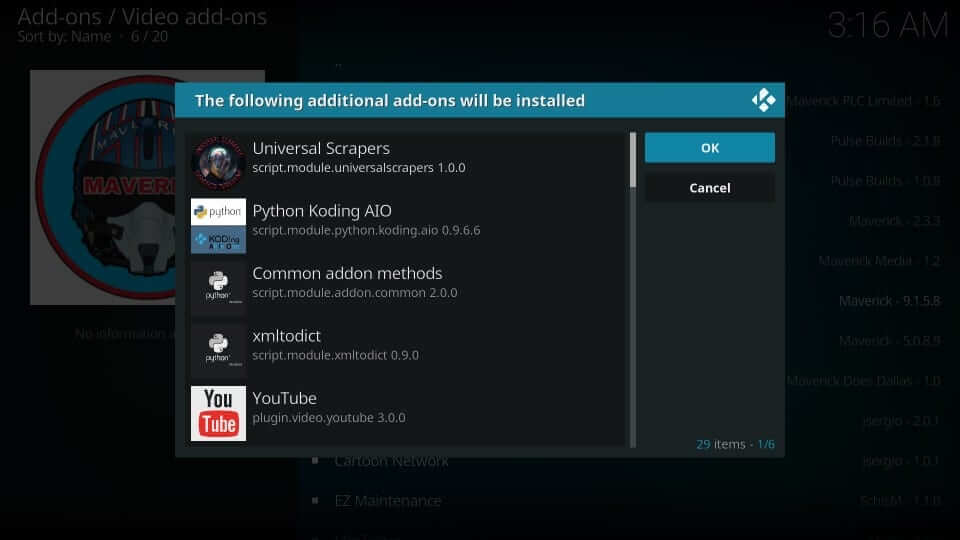
12. If prompted with additional addon installation, select OK.
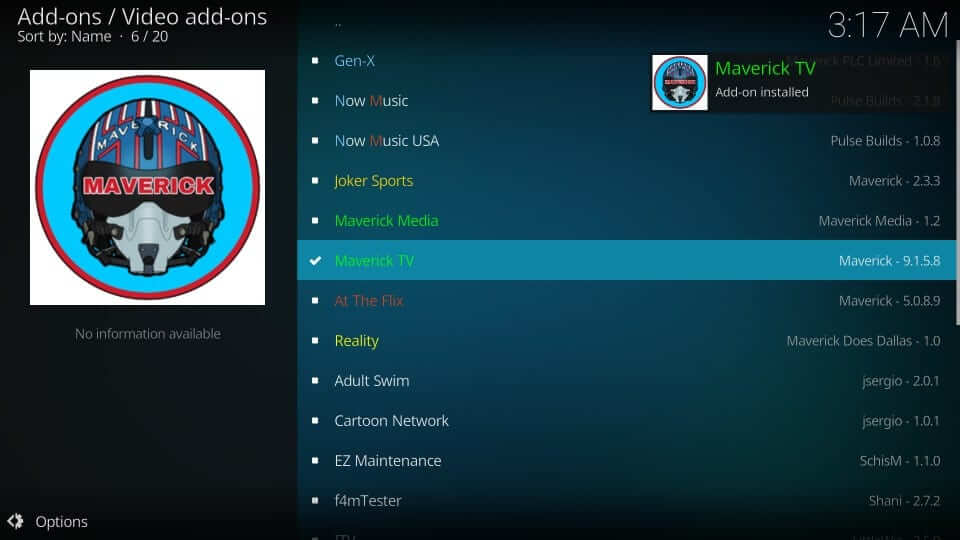
13. When the installation gets completed, a notification will appear at the top.
How to Use Maverick TV Addon Kodi
With the installation of the addon, you shall proceed with the steps below to take a look at its features.
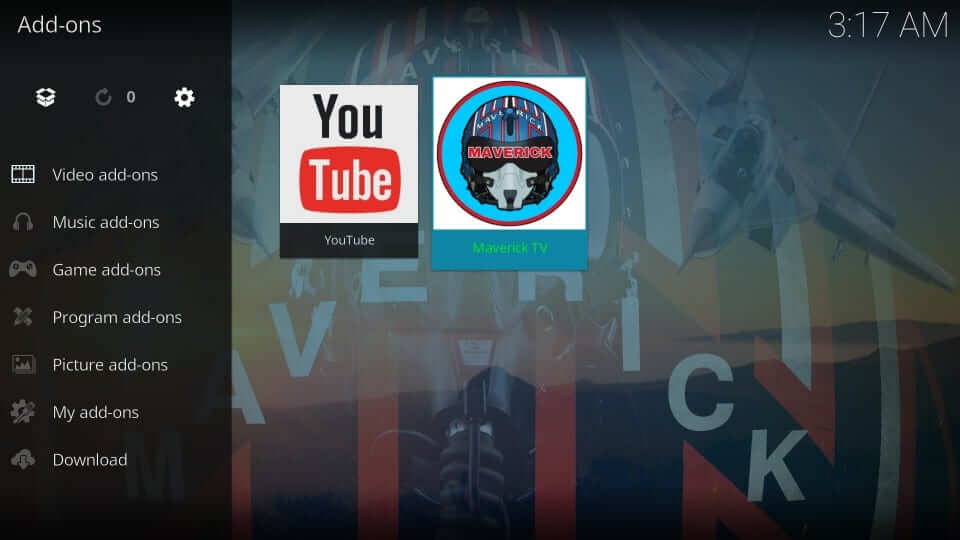
1. To launch the Maverick addon, open Kodi and select the Add-ons option.
2. Select the Video addons option to find and select the Maverick TV addon.
3. You shall choose any of the content categories shown on the main screen.
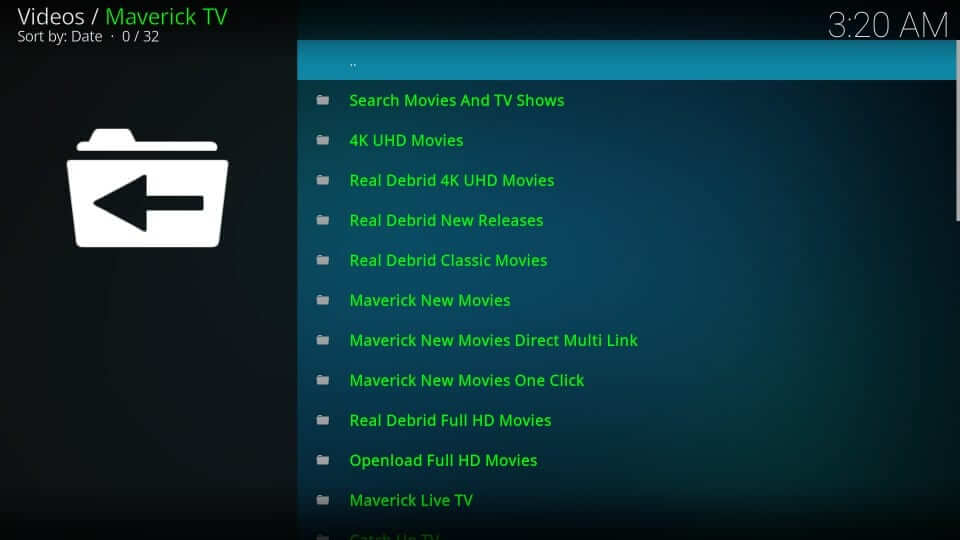
4. Some of the options includes
- Movies
- Live TV
- TV Shows
- Catch up
- Sports
Common Maverick Issues
Kodi Maverick TV addon not working
Kodi is not working may occur as a result of the source URL’s unavailability. While it is accessible for some, it isn’t available for further download.
Maverick fails to install the dependency
This error occurs when you try installing the Maverick addon. It appears as if the repository is facing issues. With the shutdown of its repo, you shall need to wait for a new repo update.
Maverick Kodi Addon Alternatives

Crackle for Kodi is one of the best add-ons available in the Kodi repository. It allows you to stream a massive list of content in HD quality.

Magic Dragon Kodi Addon offers a massive library of contents. It allows you to stream content in different categories like documentaries, movies, Real-Debrid movies, Kids’ channels, music, radio, etc.

Crew Kodi Addon is yet another Kodi Addon with devices contents like sports, IPTV, Kids, etc. With the Real-Debrid support, you will also get a high-quality premium links.